# SDK and API Compatibility Guide
Source: https://docs.honcho.dev/changelog/compatibility-guide
Compatibility guide for Honcho's SDKs and API
This guide helps you understand which versions of Honcho's API are compatible with which SDK versions.
## Version Compatibility
### Honcho API v2.4.2 (Current)
**Compatible Version:** v1.5.0
Install with:
```bash theme={null}
npm install @honcho-ai/sdk@1.5.0
```
**Compatible Version:** v1.5.0
Install with:
```bash theme={null}
pip install honcho-ai==1.5.0
```
## Version Compatibility Table
| Honcho API Version | TypeScript SDK | Python SDK |
| ------------------ | -------------- | ---------- |
| v2.4.2 (Current) | v1.5.0 | v1.5.0 |
| v2.4.1 | v1.5.0 | v1.5.0 |
| v2.4.0 | v1.5.0 | v1.5.0 |
| v2.3.3 | v1.4.1 | v1.4.1 |
| v2.3.2 | v1.4.0 | v1.4.0 |
| v2.3.1 | v1.4.0 | v1.4.0 |
| v2.3.0 | v1.4.0 | v1.4.0 |
| v2.2.0 | v1.3.0 | v1.3.0 |
| v2.1.1 | v1.2.1 | v1.2.2 |
| v2.1.0 | v1.2.1 | v1.2.2 |
| v2.0.5 | v1.1.0 | v1.1.0 |
| v2.0.4 | v1.1.0 | v1.1.0 |
# Changelog
Source: https://docs.honcho.dev/changelog/introduction
Welcome to the Honcho changelog! This section documents all notable changes to the Honcho API and SDKs.
Each release is documented with:
* **Added**: New features and capabilities
* **Changed**: Modifications to existing functionality
* **Deprecated**: Features that will be removed in future versions
* **Removed**: Features that have been removed
* **Fixed**: Bug fixes and corrections
* **Security**: Security-related improvements
## Version Format
Honcho follows [Semantic Versioning](https://semver.org/):
* **MAJOR** version for incompatible API changes
* **MINOR** version for backwards-compatible functionality additions
* **PATCH** version for backwards-compatible bug fixes
### Honcho API and SDK Changelogs
### Fixed
* Langfuse tracing to have readable waterfalls
* Alembic Migrations to match models.py
* message\_in\_seq correctly included in webhook payload
### Changed
* Alembic to always use a session pooler
* Statement timeout during alembic operations to 5 min
### Added
* Alembic migration validation test suite
### Fixed
* Alembic migrations to batch changes
* Batch message creation sequence number
### Changed
* Logging infrastructure to remove noisy messages
* Sentry integration is centralized
### Added
* Unified `Representation` class
* vllm client support
* Periodic queue cleanup logic
* WIP Dreaming Feature
* LongMemEval to Test Bench
* Prometheus Client for better Metrics
* Performance metrics instrumentation
* Error reporting to deriver
* Workspace Delete Method
* Multi-db option in test harness
### Changed
* Working Representations are Queried on the fly rather than cached in metadata
* EmbeddingStore to RepresentationFactory
* Summary Response Model to use public\_id of message for cutoff
* Semantic across codebase to reference resources based on `observer` and `observed`
* Prompts for Deriver & Dialectic to reference peer\_id and add examples
* `Get Context` route returns peer card and representation in addition to messages and summaries
* Refactoring logger.info calls to logger.debug where applicable
### Fixed
* Gemini client to use async methods
### Changed
* Deriver Rollup Queue processes interleaved messages for more context
### Fixed
* Dialectic Streaming to follow SSE conventions
* Sentry tracing in the deriver
### Added
* Get peer cards endpoint (`GET /v2/peers/{peer_id}/peer-card`) for retrieving targeted peer context information
### Changed
* Replaced Mirascope dependency with small client implementation for better control
* Optimized deriver performance by using joins on messages table instead of storing token count in queue payload
* Database scope optimization for various operations
* Batch representation task processing for \~10x speed improvement in practice
### Fixed
* Separated clean and claim work units in queue manager to prevent race conditions
* Skip locked ActiveQueueSession rows on delete operations
* Langfuse SDK integration updates for compatibility
* Added configurable maximum message size to prevent token overflow in deriver
* Various minor bugfixes
### Fixed
* Added max message count to deriver in order to not overflow token limits
### Added
* `getSummaries` endpoint to get all available summaries for a session directly
* Peer Card feature to improve context for deriver and dialectic
### Changed
* Session Peer limit to be based on observers instead, renamed config value to
`SESSION_OBSERVERS_LIMIT`
* `Messages` can take a custom timestamp for the `created_at` field, defaulting
to the current time
* `get_context` endpoint returns detailed `Summary` object rather than just
summary content
* Working representations use a FIFO queue structure to maintain facts rather
than a full rewrite
* Optimized deriver enqueue by prefetching message sequence numbers (eliminates N+1 queries)
### Fixed
* Deriver uses `get_context` internally to prevent context window limit errors
* Embedding store will truncate context when querying documents to prevent embedding
token limit errors
* Queue manager to schedule work based on available works rather than total
number of workers
* Queue manager to use atomic db transactions rather than long lived transaction
for the worker lifecycle
* Timestamp formats unified to ISO 8601 across the codebase
* Internal get\_context method's cutoff value is exclusive now
### Added
* Arbitrary filters now available on all search endpoints
* Search combines full-text and semantic using reciprocal rank fusion
* Webhook support (currently only supports queue\_empty and test events, more to come)
* Small test harness and custom test format for evaluating Honcho output quality
* Added MCP server and documentation for it
### Changed
* Search has 10 results by default, max 100 results
* Queue structure generalized to handle more event types
* Summarizer now exhaustive by default and tuned for performance
### Fixed
* Resolve race condition for peers that leave a session while sending messages
* Added explicit rollback to solve integrity error in queue
* Re-introduced Sentry tracing to deriver
* Better integrity logic in get\_or\_create API methods
### Fixed
* Summarizer module to ignore empty summaries and pass appropriate one to get\_context
* Structured Outputs calls with OpenAI provider to pass strict=True to Pydantic Schema
### Added
* Test harness for custom Honcho evaluations
* Better support for session and peer aware dialectic queries
* Langfuse settings
* Added recent history to dialectic prompt, dynamic based on new context window size setting
### Fixed
* Summary queue logic
* Formatting of logs
* Filtering by session
* Peer targeting in queries
### Changed
* Made query expansion in dialectic off by default
* Overhauled logging
* Refactor summarization for performance and code clarity
* Refactor queue payloads for clarity
### Added
* File uploads
* Brand new "ROTE" deriver system
* Updated dialectic system
* Local working representations
* Better logging for deriver/dialectic
* Deriver Queue Status no longer has redundant data
### Fixed
* Document insertion
* Session-scoped and peer-targeted dialectic queries work now
* Minor bugs
### Removed
* Peer-level messages
### Changed
* Dialectic chat endpoint takes a single query
* Rearranged configuration values (LLM, Deriver, Dialectic, History->Summary)
### Fixed
* Groq API client to use the Async library
### Fixed
* Migration/provision scripts did not have correct database connection arguments, causing timeouts
### Fixed
* Bug that causes runtime error when Sentry flags are enabled
### Fixed
* Database initialization was misconfigured and led to provision\_db script failing: switch to consistent working configuration with transaction pooler
### Added
* Ergonomic SDKs for Python and TypeScript (uses Stainless underneath)
* Deriver Queue Status endpoint
* Complex arbitrary filters on workspace/session/peer/message
* Message embedding table for full semantic search
### Changed
* Overhauled documentation
* BasedPyright typing for entire project
* Resource filtering expanded to include logical operators
### Fixed
* Various bugs
* Use new config arrangement everywhere
* Remove hardcoded responses
### Added
* Ability to get a peer's working representation
* Metadata to all data primitives (Workspaces, Peers, Sessions, Messages)
* Internal metadata to store Honcho's state no longer exposed in API
* Batch message operations and enhanced message querying with token and message count limits
* Search and summary functionalities scoped by workspace, peer, and session
* Session context retrieval with summaries and token allocatio
* HNSW Index for Documents Table
* Centralized Configuration via Environment Variables or config.toml file
### Changed
* New architecture centered around the concept of a "peer" replaces the former
"app"/"user"/"session" paradigm
* Workspaces replace "apps" as top-level namespace
* Peers replace "users"
* Sessions no longer nested beneath peers and no longer limited to a single
user-assistant model. A session exists independently of any one peer and
peers can be added to and removed from sessions.
* Dialectic API is now part of the Peer, not the Session
* Dialectic API now allows queries to be scoped to a session or "targeted"
to a fellow peer
* Database schema migrated to adopt workspace/peer/session naming and structure
* Authentication and JWT scopes updated to workspace/peer/session hierarchy
* Queue processing now works on 'work units' instead of sessions
* Message token counting updated with tiktoken integration and fallback heuristic
* Queue and message processing updated to handle sender/target and task types for multi-peer scenarios
### Fixed
* Improved error handling and validation for batch message operations and metadata
* Database Sessions to be more atomic to reduce idle in transaction time
### Removed
* Metamessages removed in favor of metadata
* Collections and Documents no longer exposed in the API, solely internal
* Obsolete tests for apps, users, collections, documents, and metamessages
***
### Added
* Normalize resources to remove joins and increase query performance
* Query tracing for debugging
### Changed
* `/list` endpoints to not require a request body
* `metamessage_type` to `label` with backwards compatability
* Database Provisioning to rely on alembic
* Database Session Manager to explicitly rollback transactions before closing
the connection
### Fixed
* Alembic Migrations to include initial database migrations
* Sentry Middleware to not report Honcho Exceptions
### Added
* JWT based API authentication
* Configurable logging
* Consolidated LLM Inference via `ModelClient` class
* Dynamic logging configurable via environment variables
### Changed
* Deriver & Dialectic API to use Hybrid Memory Architecture
* Metamessages are not strictly tied to a message
* Database provisioning is a separate script instead of happening on startup
* Consolidated `session/chat` and `session/chat/stream` endpoints
## Previous Releases
For a complete history of all releases, see our [GitHub Releases](https://github.com/plastic-labs/honcho/tags) page.
[Python SDK](https://pypi.org/project/honcho-ai/)
### Added
* Delete workspace method
### Changed
* message\_id of `Summary` model is a string nanoid
* Get Context can return Peer Card & Peer Representation
### Added
* Get Peer Card method
* Update Message metadata method
* Session level deriver status methods
* Delete session message
### Fixed
* Dialectic Stream returns Iterators
* Type warnings
### Changed
* Pagination class to match core implementation
### Added
* getSummaries API returning structured summaries
* Webhook support
### Changed
* Messages can take an optional `created_at` value, defaulting to the current
time (UTC ISO 8601)
### Added
* Filter parameter to various endpoints
### Fixed
* Honcho util import paths
### Added
* Get/poll deriver queue status endpoints added to workspace
* Added endpoint to upload files as messages
### Removed
* Removed peer messages in accordance with Honcho 2.1.0
### Changed
* Updated chat endpoint to use singular `query` in accordance with Honcho 2.1.0
### Fixed
* Properly handle AsyncClient
[TypeScript SDK](https://www.npmjs.com/package/@honcho-ai/sdk)
### Added
* Delete workspace method
### Changed
* message\_id of `Summary` model is a string nanoid
* Get Context can return Peer Card & Peer Representation
### Added
* Get Peer Card method
* Update Message metadata method
* Session level deriver status methods
* Delete session message
### Fixed
* Dialectic Stream returns Iterators
* Type warnings
### Changed
* Pagination class to match core implementation
### Added
* getSummaries API returning structured summaries
* Webhook support
### Changed
* Messages can take an optional `created_at` value, defaulting to the current
time (UTC ISO 8601)
### Added
* linting via Biome
* Adding filter parameter to various endpoints
### Fixed
* Order of parameters in `getSessions` endpoint
### Added
* Get/poll deriver queue status endpoints added to workspace
* Added endpoint to upload files as messages
### Removed
* Removed peer messages in accordance with Honcho 2.1.0
### Changed
* Updated chat endpoint to use singular `query` in accordance with Honcho 2.1.0
### Fixed
* Create default workspace on Honcho client instantiation
* Simplified Honcho client import path
## Getting Help
If you encounter issues using the Honcho API or its SDKs:
1. Open an issue on [GitHub](https://github.com/plastic-labs/honcho/issues)
2. Join our [Discord community](http://discord.gg/plasticlabs) for support
# Create Key
Source: https://docs.honcho.dev/v2/api-reference/endpoint/keys/create-key
post /v2/keys
Create a new Key
# Create Messages For Session
Source: https://docs.honcho.dev/v2/api-reference/endpoint/messages/create-messages-for-session
post /v2/workspaces/{workspace_id}/sessions/{session_id}/messages/
Create messages for a session with JSON data (original functionality).
# Create Messages With File
Source: https://docs.honcho.dev/v2/api-reference/endpoint/messages/create-messages-with-file
post /v2/workspaces/{workspace_id}/sessions/{session_id}/messages/upload
Create messages from uploaded files. Files are converted to text and split into multiple messages.
# Get Message
Source: https://docs.honcho.dev/v2/api-reference/endpoint/messages/get-message
get /v2/workspaces/{workspace_id}/sessions/{session_id}/messages/{message_id}
Get a Message by ID
# Get Messages
Source: https://docs.honcho.dev/v2/api-reference/endpoint/messages/get-messages
post /v2/workspaces/{workspace_id}/sessions/{session_id}/messages/list
Get all messages for a session
# Update Message
Source: https://docs.honcho.dev/v2/api-reference/endpoint/messages/update-message
put /v2/workspaces/{workspace_id}/sessions/{session_id}/messages/{message_id}
Update the metadata of a Message
# Metrics
Source: https://docs.honcho.dev/v2/api-reference/endpoint/metrics
get /metrics
Prometheus metrics endpoint
# Chat
Source: https://docs.honcho.dev/v2/api-reference/endpoint/peers/chat
post /v2/workspaces/{workspace_id}/peers/{peer_id}/chat
# Get Or Create Peer
Source: https://docs.honcho.dev/v2/api-reference/endpoint/peers/get-or-create-peer
post /v2/workspaces/{workspace_id}/peers
Get a Peer by ID
If peer_id is provided as a query parameter, it uses that (must match JWT workspace_id).
Otherwise, it uses the peer_id from the JWT.
# Get Peer Card
Source: https://docs.honcho.dev/v2/api-reference/endpoint/peers/get-peer-card
get /v2/workspaces/{workspace_id}/peers/{peer_id}/card
Get a peer card for a specific peer relationship.
Returns the peer card that the observer peer has for the target peer if it exists.
If no target is specified, returns the observer's own peer card.
# Get Peers
Source: https://docs.honcho.dev/v2/api-reference/endpoint/peers/get-peers
post /v2/workspaces/{workspace_id}/peers/list
Get All Peers for a Workspace
# Get Sessions For Peer
Source: https://docs.honcho.dev/v2/api-reference/endpoint/peers/get-sessions-for-peer
post /v2/workspaces/{workspace_id}/peers/{peer_id}/sessions
Get All Sessions for a Peer
# Get Working Representation
Source: https://docs.honcho.dev/v2/api-reference/endpoint/peers/get-working-representation
post /v2/workspaces/{workspace_id}/peers/{peer_id}/representation
Get a peer's working representation for a session.
If a session_id is provided in the body, we get the working representation of the peer in that session.
If a target is provided, we get the representation of the target from the perspective of the peer.
If no target is provided, we get the omniscient Honcho representation of the peer.
# Search Peer
Source: https://docs.honcho.dev/v2/api-reference/endpoint/peers/search-peer
post /v2/workspaces/{workspace_id}/peers/{peer_id}/search
Search a Peer
# Update Peer
Source: https://docs.honcho.dev/v2/api-reference/endpoint/peers/update-peer
put /v2/workspaces/{workspace_id}/peers/{peer_id}
Update a Peer's name and/or metadata
# Add Peers To Session
Source: https://docs.honcho.dev/v2/api-reference/endpoint/sessions/add-peers-to-session
post /v2/workspaces/{workspace_id}/sessions/{session_id}/peers
Add peers to a session
# Clone Session
Source: https://docs.honcho.dev/v2/api-reference/endpoint/sessions/clone-session
get /v2/workspaces/{workspace_id}/sessions/{session_id}/clone
Clone a session, optionally up to a specific message
# Delete Session
Source: https://docs.honcho.dev/v2/api-reference/endpoint/sessions/delete-session
delete /v2/workspaces/{workspace_id}/sessions/{session_id}
Delete a session by marking it as inactive
# Get Or Create Session
Source: https://docs.honcho.dev/v2/api-reference/endpoint/sessions/get-or-create-session
post /v2/workspaces/{workspace_id}/sessions
Get a specific session in a workspace.
If session_id is provided as a query parameter, it verifies the session is in the workspace.
Otherwise, it uses the session_id from the JWT for verification.
# Get Peer Config
Source: https://docs.honcho.dev/v2/api-reference/endpoint/sessions/get-peer-config
get /v2/workspaces/{workspace_id}/sessions/{session_id}/peers/{peer_id}/config
Get the configuration for a peer in a session
# Get Session Context
Source: https://docs.honcho.dev/v2/api-reference/endpoint/sessions/get-session-context
get /v2/workspaces/{workspace_id}/sessions/{session_id}/context
Produce a context object from the session. The caller provides an optional token limit which the entire context must fit into.
If not provided, the context will be exhaustive (within configured max tokens). To do this, we allocate 40% of the token limit
to the summary, and 60% to recent messages -- as many as can fit. Note that the summary will usually take up less space than
this. If the caller does not want a summary, we allocate all the tokens to recent messages.
# Get Session Peers
Source: https://docs.honcho.dev/v2/api-reference/endpoint/sessions/get-session-peers
get /v2/workspaces/{workspace_id}/sessions/{session_id}/peers
Get peers from a session
# Get Session Summaries
Source: https://docs.honcho.dev/v2/api-reference/endpoint/sessions/get-session-summaries
get /v2/workspaces/{workspace_id}/sessions/{session_id}/summaries
Get available summaries for a session.
Returns both short and long summaries if available, including metadata like
the message ID they cover up to, creation timestamp, and token count.
# Get Sessions
Source: https://docs.honcho.dev/v2/api-reference/endpoint/sessions/get-sessions
post /v2/workspaces/{workspace_id}/sessions/list
Get All Sessions in a Workspace
# Remove Peers From Session
Source: https://docs.honcho.dev/v2/api-reference/endpoint/sessions/remove-peers-from-session
delete /v2/workspaces/{workspace_id}/sessions/{session_id}/peers
Remove peers from a session
# Search Session
Source: https://docs.honcho.dev/v2/api-reference/endpoint/sessions/search-session
post /v2/workspaces/{workspace_id}/sessions/{session_id}/search
Search a Session
# Set Peer Config
Source: https://docs.honcho.dev/v2/api-reference/endpoint/sessions/set-peer-config
post /v2/workspaces/{workspace_id}/sessions/{session_id}/peers/{peer_id}/config
Set the configuration for a peer in a session
# Set Session Peers
Source: https://docs.honcho.dev/v2/api-reference/endpoint/sessions/set-session-peers
put /v2/workspaces/{workspace_id}/sessions/{session_id}/peers
Set the peers in a session
# Update Session
Source: https://docs.honcho.dev/v2/api-reference/endpoint/sessions/update-session
put /v2/workspaces/{workspace_id}/sessions/{session_id}
Update the metadata of a Session
# Delete Webhook Endpoint
Source: https://docs.honcho.dev/v2/api-reference/endpoint/webhooks/delete-webhook-endpoint
delete /v2/workspaces/{workspace_id}/webhooks/{endpoint_id}
Delete a specific webhook endpoint.
# Get Or Create Webhook Endpoint
Source: https://docs.honcho.dev/v2/api-reference/endpoint/webhooks/get-or-create-webhook-endpoint
post /v2/workspaces/{workspace_id}/webhooks
Get or create a webhook endpoint URL.
# List Webhook Endpoints
Source: https://docs.honcho.dev/v2/api-reference/endpoint/webhooks/list-webhook-endpoints
get /v2/workspaces/{workspace_id}/webhooks
List all webhook endpoints, optionally filtered by workspace.
# Test Emit
Source: https://docs.honcho.dev/v2/api-reference/endpoint/webhooks/test-emit
get /v2/workspaces/{workspace_id}/webhooks/test
Test publishing a webhook event.
# Delete Workspace
Source: https://docs.honcho.dev/v2/api-reference/endpoint/workspaces/delete-workspace
delete /v2/workspaces/{workspace_id}
Delete a Workspace
# Get All Workspaces
Source: https://docs.honcho.dev/v2/api-reference/endpoint/workspaces/get-all-workspaces
post /v2/workspaces/list
Get all Workspaces
# Get Deriver Status
Source: https://docs.honcho.dev/v2/api-reference/endpoint/workspaces/get-deriver-status
get /v2/workspaces/{workspace_id}/deriver/status
Get the deriver processing status, optionally scoped to an observer, sender, and/or session
# Get Or Create Workspace
Source: https://docs.honcho.dev/v2/api-reference/endpoint/workspaces/get-or-create-workspace
post /v2/workspaces
Get a Workspace by ID.
If workspace_id is provided as a query parameter, it uses that (must match JWT workspace_id).
Otherwise, it uses the workspace_id from the JWT.
# Search Workspace
Source: https://docs.honcho.dev/v2/api-reference/endpoint/workspaces/search-workspace
post /v2/workspaces/{workspace_id}/search
Search a Workspace
# Update Workspace
Source: https://docs.honcho.dev/v2/api-reference/endpoint/workspaces/update-workspace
put /v2/workspaces/{workspace_id}
Update a Workspace
# Introduction
Source: https://docs.honcho.dev/v2/api-reference/introduction
This section documents all available API endpoints in the Honcho Server. Each
endpoint provides CRUD operations for our core primitives. For information
about these primitives, see
[Architecture](/v2/documentation/core-concepts/architecture).
We strongly recommend using our official SDKs instead of calling these APIs directly. The SDKs provide better error handling, type safety, and developer experience.
## Recommended approach
Use our official SDKs for the best development experience:
* [Python SDK](https://pypi.org/project/honcho-ai/)
* [TypeScript SDK](https://www.npmjs.com/package/@honcho-ai/sdk)
## When to use this API reference
This reference is primarily useful for:
* Debugging SDK behavior
* Building integrations in unsupported languages
* Understanding the underlying data structures
The endpoints pages are autogenerated and include interactive examples for testing.
# Configuration Guide
Source: https://docs.honcho.dev/v2/contributing/configuration
Complete guide to configuring Honcho for development and production
Honcho uses a flexible configuration system that supports both TOML files and environment variables. Configuration values are loaded in the following priority order (highest to lowest):
1. Environment variables (always take precedence)
2. `.env` file (for local development)
3. `config.toml` file (base configuration)
4. Default values
## Recommended Configuration Approaches
### Option 1: Environment Variables Only (Production)
* Use environment variables for all configuration
* No config files needed
* Ideal for containerized deployments (Docker, Kubernetes)
* Secrets managed by your deployment platform
### Option 2: config.toml (Development/Simple Deployments)
* Use config.toml for base configuration
* Override sensitive values with environment variables
* Good for development and simple deployments
### Option 3: Hybrid Approach
* Use config.toml for non-sensitive base settings
* Use .env file for sensitive values (API keys, secrets)
* Good for development teams
### Option 4: .env Only (Local Development)
* Use .env file for all configuration
* Simple for local development
* Never commit .env files to version control
## Configuration Methods
### Using config.toml
Copy the example configuration file to get started:
```bash theme={null}
cp config.toml.example config.toml
```
Then modify the values as needed. The TOML file is organized into sections:
* `[app]` - Application-level settings (log level, session limits, embedding settings, Langfuse integration, local metrics collection)
* `[db]` - Database connection and pool settings (connection URI, pool size, timeouts, connection recycling)
* `[auth]` - Authentication configuration (enable/disable auth, JWT secret)
* `[cache]` - Redis cache configuration (enable/disable caching, Redis URL, TTL settings, lock configuration for cache stampede prevention)
* `[llm]` - LLM provider API keys (Anthropic, OpenAI, Gemini, Groq, OpenAI-compatible endpoints) and general LLM settings
* `[dialectic]` - Dialectic API configuration (provider, model, query generation settings, semantic search parameters, context window size)
* `[deriver]` - Background worker settings (worker count, polling intervals, queue management) and theory of mind configuration (model, tokens, observation limits)
* `[peer_card]` - Peer card generation settings (provider, model, token limits)
* `[summary]` - Session summarization settings (frequency thresholds, provider, model, token limits for short and long summaries)
* `[dream]` - Dream processing configuration (enable/disable, thresholds, idle timeouts, dream types, LLM settings)
* `[webhook]` - Webhook configuration (webhook secret, workspace limits)
* `[metrics]` - Metrics collection settings (enable/disable metrics, namespace)
* `[sentry]` - Error tracking and monitoring settings (enable/disable, DSN, environment, sample rates)
### Using Environment Variables
All configuration values can be overridden using environment variables. The environment variable names follow this pattern:
* `{SECTION}_{KEY}` for nested settings
* Just `{KEY}` for app-level settings
Examples:
* `DB_CONNECTION_URI` → `[db].CONNECTION_URI`
* `DB_POOL_SIZE` → `[db].POOL_SIZE`
* `AUTH_JWT_SECRET` → `[auth].JWT_SECRET`
* `DIALECTIC_MODEL` → `[dialectic].MODEL`
* `LOG_LEVEL` (no section) → `[app].LOG_LEVEL`
### Configuration Priority
When a configuration value is set in multiple places, Honcho uses this priority:
1. **Environment variables** - Always take precedence
2. **.env file** - Loaded for local development
3. **config.toml** - Base configuration
4. **Default values** - Built-in defaults
This allows you to:
* Use `config.toml` for base configuration
* Override specific values with environment variables in production
* Use `.env` files for local development without modifying config.toml
### Example
If you have this in `config.toml`:
```toml theme={null}
[db]
CONNECTION_URI = "postgresql://localhost/honcho_dev"
POOL_SIZE = 10
```
You can override just the connection URI in production:
```bash theme={null}
export DB_CONNECTION_URI="postgresql://prod-server/honcho_prod"
```
The application will use the production connection URI while keeping the pool size from config.toml.
## Core Configuration
### Application Settings
Application-level settings control core behavior of the Honcho server including logging, session limits, message handling, and optional integrations.
**Basic Application Configuration:**
```bash theme={null}
# Logging and server settings
LOG_LEVEL=INFO # DEBUG, INFO, WARNING, ERROR, CRITICAL
# Session and context limits
SESSION_OBSERVERS_LIMIT=10 # Maximum number of observers per session
GET_CONTEXT_MAX_TOKENS=100000 # Maximum tokens for context retrieval
MAX_MESSAGE_SIZE=25000 # Maximum message size in characters
# Embedding settings
EMBED_MESSAGES=true # Enable vector embeddings for messages
MAX_EMBEDDING_TOKENS=8192 # Maximum tokens per embedding
MAX_EMBEDDING_TOKENS_PER_REQUEST=300000 # Batch embedding limit
```
**Optional Integrations:**
```bash theme={null}
# Langfuse integration for LLM observability
LANGFUSE_HOST=https://cloud.langfuse.com
LANGFUSE_PUBLIC_KEY=your-langfuse-public-key
# Local metrics collection
COLLECT_METRICS_LOCAL=false
LOCAL_METRICS_FILE=metrics.jsonl
```
### Database Configuration
**Required Database Settings:**
```bash theme={null}
# PostgreSQL connection string (required)
DB_CONNECTION_URI=postgresql+psycopg://username:password@host:port/database
# Example for local development
DB_CONNECTION_URI=postgresql+psycopg://postgres:postgres@localhost:5432/honcho
# Example for production
DB_CONNECTION_URI=postgresql+psycopg://honcho_user:secure_password@db.example.com:5432/honcho_prod
```
**Database Pool Settings:**
```bash theme={null}
# Connection pool configuration
DB_SCHEMA=public
DB_POOL_SIZE=10
DB_MAX_OVERFLOW=20
DB_POOL_TIMEOUT=30
DB_POOL_RECYCLE=300
DB_POOL_PRE_PING=true
DB_SQL_DEBUG=false
DB_TRACING=false
```
**Docker Compose for PostgreSQL:**
```yaml theme={null}
# docker-compose.yml
version: '3.8'
services:
database:
image: pgvector/pgvector:pg15
environment:
POSTGRES_USER: postgres
POSTGRES_PASSWORD: postgres
POSTGRES_DB: honcho
ports:
- "5432:5432"
volumes:
- postgres_data:/var/lib/postgresql/data
- ./init.sql:/docker-entrypoint-initdb.d/init.sql
volumes:
postgres_data:
```
### Authentication Configuration
**JWT Authentication:**
```bash theme={null}
# Enable/disable authentication
AUTH_USE_AUTH=false # Set to true for production
# JWT settings (required if AUTH_USE_AUTH is true)
AUTH_JWT_SECRET=your-super-secret-jwt-key
```
**Generate JWT Secret:**
```bash theme={null}
# Generate a secure JWT secret
python scripts/generate_jwt_secret.py
```
### Cache Configuration
Honcho supports Redis caching to improve performance by caching frequently accessed data like peers, sessions, and working representations. Caching also includes lock mechanisms to prevent cache stampede scenarios.
**Redis Cache Settings:**
```bash theme={null}
# Enable/disable Redis caching
CACHE_ENABLED=false # Set to true to enable caching
# Redis connection
CACHE_URL=redis://localhost:6379/0?suppress=false
# Cache namespace and TTL
CACHE_NAMESPACE=honcho # Prefix for all cache keys
CACHE_DEFAULT_TTL_SECONDS=300 # How long items stay in cache (5 minutes)
# Lock settings for preventing cache stampede
CACHE_DEFAULT_LOCK_TTL_SECONDS=5 # Lock duration when fetching from DB on cache miss
```
**When to Enable Caching:**
* High-traffic production environments
* Applications with many repeated reads of the same data
* When you need to reduce database load
**Note:** Caching requires a Redis instance. You can run Redis locally with Docker:
```bash theme={null}
docker run -d -p 6379:6379 redis:latest
```
## LLM Provider Configuration
Honcho supports multiple LLM providers for different tasks. API keys are configured in the `[llm]` section, while specific features use their own configuration sections.
### API Keys
All provider API keys use the `LLM_` prefix:
```bash theme={null}
# Provider API Keys
LLM_ANTHROPIC_API_KEY=your-anthropic-api-key
LLM_OPENAI_API_KEY=your-openai-api-key
LLM_GEMINI_API_KEY=your-gemini-api-key
LLM_GROQ_API_KEY=your-groq-api-key
# OpenAI-compatible endpoints
LLM_OPENAI_COMPATIBLE_API_KEY=your-api-key
LLM_OPENAI_COMPATIBLE_BASE_URL=https://your-openai-compatible-endpoint.com
```
### General LLM Settings
```bash theme={null}
# Default settings for all LLM calls
LLM_DEFAULT_MAX_TOKENS=2500
# Embedding provider (used when EMBED_MESSAGES=true)
LLM_EMBEDDING_PROVIDER=openai # Options: openai, gemini
```
### Feature-Specific Model Configuration
Different features can use different providers and models:
**Dialectic API:**
The Dialectic API provides theory-of-mind informed responses by integrating long-term facts with current context.
```bash theme={null}
# Main dialectic model (default: Anthropic)
DIALECTIC_PROVIDER=anthropic
DIALECTIC_MODEL=claude-sonnet-4-20250514
DIALECTIC_MAX_OUTPUT_TOKENS=2500
DIALECTIC_THINKING_BUDGET_TOKENS=1024 # Only used with Anthropic provider
DIALECTIC_CONTEXT_WINDOW_SIZE=100000 # Maximum context window tokens
# Query generation for dialectic searches
DIALECTIC_PERFORM_QUERY_GENERATION=false # Enable query generation for semantic search
DIALECTIC_QUERY_GENERATION_PROVIDER=groq
DIALECTIC_QUERY_GENERATION_MODEL=llama-3.1-8b-instant
# Semantic search settings
DIALECTIC_SEMANTIC_SEARCH_TOP_K=10 # Number of results to retrieve
DIALECTIC_SEMANTIC_SEARCH_MAX_DISTANCE=0.85 # Maximum distance for relevance
```
**Deriver (Theory of Mind):**
The Deriver is a background processing system that extracts facts from messages and builds theory-of-mind representations of peers.
```bash theme={null}
# LLM settings for deriver
DERIVER_PROVIDER=google
DERIVER_MODEL=gemini-2.5-flash-lite
DERIVER_MAX_OUTPUT_TOKENS=10000
DERIVER_THINKING_BUDGET_TOKENS=1024 # Only used with Anthropic provider
DERIVER_MAX_INPUT_TOKENS=23000 # Maximum input tokens for deriver
# Worker settings
DERIVER_WORKERS=1 # Number of background worker processes
DERIVER_POLLING_SLEEP_INTERVAL_SECONDS=1.0 # Time between queue checks
DERIVER_STALE_SESSION_TIMEOUT_MINUTES=5 # Timeout for stale sessions
# Queue management
DERIVER_QUEUE_ERROR_RETENTION_SECONDS=2592000 # Keep errored items for 30 days
# Working representation settings
DERIVER_WORKING_REPRESENTATION_MAX_OBSERVATIONS=50 # Max observations stored
DERIVER_REPRESENTATION_BATCH_MAX_TOKENS=4096 # Max tokens per batch
```
**Peer Card:**
Peer cards are short, structured summaries of peer identity and characteristics.
```bash theme={null}
# Enable/disable peer card generation
PEER_CARD_ENABLED=true
# LLM settings for peer card generation
PEER_CARD_PROVIDER=openai
PEER_CARD_MODEL=gpt-5-nano-2025-08-07
PEER_CARD_MAX_OUTPUT_TOKENS=4000 # Includes thinking tokens for GPT-5 models
```
**Summary Generation:**
Session summaries provide compressed context for long conversations. Honcho creates two types: short summaries (frequent) and long summaries (comprehensive).
```bash theme={null}
# Enable/disable summarization
SUMMARY_ENABLED=true
# LLM settings for summary generation
SUMMARY_PROVIDER=openai
SUMMARY_MODEL=gpt-4o-mini-2024-07-18
SUMMARY_MAX_TOKENS_SHORT=1000 # Max tokens for short summaries
SUMMARY_MAX_TOKENS_LONG=4000 # Max tokens for long summaries
SUMMARY_THINKING_BUDGET_TOKENS=512 # Only used with Anthropic provider
# Summary frequency thresholds
SUMMARY_MESSAGES_PER_SHORT_SUMMARY=20 # Create short summary every N messages
SUMMARY_MESSAGES_PER_LONG_SUMMARY=60 # Create long summary every N messages
```
### Default Provider Usage
By default, Honcho uses:
* **Anthropic** (Claude) for dialectic API responses
* **Groq** for query generation (fast, cost-effective)
* **Google** (Gemini) for theory of mind derivation
* **OpenAI** (GPT) for peer cards and summarization
* **OpenAI** for embeddings (if `EMBED_MESSAGES=true`)
You only need to set the API keys for the providers you plan to use. All providers are configurable per feature.
## Additional Features Configuration
### Dream Processing
Dream processing consolidates and refines peer representations during idle periods, similar to how human memory consolidation works during sleep.
**Dream Settings:**
```bash theme={null}
# Enable/disable dream processing
DREAM_ENABLED=true
# Trigger thresholds
DREAM_DOCUMENT_THRESHOLD=50 # Minimum documents to trigger a dream
DREAM_IDLE_TIMEOUT_MINUTES=60 # Minutes of inactivity before dream can start
DREAM_MIN_HOURS_BETWEEN_DREAMS=8 # Minimum hours between dreams for a peer
# Dream types to enable
DREAM_ENABLED_TYPES=["consolidate"] # Currently supported: consolidate
# LLM settings for dream processing
DREAM_PROVIDER=openai
DREAM_MODEL=gpt-4o-mini-2024-07-18
DREAM_MAX_OUTPUT_TOKENS=2000
```
### Webhook Configuration
Webhooks allow you to receive real-time notifications when events occur in Honcho (e.g., new messages, session updates).
**Webhook Settings:**
```bash theme={null}
# Webhook secret for signing payloads (optional but recommended)
WEBHOOK_SECRET=your-webhook-signing-secret
# Limit on webhooks per workspace
WEBHOOK_MAX_WORKSPACE_LIMIT=10
```
### Metrics Collection
Enable metrics collection for monitoring Honcho performance and usage.
**Metrics Settings:**
```bash theme={null}
# Enable/disable metrics collection
METRICS_ENABLED=false
# Namespace for metrics (used in metric names)
METRICS_NAMESPACE=honcho
```
## Monitoring Configuration
### Sentry Error Tracking
**Sentry Settings:**
```bash theme={null}
# Enable/disable Sentry error tracking
SENTRY_ENABLED=false
# Sentry configuration
SENTRY_DSN=https://your-sentry-dsn@sentry.io/project-id
SENTRY_RELEASE=2.4.0 # Optional: track which version errors come from
SENTRY_ENVIRONMENT=production # Environment name (development, staging, production)
# Sampling rates (0.0 to 1.0)
SENTRY_TRACES_SAMPLE_RATE=0.1 # 10% of transactions tracked
SENTRY_PROFILES_SAMPLE_RATE=0.1 # 10% of transactions profiled
```
## Environment-Specific Examples
### Development Configuration
**config.toml for development:**
```toml theme={null}
[app]
LOG_LEVEL = "DEBUG"
SESSION_OBSERVERS_LIMIT = 10
EMBED_MESSAGES = false
[db]
CONNECTION_URI = "postgresql+psycopg://postgres:postgres@localhost:5432/honcho_dev"
POOL_SIZE = 5
[auth]
USE_AUTH = false
[cache]
ENABLED = false
[dialectic]
PROVIDER = "anthropic"
MODEL = "claude-sonnet-4-20250514"
PERFORM_QUERY_GENERATION = false
MAX_OUTPUT_TOKENS = 2500
[deriver]
WORKERS = 1
PROVIDER = "google"
MODEL = "gemini-2.5-flash-lite"
[peer_card]
ENABLED = true
PROVIDER = "openai"
MODEL = "gpt-5-nano-2025-08-07"
[summary]
ENABLED = true
PROVIDER = "openai"
MODEL = "gpt-4o-mini-2024-07-18"
MAX_TOKENS_SHORT = 1000
MAX_TOKENS_LONG = 4000
[dream]
ENABLED = true
[webhook]
MAX_WORKSPACE_LIMIT = 10
[metrics]
ENABLED = false
[sentry]
ENABLED = false
```
**Environment variables for development:**
```bash theme={null}
# .env.development
LOG_LEVEL=DEBUG
DB_CONNECTION_URI=postgresql+psycopg://postgres:postgres@localhost:5432/honcho_dev
AUTH_USE_AUTH=false
CACHE_ENABLED=false
# LLM Provider API Keys
LLM_ANTHROPIC_API_KEY=your-dev-anthropic-key
LLM_OPENAI_API_KEY=your-dev-openai-key
LLM_GEMINI_API_KEY=your-dev-gemini-key
```
### Production Configuration
**config.toml for production:**
```toml theme={null}
[app]
LOG_LEVEL = "WARNING"
SESSION_OBSERVERS_LIMIT = 10
EMBED_MESSAGES = true
[db]
CONNECTION_URI = "postgresql+psycopg://honcho_user:secure_password@prod-db:5432/honcho_prod"
POOL_SIZE = 20
MAX_OVERFLOW = 40
[auth]
USE_AUTH = true
[cache]
ENABLED = true
URL = "redis://redis:6379/0"
DEFAULT_TTL_SECONDS = 300
[dialectic]
PROVIDER = "anthropic"
MODEL = "claude-sonnet-4-20250514"
PERFORM_QUERY_GENERATION = false
MAX_OUTPUT_TOKENS = 2500
[deriver]
WORKERS = 4
PROVIDER = "google"
MODEL = "gemini-2.5-flash-lite"
[peer_card]
ENABLED = true
PROVIDER = "openai"
MODEL = "gpt-5-nano-2025-08-07"
[summary]
ENABLED = true
PROVIDER = "openai"
MODEL = "gpt-4o-mini-2024-07-18"
MAX_TOKENS_SHORT = 1000
MAX_TOKENS_LONG = 4000
[dream]
ENABLED = true
PROVIDER = "openai"
MODEL = "gpt-4o-mini-2024-07-18"
[webhook]
MAX_WORKSPACE_LIMIT = 10
[metrics]
ENABLED = true
[sentry]
ENABLED = true
ENVIRONMENT = "production"
TRACES_SAMPLE_RATE = 0.1
PROFILES_SAMPLE_RATE = 0.1
```
**Environment variables for production:**
```bash theme={null}
# .env.production
LOG_LEVEL=WARNING
DB_CONNECTION_URI=postgresql+psycopg://honcho_user:secure_password@prod-db:5432/honcho_prod
# Authentication
AUTH_USE_AUTH=true
AUTH_JWT_SECRET=your-super-secret-jwt-key
# Cache
CACHE_ENABLED=true
CACHE_URL=redis://redis:6379/0
# LLM Provider API Keys
LLM_ANTHROPIC_API_KEY=your-prod-anthropic-key
LLM_OPENAI_API_KEY=your-prod-openai-key
LLM_GEMINI_API_KEY=your-prod-gemini-key
LLM_GROQ_API_KEY=your-prod-groq-key
# Webhooks
WEBHOOK_SECRET=your-webhook-signing-secret
# Monitoring
SENTRY_DSN=https://your-sentry-dsn@sentry.io/project-id
SENTRY_ENVIRONMENT=production
```
## Migration Management
**Running Database Migrations:**
```bash theme={null}
# Check current migration status
uv run alembic current
# Upgrade to latest
uv run alembic upgrade head
# Downgrade to specific revision
uv run alembic downgrade revision_id
# Create new migration
uv run alembic revision --autogenerate -m "Description of changes"
```
## Troubleshooting
**Common Configuration Issues:**
1. **Database Connection Errors**
* Ensure `DB_CONNECTION_URI` uses `postgresql+psycopg://` prefix
* Verify database is running and accessible
* Check pgvector extension is installed
2. **Authentication Issues**
* Set `AUTH_USE_AUTH=true` for production
* Generate and set `AUTH_JWT_SECRET` if authentication is enabled
* Use `python scripts/generate_jwt_secret.py` to create a secure secret
3. **LLM Provider Issues**
* Verify API keys are set correctly
* Check model names match provider specifications
* Ensure provider is enabled in configuration
4. **Deriver Issues**
* Increase `DERIVER_WORKERS` for better performance
* Check `DERIVER_STALE_SESSION_TIMEOUT_MINUTES` for session cleanup
* Monitor background processing logs
This configuration guide covers all the settings available in Honcho. Always use environment-specific configuration files and never commit sensitive values like API keys or JWT secrets to version control.
# Contributing Guidelines
Source: https://docs.honcho.dev/v2/contributing/guidelines
Thank you for your interest in contributing to Honcho! This guide outlines the process for contributing to the project and our development conventions.
## Getting Started
Before you start contributing, please:
1. **Set up your development environment** - Follow the [Local Development guide](https://github.com/plastic-labs/honcho/blob/main/CONTRIBUTING.md#local-development) in the Honcho repository to get Honcho running locally.
2. **Join our community** - Feel free to join us in our [Discord](http://discord.gg/plasticlabs) to discuss your changes, get help, or ask questions.
3. **Review existing issues** - Check the [issues tab](https://github.com/plastic-labs/honcho/issues) to see what's already being worked on or to find something to contribute to.
## Contribution Workflow
### 1. Fork and Clone
1. Fork the repository on GitHub
2. Clone your fork locally:
```bash theme={null}
git clone https://github.com/YOUR_USERNAME/honcho.git
cd honcho
```
3. Add the upstream repository as a remote:
```bash theme={null}
git remote add upstream https://github.com/plastic-labs/honcho.git
```
### 2. Create a Branch
Create a new branch for your feature or bug fix:
```bash theme={null}
git checkout -b feature/your-feature-name
# or
git checkout -b fix/your-bug-fix-name
```
**Branch naming conventions:**
* `feature/description` - for new features
* `fix/description` - for bug fixes
* `docs/description` - for documentation updates
* `refactor/description` - for code refactoring
* `test/description` - for adding or updating tests
### 3. Make Your Changes
* Write clean, readable code that follows our coding standards (see below)
* Add tests for new functionality
* Update documentation as needed
* Make sure your changes don't break existing functionality
### 4. Commit Your Changes
We follow conventional commit standards. Format your commit messages as:
```
type(scope): description
[optional body]
[optional footer]
```
**Types:**
* `feat`: A new feature
* `fix`: A bug fix
* `docs`: Documentation only changes
* `style`: Changes that do not affect the meaning of the code
* `refactor`: A code change that neither fixes a bug nor adds a feature
* `test`: Adding missing tests or correcting existing tests
* `chore`: Changes to the build process or auxiliary tools
**Examples:**
```bash theme={null}
git commit -m "feat(api): add new dialectic endpoint for user insights"
git commit -m "fix(db): resolve connection pool timeout issue"
git commit -m "docs(readme): update installation instructions"
```
### 5. Submit a Pull Request
1. Push your branch to your fork:
```bash theme={null}
git push origin your-branch-name
```
2. Create a pull request on GitHub from your branch to the `main` branch
3. Fill out the pull request template with:
* A clear description of what changes you've made
* The motivation for the changes
* Any relevant issue numbers (use "Closes #123" to auto-close issues)
* Screenshots or examples if applicable
## Coding Standards
### Python Code Style
* Follow [PEP 8](https://www.python.org/dev/peps/pep-0008/) style guidelines
* Use [Black](https://black.readthedocs.io/) for code formatting (we may add this to CI in the future)
* Use type hints where possible
* Write docstrings for functions and classes using Google style docstrings
### Code Organization
* Keep functions focused and single-purpose
* Use meaningful variable and function names
* Add comments for complex logic
* Follow existing patterns in the codebase
### Testing
* Write unit tests for new functionality
* Ensure existing tests pass before submitting
* Use descriptive test names that explain what is being tested
* Mock external dependencies appropriately
### Documentation
* Update relevant documentation for new features
* Include examples in docstrings where helpful
* Keep README and other docs up to date with changes
## Review Process
1. **Automated checks** - Your PR will run through automated checks including tests and linting
2. **Project maintainer review** - A project maintainer will review your code for:
* Code quality and adherence to standards
* Functionality and correctness
* Test coverage
* Documentation completeness
3. **Discussion and iteration** - You may be asked to make changes or clarifications
4. **Approval and merge** - Once approved, your PR will be merged into `main`
## Types of Contributions
We welcome various types of contributions:
* **Bug fixes** - Help us squash bugs and improve stability
* **New features** - Add functionality that benefits the community
* **Documentation** - Improve or expand our documentation
* **Tests** - Increase test coverage and reliability
* **Performance improvements** - Help make Honcho faster and more efficient
* **Examples and tutorials** - Help other developers use Honcho
## Issue Reporting
When reporting bugs or requesting features:
1. Check if the issue already exists
2. Use the appropriate issue template
3. Provide clear reproduction steps for bugs
4. Include relevant environment information
5. Be specific about expected vs actual behavior
## Questions and Support
* **General questions** - Join our [Discord](http://discord.gg/plasticlabs)
* **Bug reports** - Use GitHub issues
* **Feature requests** - Use GitHub issues with the feature request template
* **Security issues** - Please email us privately rather than opening a public issue
## License
By contributing to Honcho, you agree that your contributions will be licensed under the same [AGPL-3.0 License](./license) that covers the project.
Thank you for helping make Honcho better! 🫡
# License
Source: https://docs.honcho.dev/v2/contributing/license
Honcho is licensed under the AGPL-3.0 License. This is copied below for convenience and also present in the
[GitHub Repository](https://github.com/plastic-labs/honcho)
```
GNU AFFERO GENERAL PUBLIC LICENSE
Version 3, 19 November 2007
Copyright (C) 2007 Free Software Foundation, Inc.
Everyone is permitted to copy and distribute verbatim copies
of this license document, but changing it is not allowed.
Preamble
The GNU Affero General Public License is a free, copyleft license for
software and other kinds of works, specifically designed to ensure
cooperation with the community in the case of network server software.
The licenses for most software and other practical works are designed
to take away your freedom to share and change the works. By contrast,
our General Public Licenses are intended to guarantee your freedom to
share and change all versions of a program--to make sure it remains free
software for all its users.
When we speak of free software, we are referring to freedom, not
price. Our General Public Licenses are designed to make sure that you
have the freedom to distribute copies of free software (and charge for
them if you wish), that you receive source code or can get it if you
want it, that you can change the software or use pieces of it in new
free programs, and that you know you can do these things.
Developers that use our General Public Licenses protect your rights
with two steps: (1) assert copyright on the software, and (2) offer
you this License which gives you legal permission to copy, distribute
and/or modify the software.
A secondary benefit of defending all users' freedom is that
improvements made in alternate versions of the program, if they
receive widespread use, become available for other developers to
incorporate. Many developers of free software are heartened and
encouraged by the resulting cooperation. However, in the case of
software used on network servers, this result may fail to come about.
The GNU General Public License permits making a modified version and
letting the public access it on a server without ever releasing its
source code to the public.
The GNU Affero General Public License is designed specifically to
ensure that, in such cases, the modified source code becomes available
to the community. It requires the operator of a network server to
provide the source code of the modified version running there to the
users of that server. Therefore, public use of a modified version, on
a publicly accessible server, gives the public access to the source
code of the modified version.
An older license, called the Affero General Public License and
published by Affero, was designed to accomplish similar goals. This is
a different license, not a version of the Affero GPL, but Affero has
released a new version of the Affero GPL which permits relicensing under
this license.
The precise terms and conditions for copying, distribution and
modification follow.
TERMS AND CONDITIONS
0. Definitions.
"This License" refers to version 3 of the GNU Affero General Public License.
"Copyright" also means copyright-like laws that apply to other kinds of
works, such as semiconductor masks.
"The Program" refers to any copyrightable work licensed under this
License. Each licensee is addressed as "you". "Licensees" and
"recipients" may be individuals or organizations.
To "modify" a work means to copy from or adapt all or part of the work
in a fashion requiring copyright permission, other than the making of an
exact copy. The resulting work is called a "modified version" of the
earlier work or a work "based on" the earlier work.
A "covered work" means either the unmodified Program or a work based
on the Program.
To "propagate" a work means to do anything with it that, without
permission, would make you directly or secondarily liable for
infringement under applicable copyright law, except executing it on a
computer or modifying a private copy. Propagation includes copying,
distribution (with or without modification), making available to the
public, and in some countries other activities as well.
To "convey" a work means any kind of propagation that enables other
parties to make or receive copies. Mere interaction with a user through
a computer network, with no transfer of a copy, is not conveying.
An interactive user interface displays "Appropriate Legal Notices"
to the extent that it includes a convenient and prominently visible
feature that (1) displays an appropriate copyright notice, and (2)
tells the user that there is no warranty for the work (except to the
extent that warranties are provided), that licensees may convey the
work under this License, and how to view a copy of this License. If
the interface presents a list of user commands or options, such as a
menu, a prominent item in the list meets this criterion.
1. Source Code.
The "source code" for a work means the preferred form of the work
for making modifications to it. "Object code" means any non-source
form of a work.
A "Standard Interface" means an interface that either is an official
standard defined by a recognized standards body, or, in the case of
interfaces specified for a particular programming language, one that
is widely used among developers working in that language.
The "System Libraries" of an executable work include anything, other
than the work as a whole, that (a) is included in the normal form of
packaging a Major Component, but which is not part of that Major
Component, and (b) serves only to enable use of the work with that
Major Component, or to implement a Standard Interface for which an
implementation is available to the public in source code form. A
"Major Component", in this context, means a major essential component
(kernel, window system, and so on) of the specific operating system
(if any) on which the executable work runs, or a compiler used to
produce the work, or an object code interpreter used to run it.
The "Corresponding Source" for a work in object code form means all
the source code needed to generate, install, and (for an executable
work) run the object code and to modify the work, including scripts to
control those activities. However, it does not include the work's
System Libraries, or general-purpose tools or generally available free
programs which are used unmodified in performing those activities but
which are not part of the work. For example, Corresponding Source
includes interface definition files associated with source files for
the work, and the source code for shared libraries and dynamically
linked subprograms that the work is specifically designed to require,
such as by intimate data communication or control flow between those
subprograms and other parts of the work.
The Corresponding Source need not include anything that users
can regenerate automatically from other parts of the Corresponding
Source.
The Corresponding Source for a work in source code form is that
same work.
2. Basic Permissions.
All rights granted under this License are granted for the term of
copyright on the Program, and are irrevocable provided the stated
conditions are met. This License explicitly affirms your unlimited
permission to run the unmodified Program. The output from running a
covered work is covered by this License only if the output, given its
content, constitutes a covered work. This License acknowledges your
rights of fair use or other equivalent, as provided by copyright law.
You may make, run and propagate covered works that you do not
convey, without conditions so long as your license otherwise remains
in force. You may convey covered works to others for the sole purpose
of having them make modifications exclusively for you, or provide you
with facilities for running those works, provided that you comply with
the terms of this License in conveying all material for which you do
not control copyright. Those thus making or running the covered works
for you must do so exclusively on your behalf, under your direction
and control, on terms that prohibit them from making any copies of
your copyrighted material outside their relationship with you.
Conveying under any other circumstances is permitted solely under
the conditions stated below. Sublicensing is not allowed; section 10
makes it unnecessary.
3. Protecting Users' Legal Rights From Anti-Circumvention Law.
No covered work shall be deemed part of an effective technological
measure under any applicable law fulfilling obligations under article
11 of the WIPO copyright treaty adopted on 20 December 1996, or
similar laws prohibiting or restricting circumvention of such
measures.
When you convey a covered work, you waive any legal power to forbid
circumvention of technological measures to the extent such circumvention
is effected by exercising rights under this License with respect to
the covered work, and you disclaim any intention to limit operation or
modification of the work as a means of enforcing, against the work's
users, your or third parties' legal rights to forbid circumvention of
technological measures.
4. Conveying Verbatim Copies.
You may convey verbatim copies of the Program's source code as you
receive it, in any medium, provided that you conspicuously and
appropriately publish on each copy an appropriate copyright notice;
keep intact all notices stating that this License and any
non-permissive terms added in accord with section 7 apply to the code;
keep intact all notices of the absence of any warranty; and give all
recipients a copy of this License along with the Program.
You may charge any price or no price for each copy that you convey,
and you may offer support or warranty protection for a fee.
5. Conveying Modified Source Versions.
You may convey a work based on the Program, or the modifications to
produce it from the Program, in the form of source code under the
terms of section 4, provided that you also meet all of these conditions:
a) The work must carry prominent notices stating that you modified
it, and giving a relevant date.
b) The work must carry prominent notices stating that it is
released under this License and any conditions added under section
7. This requirement modifies the requirement in section 4 to
"keep intact all notices".
c) You must license the entire work, as a whole, under this
License to anyone who comes into possession of a copy. This
License will therefore apply, along with any applicable section 7
additional terms, to the whole of the work, and all its parts,
regardless of how they are packaged. This License gives no
permission to license the work in any other way, but it does not
invalidate such permission if you have separately received it.
d) If the work has interactive user interfaces, each must display
Appropriate Legal Notices; however, if the Program has interactive
interfaces that do not display Appropriate Legal Notices, your
work need not make them do so.
A compilation of a covered work with other separate and independent
works, which are not by their nature extensions of the covered work,
and which are not combined with it such as to form a larger program,
in or on a volume of a storage or distribution medium, is called an
"aggregate" if the compilation and its resulting copyright are not
used to limit the access or legal rights of the compilation's users
beyond what the individual works permit. Inclusion of a covered work
in an aggregate does not cause this License to apply to the other
parts of the aggregate.
6. Conveying Non-Source Forms.
You may convey a covered work in object code form under the terms
of sections 4 and 5, provided that you also convey the
machine-readable Corresponding Source under the terms of this License,
in one of these ways:
a) Convey the object code in, or embodied in, a physical product
(including a physical distribution medium), accompanied by the
Corresponding Source fixed on a durable physical medium
customarily used for software interchange.
b) Convey the object code in, or embodied in, a physical product
(including a physical distribution medium), accompanied by a
written offer, valid for at least three years and valid for as
long as you offer spare parts or customer support for that product
model, to give anyone who possesses the object code either (1) a
copy of the Corresponding Source for all the software in the
product that is covered by this License, on a durable physical
medium customarily used for software interchange, for a price no
more than your reasonable cost of physically performing this
conveying of source, or (2) access to copy the
Corresponding Source from a network server at no charge.
c) Convey individual copies of the object code with a copy of the
written offer to provide the Corresponding Source. This
alternative is allowed only occasionally and noncommercially, and
only if you received the object code with such an offer, in accord
with subsection 6b.
d) Convey the object code by offering access from a designated
place (gratis or for a charge), and offer equivalent access to the
Corresponding Source in the same way through the same place at no
further charge. You need not require recipients to copy the
Corresponding Source along with the object code. If the place to
copy the object code is a network server, the Corresponding Source
may be on a different server (operated by you or a third party)
that supports equivalent copying facilities, provided you maintain
clear directions next to the object code saying where to find the
Corresponding Source. Regardless of what server hosts the
Corresponding Source, you remain obligated to ensure that it is
available for as long as needed to satisfy these requirements.
e) Convey the object code using peer-to-peer transmission, provided
you inform other peers where the object code and Corresponding
Source of the work are being offered to the general public at no
charge under subsection 6d.
A separable portion of the object code, whose source code is excluded
from the Corresponding Source as a System Library, need not be
included in conveying the object code work.
A "User Product" is either (1) a "consumer product", which means any
tangible personal property which is normally used for personal, family,
or household purposes, or (2) anything designed or sold for incorporation
into a dwelling. In determining whether a product is a consumer product,
doubtful cases shall be resolved in favor of coverage. For a particular
product received by a particular user, "normally used" refers to a
typical or common use of that class of product, regardless of the status
of the particular user or of the way in which the particular user
actually uses, or expects or is expected to use, the product. A product
is a consumer product regardless of whether the product has substantial
commercial, industrial or non-consumer uses, unless such uses represent
the only significant mode of use of the product.
"Installation Information" for a User Product means any methods,
procedures, authorization keys, or other information required to install
and execute modified versions of a covered work in that User Product from
a modified version of its Corresponding Source. The information must
suffice to ensure that the continued functioning of the modified object
code is in no case prevented or interfered with solely because
modification has been made.
If you convey an object code work under this section in, or with, or
specifically for use in, a User Product, and the conveying occurs as
part of a transaction in which the right of possession and use of the
User Product is transferred to the recipient in perpetuity or for a
fixed term (regardless of how the transaction is characterized), the
Corresponding Source conveyed under this section must be accompanied
by the Installation Information. But this requirement does not apply
if neither you nor any third party retains the ability to install
modified object code on the User Product (for example, the work has
been installed in ROM).
The requirement to provide Installation Information does not include a
requirement to continue to provide support service, warranty, or updates
for a work that has been modified or installed by the recipient, or for
the User Product in which it has been modified or installed. Access to a
network may be denied when the modification itself materially and
adversely affects the operation of the network or violates the rules and
protocols for communication across the network.
Corresponding Source conveyed, and Installation Information provided,
in accord with this section must be in a format that is publicly
documented (and with an implementation available to the public in
source code form), and must require no special password or key for
unpacking, reading or copying.
7. Additional Terms.
"Additional permissions" are terms that supplement the terms of this
License by making exceptions from one or more of its conditions.
Additional permissions that are applicable to the entire Program shall
be treated as though they were included in this License, to the extent
that they are valid under applicable law. If additional permissions
apply only to part of the Program, that part may be used separately
under those permissions, but the entire Program remains governed by
this License without regard to the additional permissions.
When you convey a copy of a covered work, you may at your option
remove any additional permissions from that copy, or from any part of
it. (Additional permissions may be written to require their own
removal in certain cases when you modify the work.) You may place
additional permissions on material, added by you to a covered work,
for which you have or can give appropriate copyright permission.
Notwithstanding any other provision of this License, for material you
add to a covered work, you may (if authorized by the copyright holders of
that material) supplement the terms of this License with terms:
a) Disclaiming warranty or limiting liability differently from the
terms of sections 15 and 16 of this License; or
b) Requiring preservation of specified reasonable legal notices or
author attributions in that material or in the Appropriate Legal
Notices displayed by works containing it; or
c) Prohibiting misrepresentation of the origin of that material, or
requiring that modified versions of such material be marked in
reasonable ways as different from the original version; or
d) Limiting the use for publicity purposes of names of licensors or
authors of the material; or
e) Declining to grant rights under trademark law for use of some
trade names, trademarks, or service marks; or
f) Requiring indemnification of licensors and authors of that
material by anyone who conveys the material (or modified versions of
it) with contractual assumptions of liability to the recipient, for
any liability that these contractual assumptions directly impose on
those licensors and authors.
All other non-permissive additional terms are considered "further
restrictions" within the meaning of section 10. If the Program as you
received it, or any part of it, contains a notice stating that it is
governed by this License along with a term that is a further
restriction, you may remove that term. If a license document contains
a further restriction but permits relicensing or conveying under this
License, you may add to a covered work material governed by the terms
of that license document, provided that the further restriction does
not survive such relicensing or conveying.
If you add terms to a covered work in accord with this section, you
must place, in the relevant source files, a statement of the
additional terms that apply to those files, or a notice indicating
where to find the applicable terms.
Additional terms, permissive or non-permissive, may be stated in the
form of a separately written license, or stated as exceptions;
the above requirements apply either way.
8. Termination.
You may not propagate or modify a covered work except as expressly
provided under this License. Any attempt otherwise to propagate or
modify it is void, and will automatically terminate your rights under
this License (including any patent licenses granted under the third
paragraph of section 11).
However, if you cease all violation of this License, then your
license from a particular copyright holder is reinstated (a)
provisionally, unless and until the copyright holder explicitly and
finally terminates your license, and (b) permanently, if the copyright
holder fails to notify you of the violation by some reasonable means
prior to 60 days after the cessation.
Moreover, your license from a particular copyright holder is
reinstated permanently if the copyright holder notifies you of the
violation by some reasonable means, this is the first time you have
received notice of violation of this License (for any work) from that
copyright holder, and you cure the violation prior to 30 days after
your receipt of the notice.
Termination of your rights under this section does not terminate the
licenses of parties who have received copies or rights from you under
this License. If your rights have been terminated and not permanently
reinstated, you do not qualify to receive new licenses for the same
material under section 10.
9. Acceptance Not Required for Having Copies.
You are not required to accept this License in order to receive or
run a copy of the Program. Ancillary propagation of a covered work
occurring solely as a consequence of using peer-to-peer transmission
to receive a copy likewise does not require acceptance. However,
nothing other than this License grants you permission to propagate or
modify any covered work. These actions infringe copyright if you do
not accept this License. Therefore, by modifying or propagating a
covered work, you indicate your acceptance of this License to do so.
10. Automatic Licensing of Downstream Recipients.
Each time you convey a covered work, the recipient automatically
receives a license from the original licensors, to run, modify and
propagate that work, subject to this License. You are not responsible
for enforcing compliance by third parties with this License.
An "entity transaction" is a transaction transferring control of an
organization, or substantially all assets of one, or subdividing an
organization, or merging organizations. If propagation of a covered
work results from an entity transaction, each party to that
transaction who receives a copy of the work also receives whatever
licenses to the work the party's predecessor in interest had or could
give under the previous paragraph, plus a right to possession of the
Corresponding Source of the work from the predecessor in interest, if
the predecessor has it or can get it with reasonable efforts.
You may not impose any further restrictions on the exercise of the
rights granted or affirmed under this License. For example, you may
not impose a license fee, royalty, or other charge for exercise of
rights granted under this License, and you may not initiate litigation
(including a cross-claim or counterclaim in a lawsuit) alleging that
any patent claim is infringed by making, using, selling, offering for
sale, or importing the Program or any portion of it.
11. Patents.
A "contributor" is a copyright holder who authorizes use under this
License of the Program or a work on which the Program is based. The
work thus licensed is called the contributor's "contributor version".
A contributor's "essential patent claims" are all patent claims
owned or controlled by the contributor, whether already acquired or
hereafter acquired, that would be infringed by some manner, permitted
by this License, of making, using, or selling its contributor version,
but do not include claims that would be infringed only as a
consequence of further modification of the contributor version. For
purposes of this definition, "control" includes the right to grant
patent sublicenses in a manner consistent with the requirements of
this License.
Each contributor grants you a non-exclusive, worldwide, royalty-free
patent license under the contributor's essential patent claims, to
make, use, sell, offer for sale, import and otherwise run, modify and
propagate the contents of its contributor version.
In the following three paragraphs, a "patent license" is any express
agreement or commitment, however denominated, not to enforce a patent
(such as an express permission to practice a patent or covenant not to
sue for patent infringement). To "grant" such a patent license to a
party means to make such an agreement or commitment not to enforce a
patent against the party.
If you convey a covered work, knowingly relying on a patent license,
and the Corresponding Source of the work is not available for anyone
to copy, free of charge and under the terms of this License, through a
publicly available network server or other readily accessible means,
then you must either (1) cause the Corresponding Source to be so
available, or (2) arrange to deprive yourself of the benefit of the
patent license for this particular work, or (3) arrange, in a manner
consistent with the requirements of this License, to extend the patent
license to downstream recipients. "Knowingly relying" means you have
actual knowledge that, but for the patent license, your conveying the
covered work in a country, or your recipient's use of the covered work
in a country, would infringe one or more identifiable patents in that
country that you have reason to believe are valid.
If, pursuant to or in connection with a single transaction or
arrangement, you convey, or propagate by procuring conveyance of, a
covered work, and grant a patent license to some of the parties
receiving the covered work authorizing them to use, propagate, modify
or convey a specific copy of the covered work, then the patent license
you grant is automatically extended to all recipients of the covered
work and works based on it.
A patent license is "discriminatory" if it does not include within
the scope of its coverage, prohibits the exercise of, or is
conditioned on the non-exercise of one or more of the rights that are
specifically granted under this License. You may not convey a covered
work if you are a party to an arrangement with a third party that is
in the business of distributing software, under which you make payment
to the third party based on the extent of your activity of conveying
the work, and under which the third party grants, to any of the
parties who would receive the covered work from you, a discriminatory
patent license (a) in connection with copies of the covered work
conveyed by you (or copies made from those copies), or (b) primarily
for and in connection with specific products or compilations that
contain the covered work, unless you entered into that arrangement,
or that patent license was granted, prior to 28 March 2007.
Nothing in this License shall be construed as excluding or limiting
any implied license or other defenses to infringement that may
otherwise be available to you under applicable patent law.
12. No Surrender of Others' Freedom.
If conditions are imposed on you (whether by court order, agreement or
otherwise) that contradict the conditions of this License, they do not
excuse you from the conditions of this License. If you cannot convey a
covered work so as to satisfy simultaneously your obligations under this
License and any other pertinent obligations, then as a consequence you may
not convey it at all. For example, if you agree to terms that obligate you
to collect a royalty for further conveying from those to whom you convey
the Program, the only way you could satisfy both those terms and this
License would be to refrain entirely from conveying the Program.
13. Remote Network Interaction; Use with the GNU General Public License.
Notwithstanding any other provision of this License, if you modify the
Program, your modified version must prominently offer all users
interacting with it remotely through a computer network (if your version
supports such interaction) an opportunity to receive the Corresponding
Source of your version by providing access to the Corresponding Source
from a network server at no charge, through some standard or customary
means of facilitating copying of software. This Corresponding Source
shall include the Corresponding Source for any work covered by version 3
of the GNU General Public License that is incorporated pursuant to the
following paragraph.
Notwithstanding any other provision of this License, you have
permission to link or combine any covered work with a work licensed
under version 3 of the GNU General Public License into a single
combined work, and to convey the resulting work. The terms of this
License will continue to apply to the part which is the covered work,
but the work with which it is combined will remain governed by version
3 of the GNU General Public License.
14. Revised Versions of this License.
The Free Software Foundation may publish revised and/or new versions of
the GNU Affero General Public License from time to time. Such new versions
will be similar in spirit to the present version, but may differ in detail to
address new problems or concerns.
Each version is given a distinguishing version number. If the
Program specifies that a certain numbered version of the GNU Affero General
Public License "or any later version" applies to it, you have the
option of following the terms and conditions either of that numbered
version or of any later version published by the Free Software
Foundation. If the Program does not specify a version number of the
GNU Affero General Public License, you may choose any version ever published
by the Free Software Foundation.
If the Program specifies that a proxy can decide which future
versions of the GNU Affero General Public License can be used, that proxy's
public statement of acceptance of a version permanently authorizes you
to choose that version for the Program.
Later license versions may give you additional or different
permissions. However, no additional obligations are imposed on any
author or copyright holder as a result of your choosing to follow a
later version.
15. Disclaimer of Warranty.
THERE IS NO WARRANTY FOR THE PROGRAM, TO THE EXTENT PERMITTED BY
APPLICABLE LAW. EXCEPT WHEN OTHERWISE STATED IN WRITING THE COPYRIGHT
HOLDERS AND/OR OTHER PARTIES PROVIDE THE PROGRAM "AS IS" WITHOUT WARRANTY
OF ANY KIND, EITHER EXPRESSED OR IMPLIED, INCLUDING, BUT NOT LIMITED TO,
THE IMPLIED WARRANTIES OF MERCHANTABILITY AND FITNESS FOR A PARTICULAR
PURPOSE. THE ENTIRE RISK AS TO THE QUALITY AND PERFORMANCE OF THE PROGRAM
IS WITH YOU. SHOULD THE PROGRAM PROVE DEFECTIVE, YOU ASSUME THE COST OF
ALL NECESSARY SERVICING, REPAIR OR CORRECTION.
16. Limitation of Liability.
IN NO EVENT UNLESS REQUIRED BY APPLICABLE LAW OR AGREED TO IN WRITING
WILL ANY COPYRIGHT HOLDER, OR ANY OTHER PARTY WHO MODIFIES AND/OR CONVEYS
THE PROGRAM AS PERMITTED ABOVE, BE LIABLE TO YOU FOR DAMAGES, INCLUDING ANY
GENERAL, SPECIAL, INCIDENTAL OR CONSEQUENTIAL DAMAGES ARISING OUT OF THE
USE OR INABILITY TO USE THE PROGRAM (INCLUDING BUT NOT LIMITED TO LOSS OF
DATA OR DATA BEING RENDERED INACCURATE OR LOSSES SUSTAINED BY YOU OR THIRD
PARTIES OR A FAILURE OF THE PROGRAM TO OPERATE WITH ANY OTHER PROGRAMS),
EVEN IF SUCH HOLDER OR OTHER PARTY HAS BEEN ADVISED OF THE POSSIBILITY OF
SUCH DAMAGES.
17. Interpretation of Sections 15 and 16.
If the disclaimer of warranty and limitation of liability provided
above cannot be given local legal effect according to their terms,
reviewing courts shall apply local law that most closely approximates
an absolute waiver of all civil liability in connection with the
Program, unless a warranty or assumption of liability accompanies a
copy of the Program in return for a fee.
END OF TERMS AND CONDITIONS
How to Apply These Terms to Your New Programs
If you develop a new program, and you want it to be of the greatest
possible use to the public, the best way to achieve this is to make it
free software which everyone can redistribute and change under these terms.
To do so, attach the following notices to the program. It is safest
to attach them to the start of each source file to most effectively
state the exclusion of warranty; and each file should have at least
the "copyright" line and a pointer to where the full notice is found.
Copyright (C)
This program is free software: you can redistribute it and/or modify
it under the terms of the GNU Affero General Public License as published
by the Free Software Foundation, either version 3 of the License, or
(at your option) any later version.
This program is distributed in the hope that it will be useful,
but WITHOUT ANY WARRANTY; without even the implied warranty of
MERCHANTABILITY or FITNESS FOR A PARTICULAR PURPOSE. See the
GNU Affero General Public License for more details.
You should have received a copy of the GNU Affero General Public License
along with this program. If not, see .
Also add information on how to contact you by electronic and paper mail.
If your software can interact with users remotely through a computer
network, you should also make sure that it provides a way for users to
get its source. For example, if your program is a web application, its
interface could display a "Source" link that leads users to an archive
of the code. There are many ways you could offer source, and different
solutions will be better for different programs; see section 13 for the
specific requirements.
You should also get your employer (if you work as a programmer) or school,
if any, to sign a "copyright disclaimer" for the program, if necessary.
For more information on this, and how to apply and follow the GNU AGPL, see
.
```
# Local Environment Setup
Source: https://docs.honcho.dev/v2/contributing/self-hosting
Set up a local environment to run Honcho for development, testing, or self-hosting
This guide helps you set up a local environment to run Honcho for development, testing, or self-hosting.
## Overview
By the end of this guide, you'll have:
* A local Honcho server running on your machine
* A PostgreSQL database with pgvector extension
* Basic configuration to connect your applications
* A working environment for development or testing
## Prerequisites
Before you begin, ensure you have the following installed:
### Required Software
* **uv** - Python package manager: `pip install uv` (manages Python installations automatically)
* **Git** - [Download from git-scm.com](https://git-scm.com/downloads)
* **Docker** (optional) - [Download from docker.com](https://www.docker.com/products/docker-desktop/)
### Database Options
You'll need a PostgreSQL database with the pgvector extension. Choose one:
* **Local PostgreSQL** - Install locally or use Docker
* **Supabase** - Free cloud PostgreSQL with pgvector
* **Railway** - Simple cloud PostgreSQL hosting
* **Your own PostgreSQL server**
## Docker Setup (Recommended)
The easiest way to get started is using Docker Compose, which handles both the database and Honcho server.
### 1. Clone the Repository
```bash theme={null}
git clone https://github.com/plastic-labs/honcho.git
cd honcho
```
### 2. Set Up Environment Variables
Copy the example environment file and configure it:
```bash theme={null}
cp .env.template .env
```
Edit `.env` and set your API keys (if using LLM features):
```bash theme={null}
# Optional API keys (required for LLM features)
OPENAI_API_KEY=your-openai-api-key
ANTHROPIC_API_KEY=your-anthropic-api-key
# Database will be created automatically by Docker
DB_CONNECTION_URI=postgresql+psycopg://postgres:postgres@database:5432/honcho
# Disable auth for local development
AUTH_USE_AUTH=false
```
### 3. Start the Services
```bash theme={null}
# Copy the example docker-compose file
cp docker-compose.yml.example docker-compose.yml
# Start PostgreSQL and Honcho
docker compose up -d
```
### 4. Verify It's Working
Check that both services are running:
```bash theme={null}
docker compose ps
```
Test the Honcho API:
```bash theme={null}
curl http://localhost:8000/health
```
You should see a response indicating the service is healthy.
## Manual Setup
For more control over your environment, you can set up everything manually.
### 1. Clone and Install Dependencies
```bash theme={null}
git clone https://github.com/plastic-labs/honcho.git
cd honcho
# Install dependencies using uv (this will also set up Python if needed)
uv sync
# Activate the virtual environment
source .venv/bin/activate # On Windows: .venv\Scripts\activate
```
### 2. Set Up PostgreSQL
#### Option A: Local PostgreSQL Installation
Install PostgreSQL and pgvector on your system:
**macOS (using Homebrew):**
```bash theme={null}
brew install postgresql
brew install pgvector
```
**Ubuntu/Debian:**
```bash theme={null}
sudo apt update
sudo apt install postgresql postgresql-contrib
# Install pgvector extension (see pgvector docs for your version)
```
**Windows:**
Download from [postgresql.org](https://www.postgresql.org/download/windows/)
#### Option B: Docker PostgreSQL
```bash theme={null}
docker run --name honcho-db \
-e POSTGRES_DB=honcho \
-e POSTGRES_USER=postgres \
-e POSTGRES_PASSWORD=postgres \
-p 5432:5432 \
-d pgvector/pgvector:pg15
```
### 3. Create Database and Enable Extensions
Connect to PostgreSQL and set up the database:
```bash theme={null}
# Connect to PostgreSQL
psql -U postgres
# Create database and enable extensions
CREATE DATABASE honcho;
\c honcho
CREATE EXTENSION IF NOT EXISTS vector;
CREATE EXTENSION IF NOT EXISTS pg_trgm;
\q
```
### 4. Configure Environment
Create a `.env` file with your settings:
```bash theme={null}
cp .env.template .env
```
Edit `.env` with your configuration:
```bash theme={null}
# Database connection
DB_CONNECTION_URI=postgresql+psycopg://postgres:postgres@localhost:5432/honcho
# Optional API keys (required for LLM features)
OPENAI_API_KEY=your-openai-api-key
ANTHROPIC_API_KEY=your-anthropic-api-key
# Development settings
AUTH_USE_AUTH=false
LOG_LEVEL=DEBUG
```
### 5. Run Database Migrations
```bash theme={null}
# Run migrations to create tables
uv run alembic upgrade head
```
### 6. Start the Server
```bash theme={null}
# Start the development server
fastapi dev src/main.py
```
The server will be available at `http://localhost:8000`.
## Cloud Database Setup
If you prefer to use a managed PostgreSQL service:
### Supabase (Recommended)
1. **Create a Supabase project** at [supabase.com](https://supabase.com)
2. **Enable pgvector extension** in the SQL editor:
```sql theme={null}
CREATE EXTENSION IF NOT EXISTS vector;
CREATE EXTENSION IF NOT EXISTS pg_trgm;
```
3. **Get your connection string** from Settings > Database
4. **Update your `.env` file** with the connection string
### Railway
1. **Create a Railway project** at [railway.app](https://railway.app)
2. **Add a PostgreSQL service**
3. **Enable pgvector** in the PostgreSQL console
4. **Get your connection string** from the service variables
5. **Update your `.env` file**
## Verify Your Setup
Once your Honcho server is running, verify everything is working:
### 1. Health Check
```bash theme={null}
curl http://localhost:8000/health
```
### 2. API Documentation
Visit `http://localhost:8000/docs` to see the interactive API documentation.
### 3. Test with SDK
Create a simple test script:
```python theme={null}
from honcho import Honcho
# Connect to your local instance
client = Honcho(base_url="http://localhost:8000")
# Create a test peer
peer = client.peer("test-user")
print(f"Created peer: {peer.id}")
```
## Connect Your Application
Now that Honcho is running locally, you can connect your applications:
### Update SDK Configuration
```python theme={null}
# Python SDK
from honcho import Honcho
client = Honcho(
base_url="http://localhost:8000", # Your local instance
api_key="your-api-key" # If auth is enabled
)
```
```typescript theme={null}
// TypeScript SDK
import { Honcho } from '@honcho-ai/sdk';
const client = new Honcho({
baseUrl: 'http://localhost:8000', // Your local instance
apiKey: 'your-api-key' // If auth is enabled
});
```
### Next Steps
* **Explore the API**: Check out the [API Reference](/v2/api-reference/introduction)
* **Try the SDKs**: See our [guides](/v2/guides) for examples
* **Configure Honcho**: Visit the [Configuration Guide](./configuration) for detailed settings
* **Join the community**: [Discord](https://discord.gg/plasticlabs)
## Troubleshooting
### Common Issues
**Database Connection Errors**
* Ensure PostgreSQL is running
* Verify the connection string format: `postgresql+psycopg://...`
* Check that pgvector extension is installed
**API Key Issues**
* Verify your OpenAI and Anthropic API keys are valid
* Check that the keys have sufficient credits/quota
**Port Already in Use**
* Pass a different port to FastAPI or stop other services using port 8000
**Docker Issues**
* Ensure Docker is running
* Check container logs: `docker compose logs`
* Restart containers: `docker compose down && docker compose up -d`
**Migration Errors**
* Ensure the database exists and pgvector is enabled
* Check database permissions
* Run migrations manually: `uv run alembic upgrade head`
### Getting Help
* **GitHub Issues**: [Report bugs](https://github.com/plastic-labs/honcho/issues)
* **Discord**: [Join our community](https://discord.gg/plasticlabs)
* **Documentation**: Check the [Configuration Guide](./configuration) for detailed settings
## Production Considerations
When self-hosting for production, consider:
* **Security**: Enable authentication, use HTTPS, secure your database
* **Scaling**: Use connection pooling, consider load balancing
* **Monitoring**: Set up logging, error tracking, health checks
* **Backups**: Regular database backups, disaster recovery plan
* **Updates**: Keep Honcho and dependencies updated
# Architecture & Intuition
Source: https://docs.honcho.dev/v2/documentation/core-concepts/architecture
Understanding Honcho's core concepts and data model.
The goal of this page is to build an intuition for the primitives in Honcho and how they fit together
Honcho has 2 main components that work together to manage agent identity and context.
* **The Memory Layer**: The Memory layer for storing interaction history for your agents
* **The Reasoning Layer**: The background processing layer that builds representations of users and agents
Below we'll deep dive into these different areas, discussing the data
primitives, the flow of data through the system, artifacts Honcho produces, and
how to use them.
## Data Model
Honcho has a hierarchical data model centered around the entities below.
```mermaid theme={null}
graph TD
W[Workspaces] -->|have| P[Peers]
W -->|have| S[Sessions]
S -->|have| SM[Messages]
P <-.->|many-to-many| S
style W fill:#FF5A7E,stroke:#333,stroke-width:2px,color:#fff
style P fill:#e1f5fe,stroke:#0277bd,color:#000
style S fill:#f3e5f5,stroke:#7b1fa2,color:#000
style SM fill:#e8f5e9,stroke:#2e7d32,color:#000
```
* A `Workspaces` has `Peers` & `Sessions`
* A `Peer` can be in multiple `Sessions` and can send `Messages` in a `Session`.
* A `Session` can have many `Peers` and stores `Messages` sent by its `Peers`.
### Workspaces
Workspaces are the top-level containers that provide complete isolation between
different applications or environments; they essentially serve as a namespace
to isolate different workloads or environments
**Key Features:**
* **Isolation**: Complete data separation between workspaces
* **Multi-tenancy**: Support multiple applications or environments
* **Configuration**: Workspace-level settings and metadata
* **Access Control**: Authentication scoped to workspace level
**Use Cases:**
* Separate development/staging/production environments
* Multi-tenant SaaS applications
* Different product lines or use cases
* Complete data separation between teams
***
### Peers
Honcho has a Peer-Centric Architecture: Peers are the most important entity within Honcho, with everything revolving around Peers and their representations.
Peers represent individual users, agents, or entities in a workspace. They are
the primary subjects for memory and context management. Treating humans and
agents the same lets us support arbitrary combinations of Peers for
multi-agent or group chat scenarios.
**Key Features:**
* **Identity**: Unique identifier within a workspace
* **Memory Storage**: Personal memory and context accumulation
* **Configuration**: Per-peer behavioral settings
* **Cross-Session Context**: Memory persists across all sessions
**Use Cases:**
* Individual users in chatbot applications
* AI agents interacting with users or other agents
* Customer profiles in support systems
* Student profiles in educational platforms
* NPCs in role-playing games
***
### Sessions
Sessions represent individual conversation threads or interaction contexts between peers.
**Key Features:**
* **Multi-Peer**: Support multiple peers in a single session
* **Temporal Boundaries**: Clear start/end to conversation threads
* **Context Scoping**: Session-specific memory and context
* **Configuration**: Session-level behavioral controls
**Use Cases:**
* Individual chat conversations
* Support tickets
* Meeting transcripts
* Learning sessions
* Single-Peer onboarding sessions where data is imported from an external source
***
### Messages
Messages are the fundamental units of interaction within sessions. They may
also be used to ingest information of any kind that is not related to a specific interaction, but provides
important context for a peer (emails, docs, files, etc.). Simple make a session
with a single peer and structure the data as messages.
**Key Features:**
* **Rich Content**: Support for text, metadata, and structured data
* **Attribution**: Clear association with sending peer
* **Ordering**: Chronological sequence within sessions
* **Processing**: Automatic background analysis and insight derivation
**Message Types:**
* User messages
* AI responses
* System notifications
* Rich media content
* User actions (clicked, reacted, etc.)
* File uploads (PDFs, text files, JSON documents)
## Reasoning Layer
The raw data you store in Honcho is useful, but it's not in a format that's most
useful for an LLM to consume. There may be too many tokens that need to be
compacted, key facts about what happened may be hard to piece together because
they involve messages from across different sessions, etc.
To solve this problem, Honcho has a reasoning layer that continually processes
incoming data to form the most informationally dense and useful representations of `Peers`
that we can then expose to agents. Honcho does the following tasks in
the reasoning engine.
* **Fact Derivation**
* **Generate Summaries**
* **Generate Peer Cards**
* **Dreaming**
Honcho will reason about each `Message` it
ingests to generate new facts and insights that are spelled out and easy to
consume in an LLM prompt.
We refer to this module of Honcho as the `Deriver`, because it's constantly
deriving new insights from messages. The sum total of all these generated
insights are what we refer to as a `Representation`, all the data related to who
and what a `Peer` is.
Depending on the configuration of a `Peer` or `Session`, the deriver will behave
differently and update different representations.
Facts derived here are used in the Dialectic chat endpoint, get\_context
endpoint,
Deriver tasks are processed in parallel, but tasks affecting the same peer representation will always be processed serially in order of message creation, so as to properly understand their cumulative effect.
There are two types of tasks that the deriver currently does:
* **Representation Tasks**: Generate/update peer representations
* **Summary Tasks**: Generate conversation summaries
### Local & Global Representations
Peer representations are more of an abstract concept, as they are made up of
various pieces of data stored throughout Honcho. There are however
multiple types of representations that Honcho can produce.
Honcho handles both **local** and **global** representations of Peers, where
**local** representations are specific to a single Peer's view of another Peer,
while Global Representations are based on any message ever produced by a Peer.
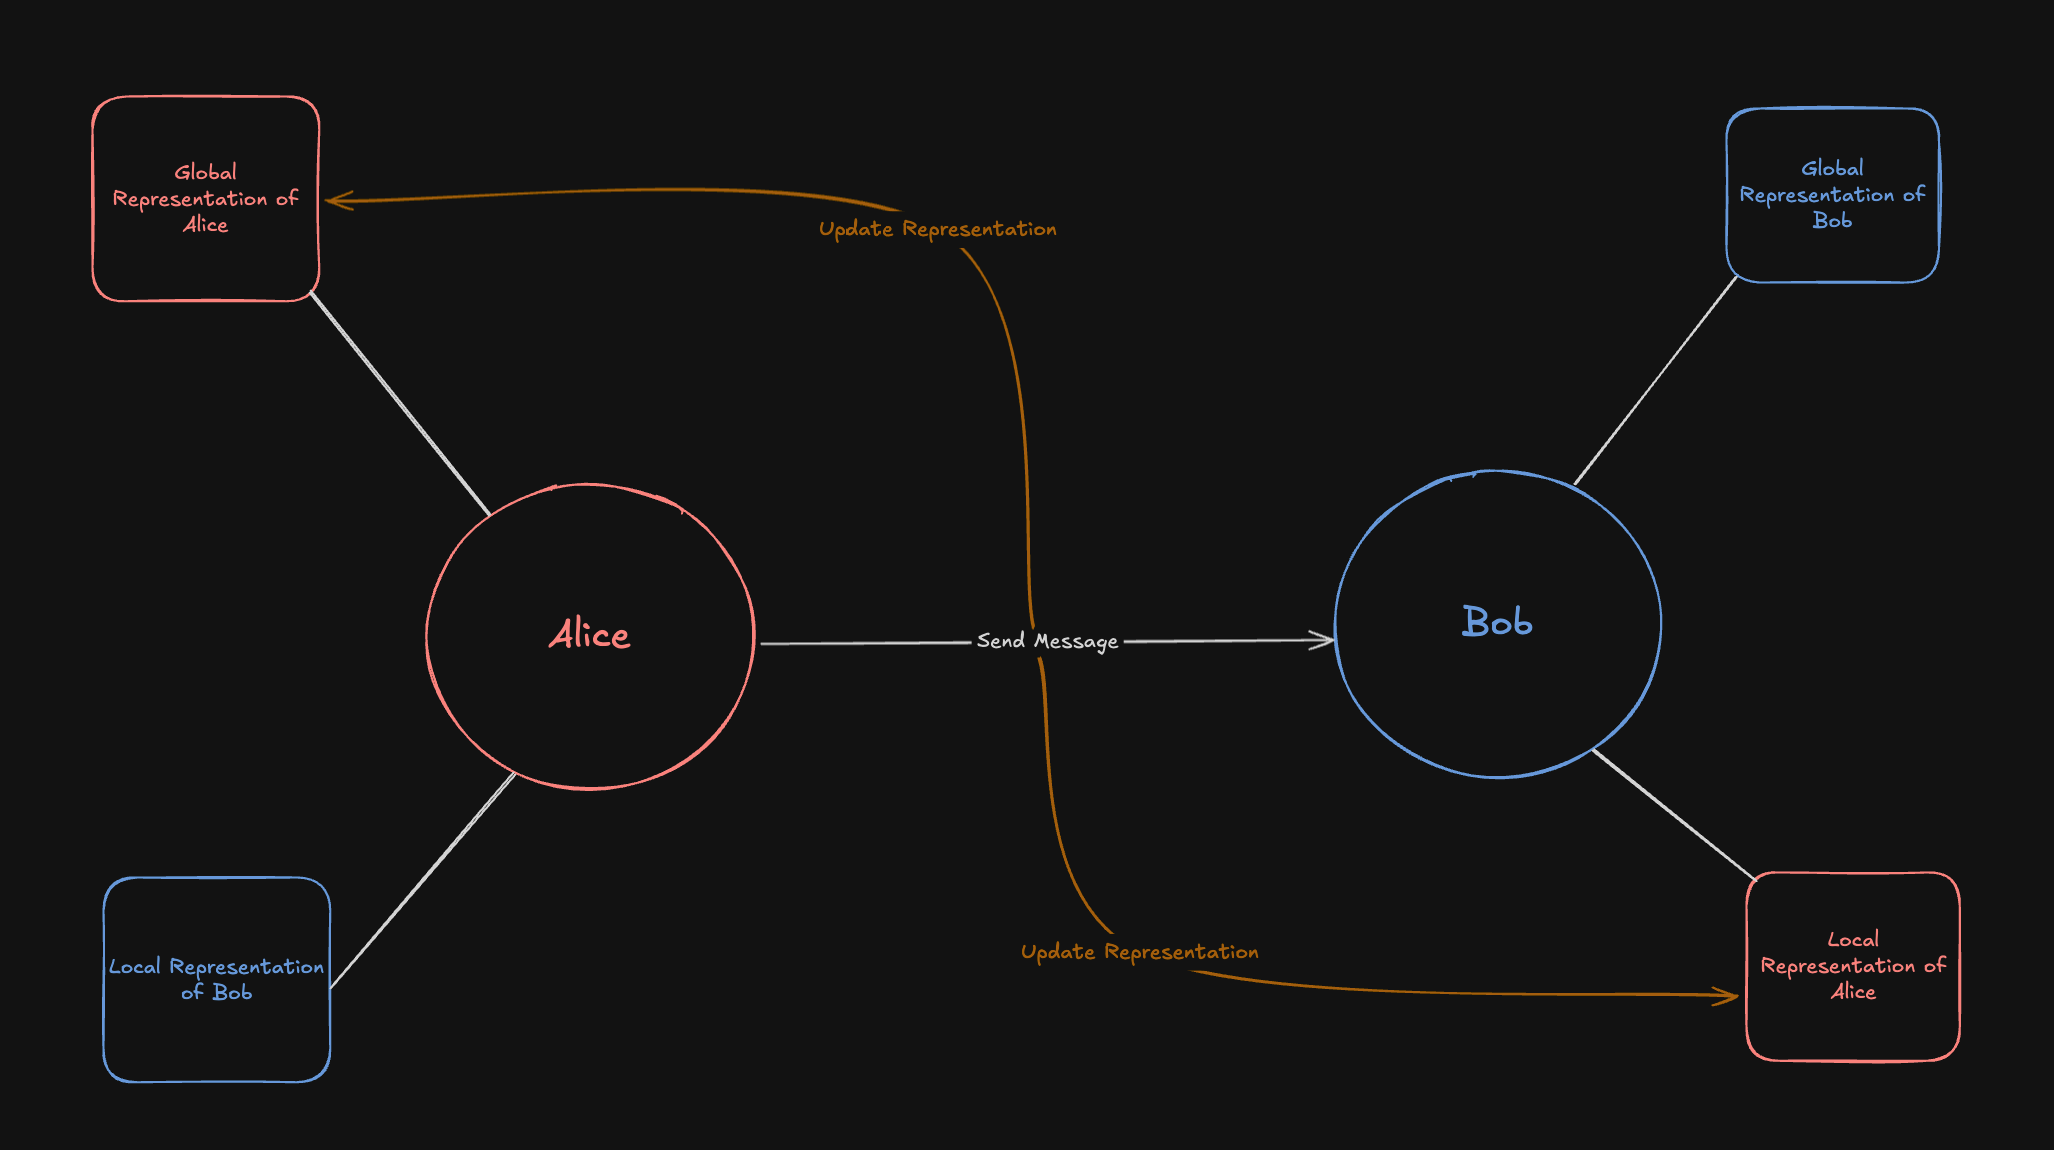 Everything is framed with regards to perspective. Alice owns her own global
representation, but she also maintains a local representation of Bob based on what she
observes and similarly Bob has a global representation of himself and local
representation of Alice. So in the example above, when Alice sends a message to
Bob it triggers an update to both Alice's global representation of herself and Bob's local
representation of Alice.
If Alice were to have another conversation with a different Peer, Nico, and
sent them a message, this action would trigger an update to Alice's Global
Representation and Nico's local representation of Alice. Bob's local
representation of Alice would not change since Bob would never receive that
message.
By default, local representations are disabled, but can be enabled in a
Peer or Session level configuration
Depending on the use case, a developer may choose to only use global
representation, only use local, or a combination.
### Summary
Summary tasks create conversation summaries. Periodically, a
"short" summary will be created for each session as messages are added -- every
20 messages by default. "Long" summaries are created every 60 messages by
default and maintain a total overview of the session by including the previous
summary in a recursive fashion. These summaries are accessed in the
`get_context` endpoint along with recent messages, allowing developers to
easily fetch everything necessary to generate the next LLM completion for an
agent.
The system defaults are also the checkpoints used on the managed version of
Honcho hosted at [https://api.honcho.dev](https://api.honcho.dev)
## Dialectic API
The Dialectic API is one of the most integral components of Honcho and acts as
the main way to leverage Peer Representations. By using the `/chat` endpoint,
developers can directly talk to Honcho about any Peer in a workspace to get
insights into the psychology of a Peer and help them steer their behavior.
This allows us to use this one endpoint for a wide variety of use cases. Model
steering, personalization, hydrating a prompt, etc. Additionally, since the
endpoint works through natural language, a developer can allow an agent to
backchannel directly with Honcho, via MCP or a direct API call.
Developers should frame the Dialectic as talking to an expert on the Peer rather than addressing the Peer itself, meaning:
```python theme={null}
alice.chat("What is the user's mood today?") # ✅ Ideal
alice.chat("What is alice's mood today?") # ✅ Works -- but make sure to consider what peer "Alice" has been saying in their messages about name/identity.
alice.chat("What is your mood today?") # ❌ Likely to fail -- the dialectic agent may conflate itself and the user.
```
Think of Dialectic Chat as an assisting agent that your main agent can consult for contextual information about any actor in your application.
## Next Steps
Learn how to use the SDK to interact with the data model
Reference for all technical terms and concepts
Detailed API documentation and examples
Get started with your first integration
# Configure Reasoning
Source: https://docs.honcho.dev/v2/documentation/core-concepts/configuration
Customizing how Honcho handles peers and sessions
Entities in Honcho can sometimes be configured to change the behavior of the deriver, which is responsible for generating and storing facts, summaries, and user representations.
These configurations can be set at the peer, session, and session-peer level (AKA the state of a peer within a specific session).
### Peer Configuration
By default, all peers are "observed" by Honcho. This means that Honcho will derive facts from messages sent by the peer and generate a representation of them. In most cases, this is why you use Honcho! However, sometimes an application requires a peer that should not be observed: for example, an assistant or game NPC that your program will never need to ask questions about.
You may therefore disable observation of a peer by setting the `observe_me` flag in their configuration to `false`.
If the peer has a session-level configuration, it will override this configuration. If the flag is not set, or is set to `true`, the peer will be observed.
```python Python theme={null}
from honcho import Honcho
# Initialize client
honcho = Honcho()
# Create peer with configuration
peer = honcho.peer("my-peer", config={"observe_me": False})
# Change peer's configuration
peer.set_peer_config({"observe_me": True})
# Note: creating the same peer again will also replace the configuration
peer = honcho.peer("my-peer", config={"observe_me": False})
```
```typescript TypeScript theme={null}
import { Honcho } from "@honcho-ai/sdk";
(async () => {
// Initialize client
const honcho = new Honcho({});
// Create peer with configuration
const peer = await honcho.peer("my-peer", { config: { observe_me: false } });
// Change peer's configuration
await peer.setPeerConfig({ observe_me: true });
// Note: creating the same peer again will also replace the configuration
await honcho.peer("my-peer", { config: { observe_me: false } });
})();
```
### Session Configuration
By default, all sessions have the deriver enabled, much like peers. You may create a session that escapes the deriver's watchful eye by setting the `deriver_disabled` flag to `true`. You can update the flag by calling `get_or_create` on the session with a new configuration.
```python Python theme={null}
from honcho import Honcho
# Initialize client
honcho = Honcho()
# Create session with configuration
session = honcho.session("my-session", config={"deriver_disabled": True})
```
```typescript TypeScript theme={null}
import { Honcho } from "@honcho-ai/sdk";
(async () => {
// Initialize client
const honcho = new Honcho({});
// Create session with configuration
const session = await honcho.session("my-session", { config: { deriver_disabled: true } });
})();
```
### Session-Peer Configuration
Configuration at the session-peer level is the most common use case for configuration flags. You will often want to arrange a session such that certain peers observe others in order to form "local representations" of them. There are two flags that can be set at the session-peer level:
* `observe_me`: Whether this peer should *be observed* by others in the session. By default, this is `true`. This overrides the peer-level `observe_me` flag.
* `observe_others`: Whether this peer should produce local representations of others in the session. By default, this is `false`. Other peers will only be observed if their `observe_me` flag is `true`.
You can combine these flags across multiple peers to arrange any possible permutation of directional observation. Note that in the default case, no local representations are produced. To produce local representations, you must set the `observe_others` flag to `true` for at least one peer in the session and at least one other peer must have their `observe_me` flag set to `true`.
Many applications will work best without local representations, preferring to chat with Honcho's top-down representation of each peer. Only enable local representations via the `observe_others` flag if you are doing advanced reasoning on user perspectives.
You can dynamically change the configuration of a session-peer by calling `set_peer_config` on the session with the peer and the configuration you want to set.
```python Python theme={null}
from honcho import Honcho
# Initialize client
honcho = Honcho()
# Create session
session = honcho.session("my-session")
# Create peers
alice = honcho.peer("alice")
bob = honcho.peer("bob")
# Add peers to session with default configuration
session.add_peers([alice, bob])
# Add another peer to the session with a custom configuration
charlie = honcho.peer("charlie")
session.add_peers([charlie, {"observe_me": False, "observe_others": True}])
# Set session-peer configuration
session.set_peer_config(alice, {"observe_others": True})
session.set_peer_config(bob, {"observe_me": False})
# Get session-peer configuration
charlie_config = session.get_peer_config(charlie)
print(charlie_config)
```
```typescript TypeScript theme={null}
import { Honcho } from "@honcho-ai/sdk";
(async () => {
// Initialize client
const honcho = new Honcho({});
// Create session
const session = await honcho.session("my-session");
// Create peers
const alice = await honcho.peer("alice");
const bob = await honcho.peer("bob");
// Add peers to session
await session.addPeers([alice, bob]);
// Add another peer to the session with a custom configuration
const charlie = await honcho.peer("charlie");
await session.addPeers([charlie, { observe_me: false, observe_others: true }]);
// Set session-peer configuration
await session.setPeerConfig(alice, { observe_others: true });
await session.setPeerConfig(bob, { observe_me: false });
// Get session-peer configuration
const charlieConfig = await session.getPeerConfig(charlie);
console.log(charlieConfig);
})();
```
# Dialectic Endpoint
Source: https://docs.honcho.dev/v2/documentation/core-concepts/features/dialectic-endpoint
An endpoint for reasoning about your users
Honcho by default runs ambient inference on top of the `message` objects you store. Those messages serve as the ground truth upon which facts about the user are derived and stored. The **Dialectic Endpoint** is the natural language interface through which insights are synthesized from those facts. We believe [intellectual respect](https://blog.plasticlabs.ai/extrusions/Extrusion-02.24) for LLMs is paramount in building effective AI agents/apps. It follows that the LLM should know better than any human what would aid them in their generation task. Thus, the Dialectic endpoint exists for flexible agent-to-agent communication.
## Automatic Fact Derivation
On every message written to a session, an automatic callback is run that will reason about the conversation and store facts in a `collection` named `honcho`. This is a reserved `collection` specifically for the backend Honcho agent to interact with.
## Dialectic Endpoint
The Dialectic endpoint allows you to define logic enabling your agent to talk to our agent that automatically retrieves and synthesizes facts from the collection. You can use the response as part of your reasoning process for your agent–add it to your next prompt to inject critical context about the user.
This chat interface is exposed via the `peer.chat()` endpoint. It accepts a string query. Below is some example code on how this works.
## Prerequisites
```python Python theme={null}
from honcho import Honcho
# use the default workspace
honcho = Honcho()
# get/create a peer
peer = honcho.peer("demo-user")
# get/create a session
session = honcho.session("demo-session")
# (assuming some messages have been written to Honcho for the deriver to use)
```
```typescript TypeScript theme={null}
import { Honcho } from '@honcho-ai/sdk';
// use the default workspace
const honcho = new Honcho({});
// get/create a peer
const peer = await honcho.peer('demo-user');
// get/create a session
const session = await honcho.session('demo-session');
// (assuming some messages have been written to Honcho for the deriver to use)
```
## Static Dialectic Call
```python Python theme={null}
query = "What is the user's favorite way of completing the task?"
answer = peer.chat(query)
```
```typescript TypeScript theme={null}
const query = "What is the user's favorite way of completing the task?"
const dialecticResponse = await peer.chat(query)
```
## Streaming Dialectic Call
```python Python theme={null}
query = "What do we know about the user?"
response_stream = peer.chat(query, stream=True)
for line in response_stream.iter_text():
print(line)
```
```typescript TypeScript theme={null}
const query = "What do we know about the user?"
const responseStream = await peer.chat(query, { stream: true })
for await (const line of responseStream.iter_text()) {
console.log(line)
}
```
We've designed the Dialectic endpoint to be infinitely flexible. We wrote an incomplete list of ideas on how to use it on our blog [here](https://blog.plasticlabs.ai/blog/Introducing-Honcho's-Dialectic-API#how-it-works).
# File Uploads
Source: https://docs.honcho.dev/v2/documentation/core-concepts/features/file-uploads
Upload PDFs, text files, and JSON documents to create messages in Honcho
Honcho's file upload feature allows you to convert documents into messages automatically. Upload PDFs, text files, or JSON documents, and Honcho will extract the text content, split it into appropriately sized chunks, and create messages that become part of your peer's knowledge or session context.
This feature is perfect for ingesting documents, reports, research papers, or any text-based content that you want your AI agents to understand and reference.
## How It Works
When you upload a file, Honcho:
1. **Extracts text** from the file using specialized processors based on file type
2. **Creates messages** with the extracted content split into chunks that fit within message limits (messages are limited to 50,000 characters)
3. **Queues processing** for background analysis and insight derivation like any other message
The file content becomes part of the peer's representation, making it available for natural language queries and context retrieval.
## Supported File Types
Honcho currently supports the following file types with more to come:
* **PDF files** (`application/pdf`) - Text extraction with page numbers
* **Text files** (`text/*`) - Plain text, markdown, code files, etc.
* **JSON files** (`application/json`) - Structured data converted to readable format
Files are processed in memory and not stored on disk. Only the extracted text content is preserved in Honcho's message system.
## Basic Usage
```python Python theme={null}
from honcho import Honcho
# Initialize client
honcho = Honcho()
# Create session and peer
session = honcho.session("research-session")
user = honcho.peer("researcher")
# Upload a PDF to a session
with open("research_paper.pdf", "rb") as file:
messages = session.upload_file(
file=file,
peer_id=user.id,
)
print(f"Created {len(messages)} messages from the PDF")
```
```typescript TypeScript theme={null}
import { Honcho } from "@honcho-ai/sdk";
import fs from "fs";
(async () => {
// Initialize client
const honcho = new Honcho({});
// Create session and peer
const session = await honcho.session("research-session");
const user = await honcho.peer("researcher");
// Upload a PDF to a session
const fileStream = fs.createReadStream("research_paper.pdf");
const messages = await session.uploadFile(fileStream, user.id);
console.log(`Created ${messages.length} messages from the PDF`);
})();
```
## Upload Parameters
The upload methods accept the following parameters:
| Parameter | Type | Required | Description |
| --------- | ------ | -------- | ------------------------------------ |
| `file` | File | Yes | File to upload |
| `peer_id` | String | Yes | ID of the peer creating the messages |
## File Processing Details
### Text Extraction
**PDF Files**: Text is extracted page by page with page numbers preserved:
```
[Page 1]
Introduction
This document provides...
[Page 2]
Methodology
Our approach involves...
```
**Text Files**: Content is decoded using UTF-8, UTF-16, or Latin-1 encoding as needed.
**JSON Files**: Structured data is converted to string format.
### Chunking Strategy
Large files are automatically split into chunks of \~49,500 characters. The system seeks to break at natural boundaries if present:
1. Paragraph breaks (`\n\n`)
2. Line breaks (`\n`)
3. Sentence endings (`. `)
4. Word boundaries (` `)
Each chunk becomes a separate message, maintaining the original document structure.
## Querying Uploaded Content
Once files are uploaded, you can query the content using Honcho's natural language interface:
```python Python theme={null}
# Query what was learned from the uploaded documents
response = user.chat("What are the key findings from the research papers I uploaded?")
print(response)
# Ask about specific documents
response = user.chat("What does the quarterly report say about revenue growth?")
print(response)
# Get context from the uploaded documents for LLM integration
context = session.get_context(tokens=3000)
messages = context.to_openai(assistant=assistant)
```
```typescript TypeScript theme={null}
(async () => {
// Query what was learned from the uploaded documents
const response = await user.chat("What are the key findings from the research papers I uploaded?");
console.log(response);
// Ask about specific documents
const response2 = await user.chat("What does the quarterly report say about revenue growth?");
console.log(response2);
// Get context from the uploaded documents for LLM integration
const context = await session.getContext({ tokens: 3000 });
const messages = context.toOpenAI(assistant);
})();
```
## Error Handling
### Unsupported File Types
Files with unsupported content types will raise an exception:
```python theme={null}
try:
messages = session.upload_file(
file=open("image.jpg", "rb"),
peer_id=user.id
)
except Exception as e:
print(f"Upload failed: {e}")
# Error: "Could not process file image.jpg: Unsupported file type: image/jpeg"
```
### Missing Required Fields
Session uploads require a `peer_id` parameter:
```python theme={null}
# This will fail for session uploads
try:
messages = session.upload_file(file=file) # Missing peer_id
except ValueError as e:
print(f"Validation error: {e}")
```
## Complete Example: Document Analysis Assistant
Here's a complete example of building a document analysis assistant:
```python Python theme={null}
from honcho import Honcho
# Initialize
honcho = Honcho()
session = honcho.session("document-analysis")
user = honcho.peer("analyst")
assistant = honcho.peer("analysis-bot")
def upload_document(file_path, description):
"""Upload a document and add it to the session"""
with open(file_path, "rb") as file:
messages = session.upload_file(
file=file,
peer_id=user.id,
)
return messages
def analyze_documents():
"""Get AI analysis of uploaded documents"""
context = session.get_context(tokens=4000)
messages = context.to_openai(assistant=assistant)
# Add analysis request
messages.append({
"role": "user",
"content": "Please analyze all the documents I've uploaded and provide a comprehensive summary of the key findings, trends, and recommendations."
})
# Call OpenAI (or your preferred LLM)
# response = openai.chat.completions.create(model="gpt-4", messages=messages)
# return response.choices[0].message.content
return "Analysis would be generated here"
# Upload multiple documents
documents = [
("quarterly_report.pdf", "Q3 2024 Quarterly Financial Report"),
("market_research.pdf", "Market Analysis and Competitive Landscape"),
("product_roadmap.pdf", "Product Development Roadmap 2024-2025")
]
for file_path, description in documents:
messages = upload_document(file_path, description)
print(f"Uploaded {file_path}: {len(messages)} messages created")
# Get AI analysis
analysis = analyze_documents()
print("Document Analysis:", analysis)
```
```typescript TypeScript theme={null}
import { Honcho } from "@honcho-ai/sdk";
import fs from "fs";
(async () => {
// Initialize
const honcho = new Honcho({});
const session = await honcho.session("document-analysis");
const user = await honcho.peer("analyst");
const assistant = await honcho.peer("analysis-bot");
async function uploadDocument(filePath: string, description: string) {
const fileStream = fs.createReadStream(filePath);
const messages = await session.uploadFile(fileStream, user.id);
return messages;
}
async function analyzeDocuments() {
const context = await session.getContext({ tokens: 4000 });
const messages = context.toOpenAI(assistant);
// Add analysis request
messages.push({
role: "user",
content: "Please analyze all the documents I've uploaded and provide a comprehensive summary of the key findings, trends, and recommendations."
});
// Call OpenAI (or your preferred LLM)
// const response = await openai.chat.completions.create({ model: "gpt-4", messages });
// return response.choices[0].message.content;
return "Analysis would be generated here";
}
// Upload multiple documents
const documents = [
["quarterly_report.pdf", "Q3 2024 Quarterly Financial Report"],
["market_research.pdf", "Market Analysis and Competitive Landscape"],
["product_roadmap.pdf", "Product Development Roadmap 2024-2025"]
];
for (const [filePath, description] of documents) {
const messages = await uploadDocument(filePath, description);
console.log(`Uploaded ${filePath}: ${messages.length} messages created`);
}
// Get AI analysis
const analysis = await analyzeDocuments();
console.log("Document Analysis:", analysis);
})();
```
## Error Handling
* **Always wrap uploads in try-catch blocks** for robust error handling
* **Validate file types** before upload to avoid processing errors
* **Handle large files gracefully** with progress indicators
* **Implement retry logic** for network failures
# Get Context
Source: https://docs.honcho.dev/v2/documentation/core-concepts/features/get-context
Learn how to use get_context() to retrieve and format conversation context for LLM integration
The `get_context()` method is a powerful feature that retrieves formatted conversation context from sessions, making it easy to integrate with LLMs like OpenAI, Anthropic, and others. This guide covers everything you need to know about working with session context.
By default, the context includes a blend of summary and messages which covers the entire history of the session. Summaries are automatically generated at intervals and recent messages are included depending on how many tokens the context is intended to be. You can specify any token limit you want, and can disable summaries to fill that limit entirely with recent messages.
## Basic Usage
The `get_context()` method is available on all Session objects and returns a `SessionContext` that contains the formatted conversation history.
```python Python theme={null}
from honcho import Honcho
# Initialize client and create session
honcho = Honcho()
session = honcho.session("conversation-1")
# Get basic context (not very useful before adding any messages!)
context = session.get_context()
```
```typescript TypeScript theme={null}
import { Honcho } from "@honcho-ai/sdk";
(async () => {
// Initialize client and create session
const honcho = new Honcho({});
const session = await honcho.session("conversation-1");
// Get basic context (not very useful before adding any messages!)
const context = await session.getContext();
})();
```
## Context Parameters
The `get_context()` method accepts several optional parameters to customize the retrieved context:
### Token Limits
Control the size of the context by setting a maximum token count:
```python Python theme={null}
# Limit context to 1500 tokens
context = session.get_context(tokens=1500)
# Limit context to 3000 tokens for larger conversations
context = session.get_context(tokens=3000)
```
```typescript TypeScript theme={null}
(async () => {
// Limit context to 1500 tokens
const context = await session.getContext({ tokens: 1500 });
// Limit context to 3000 tokens for larger conversations
const context = await session.getContext({ tokens: 3000 });
})();
```
### Summary Mode
Enable summary mode (on by default) to get a condensed version of the conversation:
```python Python theme={null}
# Get context with summary enabled -- will contain both summary and messages
context = session.get_context(summary=True)
# Combine summary=False with token limits to get more messages
context = session.get_context(summary=False, tokens=2000)
```
```typescript TypeScript theme={null}
(async () => {
// Get context with summary enabled -- will contain both summary and messages
const context = await session.getContext({ summary: true });
// Combine summary=False with token limits to get more messages
const context = await session.getContext({
summary: false,
tokens: 2000
});
})();
```
## Converting to LLM Formats
The `SessionContext` object provides methods to convert the context into formats compatible with popular LLM APIs. When converting to OpenAI format, you must specify the assistant peer to format the context in such a way that the LLM can understand it.
### OpenAI Format
Convert context to OpenAI's chat completion format:
```python Python theme={null}
# Create peers
alice = honcho.peer("alice")
assistant = honcho.peer("assistant")
# Add some conversation
session.add_messages([
alice.message("What's the weather like today?"),
assistant.message("It's sunny and 75°F outside!")
])
# Get context and convert to OpenAI format
context = session.get_context()
openai_messages = context.to_openai(assistant=assistant)
# The messages are now ready for OpenAI API
print(openai_messages)
# [
# {"role": "user", "content": "What's the weather like today?"},
# {"role": "assistant", "content": "It's sunny and 75°F outside!"}
# ]
```
```typescript TypeScript theme={null}
(async () => {
// Create peers
const alice = await honcho.peer("alice");
const assistant = await honcho.peer("assistant");
// Add some conversation
await session.addMessages([
alice.message("What's the weather like today?"),
assistant.message("It's sunny and 75°F outside!")
]);
// Get context and convert to OpenAI format
const context = await session.getContext();
const openaiMessages = context.toOpenAI(assistant);
// The messages are now ready for OpenAI API
console.log(openaiMessages);
// [
// {"role": "user", "content": "What's the weather like today?"},
// {"role": "assistant", "content": "It's sunny and 75°F outside!"}
// ]
})();
```
### Anthropic Format
Convert context to Anthropic's Claude format:
```python Python theme={null}
# Get context and convert to Anthropic format
context = session.get_context()
anthropic_messages = context.to_anthropic(assistant=assistant)
# Ready for Anthropic API
print(anthropic_messages)
```
```typescript TypeScript theme={null}
(async () => {
// Get context and convert to Anthropic format
const context = await session.getContext();
const anthropicMessages = context.toAnthropic(assistant);
// Ready for Anthropic API
console.log(anthropicMessages);
})();
```
## Complete LLM Integration Examples
### Using with OpenAI
```python Python theme={null}
import openai
from honcho import Honcho
# Initialize clients
honcho = Honcho()
openai_client = openai.OpenAI()
# Set up conversation
session = honcho.session("support-chat")
user = honcho.peer("user-123")
assistant = honcho.peer("support-bot")
# Add conversation history
session.add_messages([
user.message("I'm having trouble with my account login"),
assistant.message("I can help you with that. What error message are you seeing?"),
user.message("It says 'Invalid credentials' but I'm sure my password is correct")
])
# Get context for LLM
messages = session.get_context(tokens=2000).to_openai(assistant=assistant)
# Add new user message and get AI response
messages.append({
"role": "user",
"content": "Can you reset my password?"
})
response = openai_client.chat.completions.create(
model="gpt-4",
messages=messages
)
# Add AI response back to session
session.add_messages([
user.message("Can you reset my password?"),
assistant.message(response.choices[0].message.content)
])
```
```typescript TypeScript theme={null}
import OpenAI from 'openai';
import { Honcho } from "@honcho-ai/sdk";
(async () => {
// Initialize clients
const honcho = new Honcho({});
const openai = new OpenAI();
// Set up conversation
const session = await honcho.session("support-chat");
const user = await honcho.peer("user-123");
const assistant = await honcho.peer("support-bot");
// Add conversation history
await session.addMessages([
user.message("I'm having trouble with my account login"),
assistant.message("I can help you with that. What error message are you seeing?"),
user.message("It says 'Invalid credentials' but I'm sure my password is correct")
]);
// Get context for LLM
const messages = await session.getContext({ tokens: 2000 }).toOpenAI(assistant);
// Add new user message and get AI response
const response = await openai.chat.completions.create({
model: "gpt-4",
messages: [
...messages,
{ role: "user", content: "Can you reset my password?" }
]
});
// Add AI response back to session
await session.addMessages([
user.message("Can you reset my password?"),
assistant.message(response.choices[0].message.content)
]);
})();
```
### Multi-Turn Conversation Loop
```python Python theme={null}
def chat_loop():
"""Example of a continuous chat loop using get_context()"""
session = honcho.session("chat-session")
user = honcho.peer("user")
assistant = honcho.peer("ai-assistant")
while True:
# Get user input
user_input = input("You: ")
if user_input.lower() in ['quit', 'exit']:
break
# Add user message to session
session.add_messages([user.message(user_input)])
# Get conversation context
context = session.get_context(tokens=2000)
messages = context.to_openai(assistant=assistant)
# Get AI response
response = openai_client.chat.completions.create(
model="gpt-4",
messages=messages
)
ai_response = response.choices[0].message.content
print(f"Assistant: {ai_response}")
# Add AI response to session
session.add_messages([assistant.message(ai_response)])
# Start the chat loop
chat_loop()
```
```typescript TypeScript theme={null}
(async () => {
async function chatLoop() {
const session = await honcho.session("chat-session");
const user = await honcho.peer("user");
const assistant = await honcho.peer("ai-assistant");
// This would be replaced with actual user input handling in a real app
const userInputs = [
"Hello, how are you?",
"What's the weather like?",
"Tell me a joke"
];
for (const userInput of userInputs) {
console.log(`You: ${userInput}`);
// Add user message to session
await session.addMessages([user.message(userInput)]);
// Get conversation context
const context = await session.getContext({ tokens: 2000 });
const messages = context.toOpenAI(assistant);
// Get AI response
const response = await openai.chat.completions.create({
model: "gpt-4",
messages: messages
});
const aiResponse = response.choices[0].message.content;
console.log(`Assistant: ${aiResponse}`);
// Add AI response to session
await session.addMessages([assistant.message(aiResponse)]);
}
}
// Start the chat loop
await chatLoop();
})();
```
## Advanced Context Usage
### Context with Summaries for Long Conversations
For very long conversations, use summaries to maintain context while controlling token usage:
```python Python theme={null}
# For long conversations, use summary mode
long_session = honcho.session("long-conversation")
# Get summarized context to fit within token limits
context = long_session.get_context(summary=True, tokens=1500)
messages = context.to_openai(assistant=assistant)
# This will include a summary of older messages and recent full messages
print(f"Context contains {len(messages)} formatted messages")
```
```typescript TypeScript theme={null}
(async () => {
// For long conversations, use summary mode
const longSession = await honcho.session("long-conversation");
// Get summarized context to fit within token limits
const context = await longSession.getContext({
summary: true,
tokens: 1500
});
const messages = context.toOpenAI(assistant);
// This will include a summary of older messages and recent full messages
console.log(`Context contains ${messages.length} formatted messages`);
})();
```
### Context for Different Assistant Types
You can get context formatted for different types of assistants in the same session:
```python Python theme={null}
# Create different assistant peers
chatbot = honcho.peer("chatbot")
analyzer = honcho.peer("data-analyzer")
moderator = honcho.peer("moderator")
# Get context formatted for each assistant type
chatbot_context = session.get_context().to_openai(assistant=chatbot)
analyzer_context = session.get_context().to_openai(assistant=analyzer)
moderator_context = session.get_context().to_openai(assistant=moderator)
# Each context will format the conversation from that assistant's perspective
```
```typescript TypeScript theme={null}
(async () => {
// Create different assistant peers
const chatbot = await honcho.peer("chatbot");
const analyzer = await honcho.peer("data-analyzer");
const moderator = await honcho.peer("moderator");
// Get context formatted for each assistant type
const context = await session.getContext();
const chatbotContext = context.toOpenAI(chatbot);
const analyzerContext = context.toOpenAI(analyzer);
const moderatorContext = context.toOpenAI(moderator);
// Each context will format the conversation from that assistant's perspective
})();
```
## Best Practices
### 1. Token Management
Always set appropriate token limits to control costs and ensure context fits within LLM limits:
```python Python theme={null}
# Good: Set reasonable token limits based on your model
context = session.get_context(tokens=3000) # For GPT-4
context = session.get_context(tokens=1500) # For smaller models
# Good: Use summaries for very long conversations
context = session.get_context(summary=True, tokens=2000)
```
```typescript TypeScript theme={null}
(async () => {
// Good: Set reasonable token limits based on your model
const context = await session.getContext({ tokens: 3000 }); // For GPT-4
const context = await session.getContext({ tokens: 1500 }); // For smaller models
// Good: Use summaries for very long conversations
const context = await session.getContext({ summary: true, tokens: 2000 });
})();
```
### 2. Context Caching
For applications with frequent context retrieval, consider caching context when appropriate:
```python Python theme={null}
# Cache context for multiple LLM calls within the same request
context = session.get_context(tokens=2000)
openai_messages = context.to_openai(assistant=assistant)
anthropic_messages = context.to_anthropic(assistant=assistant)
# Use the same context object for multiple format conversions
```
```typescript TypeScript theme={null}
(async () => {
// Cache context for multiple LLM calls within the same request
const context = await session.getContext({ tokens: 2000 });
const openaiMessages = context.toOpenAI(assistant);
const anthropicMessages = context.toAnthropic(assistant);
// Use the same context object for multiple format conversions
})();
```
### 3. Error Handling
Always handle potential errors when working with context:
```python Python theme={null}
try:
context = session.get_context(tokens=2000)
messages = context.to_openai(assistant=assistant)
# Use messages with LLM API
response = openai_client.chat.completions.create(
model="gpt-4",
messages=messages
)
except Exception as e:
print(f"Error getting context: {e}")
# Handle error appropriately
```
```typescript TypeScript theme={null}
(async () => {
try {
const context = await session.getContext({ tokens: 2000 });
const messages = context.toOpenAI(assistant);
// Use messages with LLM API
const response = await openai.chat.completions.create({
model: "gpt-4",
messages: messages
});
} catch (error) {
console.error(`Error getting context: ${error}`);
// Handle error appropriately
}
})();
```
## Conclusion
The `get_context()` method is essential for integrating Honcho sessions with LLMs. By understanding how to:
* Retrieve context with appropriate parameters
* Convert context to LLM-specific formats
* Manage token limits and summaries
* Handle multi-turn conversations
You can build sophisticated AI applications that maintain conversation history and context across interactions while integrating seamlessly with popular LLM providers.
# Local vs Global Representations
Source: https://docs.honcho.dev/v2/documentation/core-concepts/features/local-vs-global
Model directional relationships between Peers in Honcho
One of the unique affordances of Honcho is that it allows developers to model
directional relationships between Peers. What I mean by this is you can model
how one `Peer` thinks about another `Peer`.
There are many use cases where you don't want every agent or human to know
everything about another user such as games or multi-agent workflows. To
illustrate this, the following examples shows 2 conversations.
Conversation #1 (With Bob and Alice)
```
Alice: I had a great breakfast today.
Bob: What did you eat?
Alice: I had pancakes and eggs and bacon
```
Conversation #2 (With Alice and Charlie)
```
Alice: I actually didn't eat any breakfast today.
Charlie: Oh that's too bad.
Alice: But I lied to Bob and told him I did, so back me up if you see them.
```
Alice told Bob a lie in this conversation. If we stored both of these
conversations in Honcho with Alice, Bob, and Charlie as `Peers` and let them
use Honcho to get insights on each other then Bob would immediately know this
deception. For example:
```python Python theme={null}
# Bob could run
alice.chat("What did Alice eat today?")
# Response: Alice did not eat anything today
```
This is a problem. Bob shouldn't be able to know everything about Alice in this
situation. So to support these situations we support what we call **Local
Representations**.
By default insights generated for a `Peer` are scoped globally. This means every
message sent by that `Peer` in any conversation updates the same representation
of that `Peer`. However, we can enable **Local Representations** so Bob can
form a representation Alice based only on what they observe Alice do.
This feature is illustrated in the graphic below:
We can enable local representation for a `Peer` by setting `observe_others=True`.
This is shown in the [Configure
Reasoning](/v2/documentation/core-concepts/configuration) page.
Now if we used Bob's local representation of Alice then Bob would only get
insights on what they've seen Alice say to them.
```python theme={null}
bob.chat(target="alice", query="What did Alice eat today?")
# Response: Alice ate pancakes, eggs, and bacon
```
Local Representations are turned off by default
# Queue Status
Source: https://docs.honcho.dev/v2/documentation/core-concepts/features/queue-status
Learn how to check the status of the Deriver
Whenever `Messages` are stored in Honcho, a background process called the
[Deriver](/docs/v2/documentation/core-concepts/architecture#reasoning-layer) is
triggered to reason about the conversation and generate insights.
The Deriver is an asynchronous process and, depending on load may not immediately
generated insights for the latest message you've sent. To help with this, Honcho
provides several utilities to check the status of the Deriver.
```python Python theme={null}
from honcho import Honcho
honcho = Honcho()
status = honcho.get_deriver_status()
honcho.poll_deriver_status()
```
```typescript typescript theme={null}
import { Honcho } from '@honcho-ai/sdk';
const honcho = new Honcho({});
const status = await honcho.getDeriverStatus();
await honcho.pollDeriverStatus();
```
Output types
```python Python theme={null}
class DeriverStatus(BaseModel):
completed_work_units: int
"""Completed work units"""
in_progress_work_units: int
"""Work units currently being processed"""
pending_work_units: int
"""Work units waiting to be processed"""
total_work_units: int
"""Total work units"""
sessions: Optional[Dict[str, Sessions]] = None
"""Per-session status when not filtered by session"""
```
```typescript TypeScript theme={null}
Promise<{
totalWorkUnits: number
completedWorkUnits: number
inProgressWorkUnits: number
pendingWorkUnits: number
sessions?: Record
}>
```
Whenever a `Message` is sent it will generate several tasks. These could
be tasks such as generating insights, cleaning up a representation, summarizing
a conversation etc. These tasks are defined based on who is sending the
message, what `Session` the message is in, and potentially who is observing the
message. We call the combination of these parameters a `work_unit`
This has a few different implications.
* tasks within the same work\_unit are processed sequentially, but multiple
work\_units will be processed in parallel
* If local representations are turned in a Session then a `Message` will
generate an additional work unit for every `Peer` that has `observe_others=True`
The `get_deriver_status` and `poll_deriver_status` methods can take additional
parameters to scope the status to a specific work unit
```python Python theme={null}
def get_deriver_status(
self,
observer_id: str | None = None,
sender_id: str | None = None,
session_id: str | None = None,
) -> DeriverStatus:
```
```typescript TypeScript theme={null}
export const DeriverStatusOptionsSchema = z.object({
observerId: z.string().optional(),
senderId: z.string().optional(),
sessionId: z.string().optional(),
timeoutMs: z
.number()
.positive('Timeout must be a positive number')
.optional(),
})
```
Additionally, there are deriver status and polling deriver status methods
available on the `Session` objects in each of the SDKs.
Below are the function signatures for the session level deriver status method
```python python theme={null}
@validate_call
def get_deriver_status(
self,
observer_id: str | None = None,
sender_id: str | None = None,
) -> DeriverStatus:
```
```typescript TypeScript theme={null}
async getDeriverStatus(
options?: Omit
): Promise<{
totalWorkUnits: number
completedWorkUnits: number
inProgressWorkUnits: number
pendingWorkUnits: number
sessions?: Record
}>
```
# Search
Source: https://docs.honcho.dev/v2/documentation/core-concepts/features/search
Learn how to search across workspaces, sessions, and peers to find relevant conversations and content
Honcho's search functionality allows you to find relevant messages and conversations across different scopes - from entire workspaces down to specific peers or sessions.
## Search Scopes
### Workspace Search
Search across all content in your workspace - sessions, peers, and messages:
```python Python theme={null}
from honcho import Honcho
# Initialize client
honcho = Honcho()
# Search across entire workspace
results = honcho.search("budget planning")
# Iterate through all results
for result in results:
print(f"Found: {result}")
```
```typescript TypeScript theme={null}
import { Honcho } from "@honcho-ai/sdk";
(async () => {
// Initialize client
const honcho = new Honcho({});
// Search across entire workspace
const results = await honcho.search("budget planning");
// Iterate through all results
for (const result of results) {
console.log(`Found: ${result}`);
}
})();
```
### Session Search
Search within a specific session's conversation history:
```python Python theme={null}
# Create or get a session
session = honcho.session("team-meeting-jan")
# Search within this session only
results = session.search("action items")
# Process results
for result in results:
print(f"Session result: {result}")
```
```typescript TypeScript theme={null}
(async () => {
// Create or get a session
const session = await honcho.session("team-meeting-jan");
// Search within this session only
const results = await session.search("action items");
// Process results
for (const result of results) {
console.log(`Session result: ${result}`);
}
})();
```
### Peer Search
Search across all content associated with a specific peer:
```python Python theme={null}
# Create or get a peer
alice = honcho.peer("alice")
# Search across all of Alice's messages and interactions
results = alice.search("programming")
# View results
for result in results:
print(f"Alice's content: {result}")
```
```typescript TypeScript theme={null}
import { Message } from "@honcho-ai/sdk";
(async () => {
// Create or get a peer
const alice = await honcho.peer("alice");
// Search across all of Alice's messages and interactions
const results: Message[] = await alice.search("programming");
// View results
for (const result of results) {
console.log(`Alice's content: ${result.content}`);
}
})();
```
## Filters and Limits
### Get a specific number of results
You can specify the number of results you want to return by passing the `limit` parameter to the search method. The default is 10 results, with a maximum of 100.
```python Python theme={null}
results = honcho.search("budget planning", limit=20)
```
```typescript TypeScript theme={null}
(async () => {
const results = await honcho.search("budget planning", { limit: 20 });
})();
```
### Get messages from a Peer in a specific Session
Combine Peer-level search with a `session_id` filter to get messages from a Peer in a specific Session.
```python Python theme={null}
my_peer = honcho.peer("my-peer")
my_session = honcho.session("team-meeting-jan")
results = my_peer.search("budget planning", filters={"session_id": my_session.id})
```
```typescript TypeScript theme={null}
(async () => {
const my_peer = await honcho.peer("my-peer");
const my_session = await honcho.session("team-meeting-jan");
const results = await my_peer.search("budget planning", { filters: { session_id: my_session.id } });
})();
```
Search returns an object containing an `items` array of message objects:
```json theme={null}
{
"items": [
{
"id": "",
"content": "",
"peer_id": "",
"session_id": "",
"metadata": {},
"created_at": "2023-11-07T05:31:56Z",
"workspace_id": "",
"token_count": 123
}
]
}
```
### Filter results by time range
```python Python theme={null}
results = honcho.search("budget planning", filters={"created_at": {"gte": "2024-01-01", "lte": "2024-01-31"}})
```
```typescript TypeScript theme={null}
(async () => {
const results = await honcho.search("budget planning", { filters: { created_at: { gte: "2024-01-01", lte: "2024-01-31" } } });
})();
```
### Filter results by metadata
```python Python theme={null}
results = honcho.search("budget planning", filters={"metadata": {"key": "value"}})
```
```typescript TypeScript theme={null}
(async () => {
const results = await honcho.search("budget planning", { filters: { metadata: { key: "value" } } });
})();
```
### Best Practices
### Handle Empty Results Gracefully
```python Python theme={null}
# Always check for empty results
results = honcho.search("very specific query")
result_list = list(results)
if result_list:
print(f"Found {len(result_list)} results")
for result in result_list:
print(f"- {result}")
else:
print("No results found - try a broader search")
```
```typescript TypeScript theme={null}
import { Message } from "@honcho-ai/sdk";
(async () => {
// Always check for empty results
const results: Message[] = await honcho.search("very specific query");
if (results.length > 0) {
console.log(`Found ${results.length} results`);
for (const result of results) {
console.log(`- ${result.content}`);
}
} else {
console.log("No results found - try a broader search");
}
})();
```
## Conclusion
Honcho's search functionality provides powerful discovery capabilities across your conversational data. By understanding how to:
* Choose the appropriate search scope (workspace, session, or peer)
* Handle paginated results effectively
* Combine search with context building
You can build applications that provide intelligent insights and context-aware responses based on historical conversations and interactions.
# Storing Data
Source: https://docs.honcho.dev/v2/documentation/core-concepts/features/storing-data
Store Data in Honcho to Generate Memories and Insights
The most basic building block of Honcho's data model is the `Message` object.
A `Message` is sent by a `Peer` and saved in a `Session`
```python Python theme={null}
from honcho import Honcho
honcho = Honcho()
peer = honcho.peer("sample-peer")
session = honcho.session("sample-session")
message = peer.message("Hello, world!", session_id=session.id)
session.add_messages([message])
```
```typescript TypeScript theme={null}
import { Honcho } from '@honcho-ai/sdk';
const honcho = new Honcho({});
const peer = await honcho.peer('sample-peer');
const session = await honcho.session('sample-session');
const message = peer.message('Hello, world!');
await session.addMessages([message]);
```
Once a `Message` is saved in Honcho, it will kick off a background task that
looks at the new data to generate insights about the `Peer` that sent the `Message`
This is the default behavior of Honcho and can be turned off by [configuring the
Peer or Session](/v2/documentation/core-concepts/configuration)
This pattern of having a Peer, Session, and Messages is highly flexible and
works for many different use cases and agent setups. Some use cases may only
need a single Peer, but many Sessions. Others will only use a single `Session`
for their entire app. These are flexible components that work in any situation.
## Chat Bots
A common use case for Honcho to is to build a chatbot like ChatGPT or Claude.
In this case you can simply
* Make a `Peer` for the User
* Make a `Peer` for the AI
Then you can make a `Session` for each thread of conversation and save
`Messages` from the user and assistant in each turn of conversation
# Streaming Responses
Source: https://docs.honcho.dev/v2/documentation/core-concepts/features/streaming-response
Using streaming responses with Honcho SDKs
When working with AI-generated content, streaming the response as it's generated can significantly improve the user experience. Honcho provides streaming functionality in its SDKs that allows your application to display content as it's being generated, rather than waiting for the complete response.
## When to Use Streaming
Streaming is particularly useful for:
* Real-time chat interfaces
* Long-form content generation
* Applications where perceived speed is important
* Interactive agent experiences
* Reducing time-to-first-word in user interactions
## Streaming with the Dialectic Endpoint
One of the primary use cases for streaming in Honcho is with the Dialectic endpoint. This allows you to stream the AI's reasoning about a user in real-time.
### Prerequisites
```python Python theme={null}
from honcho import Honcho
# Initialize client (using the default workspace)
honcho = Honcho()
# Create or get peers
user = honcho.peer("demo-user")
assistant = honcho.peer("assistant")
# Create a new session
session = honcho.session("demo-session")
# Add peers to the session
session.add_peers([user, assistant])
# Store some messages for context (optional)
session.add_messages([
user.message("Hello, I'm testing the streaming functionality")
])
```
```typescript TypeScript theme={null}
import { Honcho } from '@honcho-ai/sdk';
(async () => {
// Initialize client (using the default workspace)
const honcho = new Honcho({});
// Create or get peers
const user = await honcho.peer('demo-user');
const assistant = await honcho.peer('assistant');
// Create a new session
const session = await honcho.session('demo-session');
// Add peers to the session
await session.addPeers([user, assistant]);
// Store some messages for context (optional)
await session.addMessages([
user.message("Hello, I'm testing the streaming functionality")
]);
})();
```
## Streaming from the Dialectic Endpoint
```python Python theme={null}
import time
# Basic streaming example
response_stream = user.chat("What can you tell me about this user?", stream=True)
for chunk in response_stream.iter_text():
print(chunk, end="", flush=True) # Print each chunk as it arrives
time.sleep(0.01) # Optional delay for demonstration
```
```typescript TypeScript theme={null}
(async () => {
// Basic streaming example
const responseStream = await user.chat("What can you tell me about this user?", {
stream: true
});
// Process the stream
for await (const chunk of responseStream.iter_text()) {
process.stdout.write(chunk); // Write to console without newlines
}
})();
```
## Working with Streaming Data
When working with streaming responses, consider these patterns:
1. **Progressive Rendering** - Update your UI as chunks arrive instead of waiting for the full response
2. **Buffered Processing** - Accumulate chunks until a logical break (like a sentence or paragraph)
3. **Token Counting** - Monitor token usage in real-time for applications with token limits
4. **Error Handling** - Implement appropriate error handling for interrupted streams
## Example: Restaurant Recommendation Chat
```python Python theme={null}
import asyncio
from honcho import Honcho
async def restaurant_recommendation_chat():
# Initialize client
honcho = Honcho()
# Create peers
user = honcho.peer("food-lover")
assistant = honcho.peer("restaurant-assistant")
# Create session
session = honcho.session("food-preferences-session")
# Add peers to session
await session.add_peers([user, assistant])
# Store multiple user messages about food preferences
user_messages = [
"I absolutely love spicy Thai food, especially curries with coconut milk.",
"Italian cuisine is another favorite - fresh pasta and wood-fired pizza are my weakness!",
"I try to eat vegetarian most of the time, but occasionally enjoy seafood.",
"I can't handle overly sweet desserts, but love something with dark chocolate."
]
# Add the user's messages to the session
session_messages = [user.message(message) for message in user_messages]
await session.add_messages(session_messages)
# Print the user messages
for message in user_messages:
print(f"User: {message}")
# Ask for restaurant recommendations based on preferences
print("\nRequesting restaurant recommendations...")
print("Assistant: ", end="", flush=True)
full_response = ""
# Stream the response using the user's peer to get recommendations
response_stream = user.chat(
"Based on this user's food preferences, recommend 3 restaurants they might enjoy in the Lower East Side.",
stream=True,
session_id=session.id
)
for chunk in response_stream.iter_text():
print(chunk, end="", flush=True)
full_response += chunk
await asyncio.sleep(0.01)
# Store the assistant's complete response
await session.add_messages([
assistant.message(full_response)
])
# Run the async function
if __name__ == "__main__":
asyncio.run(restaurant_recommendation_chat())
```
```typescript TypeScript theme={null}
import { Honcho } from '@honcho-ai/sdk';
(async () => {
async function restaurantRecommendationChat() {
// Initialize client
const honcho = new Honcho({});
// Create peers
const user = await honcho.peer('food-lover');
const assistant = await honcho.peer('restaurant-assistant');
// Create session
const session = await honcho.session('food-preferences-session');
// Add peers to session
await session.addPeers([user, assistant]);
// Store multiple user messages about food preferences
const userMessages = [
"I absolutely love spicy Thai food, especially curries with coconut milk.",
"Italian cuisine is another favorite - fresh pasta and wood-fired pizza are my weakness!",
"I try to eat vegetarian most of the time, but occasionally enjoy seafood.",
"I can't handle overly sweet desserts, but love something with dark chocolate."
];
// Add the user's messages to the session
const sessionMessages = userMessages.map(message => user.message(message));
await session.addMessages(sessionMessages);
// Print the user messages
for (const message of userMessages) {
console.log(`User: ${message}`);
}
// Ask for restaurant recommendations based on preferences
console.log("\nRequesting restaurant recommendations...");
process.stdout.write("Assistant: ");
let fullResponse = "";
// Stream the response using the user's peer to get recommendations
const responseStream = await user.chat(
"Based on this user's food preferences, recommend 3 restaurants they might enjoy in the Lower East Side.",
{
stream: true,
sessionId: session.id
}
);
for await (const chunk of responseStream.iter_text()) {
process.stdout.write(chunk);
fullResponse += chunk;
}
// Store the assistant's complete response
await session.addMessages([
assistant.message(fullResponse)
]);
}
await restaurantRecommendationChat();
})();
```
## Performance Considerations
When implementing streaming:
* Consider connection stability for mobile or unreliable networks
* Implement appropriate timeouts for stream operations
* Be mindful of memory usage when accumulating large responses
* Use appropriate error handling for network interruptions
Streaming responses provide a more interactive and engaging user experience. By implementing streaming in your Honcho applications, you can create more responsive AI-powered features that feel natural and immediate to your users.
# Using Filters
Source: https://docs.honcho.dev/v2/documentation/core-concepts/features/using-filters
Learn how to filter workspaces, peers, sessions, and messages using Honcho's powerful filtering system
Honcho provides a sophisticated filtering system that allows you to query workspaces, peers, sessions, and messages with precise control. The filtering system supports logical operators, comparison operators, metadata filtering, and wildcards to help you find exactly what you need.
## Basic Filtering Concepts
Filters in Honcho are expressed as dictionaries that define conditions for matching resources. The system supports both simple equality filters and complex queries with multiple conditions.
### Simple Filters
The most basic filters check for exact matches:
```python Python theme={null}
from honcho import Honcho
# Initialize client
honcho = Honcho()
# Simple peer filter
peers = honcho.get_peers(filters={"peer_id": "alice"})
# Simple session filter with metadata
sessions = honcho.get_sessions(filters={
"metadata": {"type": "support"}
})
# Simple message filter
messages = honcho.get_messages(filters={
"session_id": "support-chat-1",
"peer_id": "alice"
})
```
```typescript TypeScript theme={null}
import { Honcho } from "@honcho-ai/sdk";
(async () => {
// Initialize client
const honcho = new Honcho({});
// Simple peer filter
const peers = await honcho.getPeers({
filters: { peerId: "alice" }
});
// Simple session filter with metadata
const sessions = await honcho.getSessions({
filters: {
metadata: { type: "support" }
}
});
// Simple message filter
const messages = await honcho.getMessages({
filters: {
sessionId: "support-chat-1",
peerId: "alice"
}
});
})();
```
## Logical Operators
Combine multiple conditions using logical operators for complex queries:
### AND Operator
Use AND to require all conditions to be true:
```python Python theme={null}
messages = honcho.get_messages(filters={
"AND": [
{"session_id": "chat-1"},
{"created_at": {"gte": "2024-01-01"}}
]
})
```
```typescript TypeScript theme={null}
(async () => {
const messages = await honcho.getMessages({
filters: {
AND: [
{ sessionId: "chat-1" },
{ createdAt: { gte: "2024-01-01" } }
]
}
});
})();
```
### OR Operator
Use OR to match any of the specified conditions:
```python Python theme={null}
# Find messages from either alice or bob
messages = session.get_messages(filters={
"OR": [
{"peer_id": "alice"},
{"peer_id": "bob"}
]
})
# Complex OR with metadata conditions
sessions = honcho.get_sessions(filters={
"OR": [
{"metadata": {"priority": "high"}},
{"metadata": {"urgent": True}},
{"metadata": {"escalated": True}}
]
})
```
```typescript TypeScript theme={null}
(async () => {
// Find messages from either alice or bob
const messages = await session.getMessages({
filters: {
OR: [
{ peerId: "alice" },
{ peerId: "bob" }
]
}
});
// Complex OR with metadata conditions
const sessions = await honcho.getSessions({
filters: {
OR: [
{ metadata: { priority: "high" } },
{ metadata: { urgent: true } },
{ metadata: { escalated: true } }
]
}
});
})();
```
### NOT Operator
Use NOT to exclude specific conditions:
```python Python theme={null}
# Find all peers except alice
peers = honcho.get_peers(filters={
"NOT": [
{"peer_id": "alice"}
]
})
# Find sessions that are NOT completed
sessions = honcho.get_sessions(filters={
"NOT": [
{"metadata": {"status": "completed"}}
]
})
```
```typescript TypeScript theme={null}
(async () => {
// Find all peers except alice
const peers = await honcho.getPeers({
filters: {
NOT: [
{ peerId: "alice" }
]
}
});
// Find sessions that are NOT completed
const sessions = await honcho.getSessions({
filters: {
NOT: [
{ metadata: { status: "completed" } }
]
}
});
})();
```
### Combining Logical Operators
Create sophisticated queries by combining different logical operators:
```python Python theme={null}
# Find messages from alice OR bob, but NOT where message has archived set to true in metadata
messages = session.get_messages(filters={
"AND": [
{
"OR": [
{"peer_id": "alice"},
{"peer_id": "bob"}
]
},
{
"NOT": [
{"metadata": {"archived": True}}
]
}
]
})
```
```typescript TypeScript theme={null}
(async () => {
// Find messages from alice OR bob, but NOT where message has archived set to true in metadata
const messages = await session.getMessages({
filters: {
AND: [
{
OR: [
{ peerId: "alice" },
{ peerId: "bob" }
]
},
{
NOT: [
{ metadata: { archived: true } }
]
}
]
}
});
})();
```
## Comparison Operators
Use comparison operators for range queries and advanced matching:
### Numeric Comparisons
```python Python theme={null}
# Find sessions created after a specific date
sessions = honcho.get_sessions(filters={
"created_at": {"gte": "2024-01-01"}
})
# Find messages within a date range
messages = session.get_messages(filters={
"created_at": {
"gte": "2024-01-01",
"lte": "2024-12-31"
}
})
# Metadata numeric comparisons
sessions = honcho.get_sessions(filters={
"metadata": {
"score": {"gt": 8.5},
"duration": {"lte": 3600}
}
})
```
```typescript TypeScript theme={null}
(async () => {
// Find sessions created after a specific date
const sessions = await honcho.getSessions({
filters: {
createdAt: { gte: "2024-01-01" }
}
});
// Find messages within a date range
const messages = await session.getMessages({
filters: {
createdAt: {
gte: "2024-01-01",
lte: "2024-12-31"
}
}
});
// Metadata numeric comparisons
const sessions = await honcho.getSessions({
filters: {
metadata: {
score: { gt: 8.5 },
duration: { lte: 3600 }
}
}
});
})();
```
### List Membership
```python Python theme={null}
# Find messages from specific peers in a session
messages = session.get_messages(filters={
"peer_id": {"in": ["alice", "bob", "charlie"]}
})
# Find sessions with specific tags
sessions = honcho.get_sessions(filters={
"metadata": {
"tag": {"in": ["important", "urgent", "follow-up"]}
}
})
# Not equal comparisons
peers = honcho.get_peers(filters={
"metadata": {
"status": {"ne": "inactive"}
}
})
```
```typescript TypeScript theme={null}
(async () => {
// Find messages from specific peers in a session
const messages = await session.getMessages({
filters: {
peerId: { in: ["alice", "bob", "charlie"] }
}
});
// Find sessions with specific tags
const sessions = await honcho.getSessions({
filters: {
metadata: {
tag: { in: ["important", "urgent", "follow-up"] }
}
}
});
// Not equal comparisons
const peers = await honcho.getPeers({
filters: {
metadata: {
status: { ne: "inactive" }
}
}
});
})();
```
## Metadata Filtering
Metadata filtering is particularly powerful in Honcho, supporting nested conditions and complex queries:
### Basic Metadata Filtering
```python Python theme={null}
# Simple metadata equality
sessions = honcho.get_sessions(filters={
"metadata": {
"type": "customer_support",
"priority": "high"
}
})
# Nested metadata objects
peers = honcho.get_peers(filters={
"metadata": {
"profile": {
"role": "admin",
"department": "engineering"
}
}
})
```
```typescript TypeScript theme={null}
(async () => {
// Simple metadata equality
const sessions = await honcho.getSessions({
filters: {
metadata: {
type: "customer_support",
priority: "high"
}
}
});
// Nested metadata objects
const peers = await honcho.getPeers({
filters: {
metadata: {
profile: {
role: "admin",
department: "engineering"
}
}
}
});
})();
```
### Advanced Metadata Queries
If you want to do advanced queries like these, make sure not to create metadata fields that use the same names as the included comparison operators! For example, if you have a metadata field called `contains`, it will conflict with the `contains` operator.
```python Python theme={null}
# Metadata with comparison operators
sessions = honcho.get_sessions(filters={
"metadata": {
"score": {"gte": 4.0, "lte": 5.0},
"created_by": {"ne": "system"},
"tags": {"contains": "important"}
}
})
# Complex metadata conditions
messages = session.get_messages(filters={
"AND": [
{"metadata": {"sentiment": {"in": ["positive", "neutral"]}}},
{"metadata": {"confidence": {"gt": 0.8}}},
{"content": {"icontains": "thank"}}
]
})
```
```typescript TypeScript theme={null}
(async () => {
// Metadata with comparison operators
const sessions = await honcho.getSessions({
filters: {
metadata: {
score: { gte: 4.0, lte: 5.0 },
createdBy: { ne: "system" },
tags: { contains: "important" }
}
}
});
// Complex metadata conditions
const messages = await session.getMessages({
filters: {
AND: [
{ metadata: { sentiment: { in: ["positive", "neutral"] } } },
{ metadata: { confidence: { gt: 0.8 } } },
{ content: { icontains: "thank" } }
]
}
});
})();
```
## Wildcards
Use wildcards (\*) to match any value for a field:
```python Python theme={null}
# Find all sessions with any peer_id (essentially all sessions)
sessions = honcho.get_sessions(filters={
"peer_id": "*"
})
# Wildcard in lists - matches everything
messages = session.get_messages(filters={
"peer_id": {"in": ["alice", "bob", "*"]}
})
# Metadata wildcards
sessions = honcho.get_sessions(filters={
"metadata": {
"type": "*", # Any type
"status": "active" # But status must be active
}
})
```
```typescript TypeScript theme={null}
(async () => {
// Find all sessions with any peer_id (essentially all sessions)
const sessions = await honcho.getSessions({
filters: {
peerId: "*"
}
});
// Wildcard in lists - matches everything
const messages = await session.getMessages({
filters: {
peerId: { in: ["alice", "bob", "*"] }
}
});
// Metadata wildcards
const sessions = await honcho.getSessions({
filters: {
metadata: {
type: "*", // Any type
status: "active" // But status must be active
}
}
});
})();
```
## Resource-Specific Examples
### Filtering Workspaces
```python Python theme={null}
# Find workspaces by name pattern
workspaces = honcho.get_workspaces(filters={
"name": {"contains": "prod"}
})
# Filter by metadata
workspaces = honcho.get_workspaces(filters={
"metadata": {
"environment": "production",
"team": {"in": ["backend", "frontend", "devops"]}
}
})
```
```typescript TypeScript theme={null}
(async () => {
// Find workspaces by name pattern
const workspaces = await honcho.getWorkspaces({
filters: {
name: { contains: "prod" }
}
});
// Filter by metadata
const workspaces = await honcho.getWorkspaces({
filters: {
metadata: {
environment: "production",
team: { in: ["backend", "frontend", "devops"] }
}
}
});
})();
```
### Filtering Messages
```python Python theme={null}
# Find error messages from the last week
from datetime import datetime, timedelta
week_ago = (datetime.now() - timedelta(days=7)).isoformat()
messages = session.get_messages(filters={
"AND": [
{"content": {"icontains": "error"}},
{"created_at": {"gte": week_ago}},
{"metadata": {"level": {"in": ["error", "critical"]}}}
]
})
# Find messages in specific sessions with sentiment analysis
messages = session.get_messages(filters={
"AND": [
{"session_id": {"in": ["support-1", "support-2", "support-3"]}},
{"metadata": {"sentiment": "negative"}},
{"metadata": {"confidence": {"gte": 0.7}}}
]
})
```
```typescript TypeScript theme={null}
(async () => {
// Find error messages from the last week
const weekAgo = new Date(Date.now() - 7 * 24 * 60 * 60 * 1000).toISOString();
const messages = await session.getMessages({
filters: {
AND: [
{ content: { icontains: "error" } },
{ createdAt: { gte: weekAgo } },
{ metadata: { level: { in: ["error", "critical"] } } }
]
}
});
// Find messages in specific sessions with sentiment analysis
const messages = await session.getMessages({
filters: {
AND: [
{ sessionId: { in: ["support-1", "support-2", "support-3"] } },
{ metadata: { sentiment: "negative" } },
{ metadata: { confidence: { gte: 0.7 } } }
]
}
});
})();
```
## Error Handling
Handle filter errors gracefully:
```python Python theme={null}
from honcho.exceptions import FilterError
try:
# Invalid filter - unsupported operator
messages = session.get_messages(filters={
"created_at": {"invalid_operator": "2024-01-01"}
})
except FilterError as e:
print(f"Filter error: {e}")
# Handle the error appropriately
try:
# Invalid column name
sessions = honcho.get_sessions(filters={
"nonexistent_field": "value"
})
except FilterError as e:
print(f"Invalid field: {e}")
```
```typescript TypeScript theme={null}
(async () => {
try {
// Invalid filter - unsupported operator
const messages = await session.getMessages({
filters: {
createdAt: { invalidOperator: "2024-01-01" }
}
});
} catch (error) {
if (error.message.includes("filters")) {
console.error(`Filter error: ${error.message}`);
// Handle the error appropriately
}
}
try {
// Invalid column name
const sessions = await honcho.getSessions({
filters: {
nonexistentField: "value"
}
});
} catch (error) {
console.error(`Invalid field: ${error.message}`);
}
})();
```
## Conclusion
Honcho's filtering system provides powerful capabilities for querying your conversational data. By understanding how to:
* Use simple equality filters and complex logical operators
* Apply comparison operators for range and pattern matching
* Filter metadata with nested conditions
* Handle wildcards and dynamic filter construction
* Follow best practices for performance and validation
You can build sophisticated applications that efficiently find and process exactly the conversations, messages, and insights you need from your Honcho data.
# Working Representations
Source: https://docs.honcho.dev/v2/documentation/core-concepts/features/working-rep
Learn how to retrieve cached peer knowledge and understanding using Honcho's working representation system
Working representations are Honcho's system for accessing cached psychological models that capture what peers know, think, and remember. Unlike the `chat()` method which generates fresh representations on-demand, the `working_rep()` method retrieves pre-computed representations that have been automatically built and stored as conversations progress.
## How Working Representations Are Created
Working representations are automatically generated and cached through Honcho's background processing system:
1. **Automatic Generation**: When messages are added to sessions, they trigger background jobs that analyze conversations using theory of mind inference and long-term memory integration
2. **Cached Storage**: The generated representations are stored in the database as metadata on `Peer` objects (for global representations) or `SessionPeer` objects (for session-scoped representations)
3. **Retrieval**: The `working_rep()` method provides fast access to these cached representations without requiring LLM processing
**Cached vs On-Demand**: `working_rep()` retrieves cached representations for fast access, while `peer.chat()` generates fresh representations using the dialectic system. Use `working_rep()` when you need fast access to stored knowledge, and `chat()` when you need current analysis with custom queries.
## Basic Usage
Working representations are accessed through the `working_rep()` method on Session objects:
```python Python theme={null}
from honcho import Honcho
# Initialize client
honcho = Honcho()
# Create peers and session
user = honcho.peer("user-123")
assistant = honcho.peer("ai-assistant")
session = honcho.session("support-conversation")
# Add conversation to trigger representation generation
session.add_messages([
user.message("I'm having trouble with my billing account"),
assistant.message("I can help with that. What specific issue are you seeing?"),
user.message("My credit card was charged twice last month"),
assistant.message("I see duplicate charges on your account. Let me refund one of them.")
])
# Chat to generate a working representation
response = user.chat("What is this user's main concern right now?", session_id=session.id)
# Retrieve the cached working representation for the user
user_representation = session.working_rep("user-123")
print("Cached user representation:", user_representation)
```
```typescript TypeScript theme={null}
import { Honcho } from "@honcho-ai/sdk";
// Initialize client
const honcho = new Honcho({});
// Create peers and session
const user = await honcho.peer("user-123");
const assistant = await honcho.peer("ai-assistant");
const session = await honcho.session("support-conversation");
// Add conversation to trigger representation generation
await session.addMessages([
user.message("I'm having trouble with my billing account"),
assistant.message("I can help with that. What specific issue are you seeing?"),
user.message("My credit card was charged twice last month"),
assistant.message("I see duplicate charges on your account. Let me refund one of them.")
]);
// Chat to generate a working representation
const response = await user.chat("What is this user's main concern right now?", { sessionId: session.id });
// Retrieve the cached working representation for the user
const userRepresentation = await session.workingRep("user-123");
console.log("Cached user representation:", userRepresentation);
// Returns: { representation: Object }
```
## Understanding Representation Content
Cached working representations contain structured psychological analysis based on conversation history. The format typically includes:
### Current Mental State Predictions
Information about what the peer is currently thinking, feeling, or focused on based on recent messages.
### Relevant Long-term Facts
Facts about the peer that have been extracted and stored over time from various conversations.
### Example Representation Structure
```python Python theme={null}
# Example of what a cached representation might contain
representation = session.working_rep("user-123")
# Typical content structure:
"""
PREDICTION ABOUT THE USER'S CURRENT MENTAL STATE:
The user appears frustrated with a billing issue, specifically concerning duplicate charges.
They seem to have some confidence in the support process as they provided specific details.
RELEVANT LONG-TERM FACTS ABOUT THE USER:
- User has had previous billing inquiries
- User prefers direct, specific communication
- User is detail-oriented when reporting issues
"""
print("Full representation:", representation)
```
```typescript TypeScript theme={null}
// Example of what a cached representation might contain
const representation = await session.workingRep("user-123");
// Typical content structure:
/*
PREDICTION ABOUT THE USER'S CURRENT MENTAL STATE:
The user appears frustrated with a billing issue, specifically concerning duplicate charges.
They seem to have some confidence in the support process as they provided specific details.
RELEVANT LONG-TERM FACTS ABOUT THE USER:
- User has had previous billing inquiries
- User prefers direct, specific communication
- User is detail-oriented when reporting issues
*/
console.log("Full representation:", representation);
```
## When Representations Are Updated
Working representations are automatically updated through Honcho's background processing system:
### Message Processing Pipeline
1. **Message Creation**: When messages are added via `session.add_messages()` or similar methods
2. **Background Queuing**: Messages are queued for processing in the background
3. **Theory of Mind Analysis**: The system analyzes conversation patterns and psychological states
4. **Fact Extraction**: Long-term facts are extracted and stored in vector embeddings
5. **Representation Generation**: New representations are created combining current analysis with historical facts
6. **Cache Update**: The new representation is stored in the database metadata
### Processing Triggers
Representations are updated when:
* New messages are added to sessions
* Sufficient new content has accumulated
* The background processing system determines an update is needed
## Comparison with Chat Method
Understanding when to use `working_rep()` vs `peer.chat()`:
### Use `working_rep()` when:
* You need fast access to stored psychological models
* You want to see what the system has already learned about a peer
* You're building dashboards or analytics that display peer understanding
* You need consistent representations that don't change between calls
### Use `peer.chat()` when:
* You need to ask specific questions about a peer
* You want fresh analysis based on current conversation state
* You need customized insights for specific use cases
* You want to query about relationships between peers
```python Python theme={null}
# Fast cached access
cached_rep = session.working_rep("user-123")
print("Cached:", cached_rep[:100] + "...")
# Custom query with fresh analysis
custom_analysis = user.chat("What is this user's main concern right now?", session_id=session.id)
print("Fresh analysis:", custom_analysis)
```
```typescript TypeScript theme={null}
// Fast cached access
const cachedRep = await session.workingRep("user-123");
console.log("Cached:", cachedRep.substring(0, 100) + "...");
// Custom query with fresh analysis
const customAnalysis = await user.chat("What is this user's main concern right now?", { sessionId: session.id });
console.log("Fresh analysis:", customAnalysis);
```
## Best Practices
### 1. Ensure Availability Before Using
Make sure that a representation exists before processing it by using the chat endpoint first.
### 2. Use for Fast Analytics
Cached representations are ideal for analytics dashboards:
```python Python theme={null}
# Good: Fast dashboard updates using cached data
def update_analytics_dashboard(sessions):
analytics = {}
for session in sessions:
for peer_id in session.get_peer_ids():
rep = session.working_rep(peer_id)
analytics[peer_id] = analyze_representation(rep)
return analytics
```
```typescript TypeScript theme={null}
// Good: Fast dashboard updates using cached data
async function updateAnalyticsDashboard(sessions) {
const analytics: Record = {};
for (const session of sessions) {
const peerIds = await session.getPeerIds();
for (const peerId of peerIds) {
const rep = await session.workingRep(peerId);
analytics[peerId] = analyzeRepresentation(rep);
}
}
return analytics;
}
```
### 3. Combine with Fresh Analysis When Needed
Use cached representations for baseline understanding, and fresh analysis for current insights:
```python Python theme={null}
# Get baseline understanding from cache
baseline = session.working_rep("user-123")
# Get current specific insights
current_state = user.chat("How is this user feeling right now?", session_id=session.id)
# Combine for comprehensive view
comprehensive_view = {
"baseline_knowledge": baseline,
"current_analysis": current_state
}
```
```typescript TypeScript theme={null}
// Get baseline understanding from cache
const baseline = await session.workingRep("user-123");
// Get current specific insights
const currentState = await user.chat("How is this user feeling right now?", { sessionId: session.id });
// Combine for comprehensive view
const comprehensiveView = {
baselineKnowledge: baseline,
currentAnalysis: currentState
};
```
## Conclusion
Working representations provide fast access to cached psychological models that Honcho automatically builds and maintains. By understanding how to:
* Retrieve cached representations using `session.working_rep()`
* Parse and interpret representation content
* Handle cases where representations aren't available
* Combine cached and fresh analysis appropriately
You can build efficient applications that leverage Honcho's continuous learning about peer knowledge and mental states without the latency of real-time generation.
# Terminology
Source: https://docs.honcho.dev/v2/documentation/core-concepts/glossary
Glossary of AI and Honcho Specific Terms
## AI Development Basics
Essential terms for developers new to building AI applications.
#### LLM (Large Language Model)
The AI model that generates text responses, like GPT-4, Claude, or Llama. Think of it as the "brain" that powers your chatbot or AI assistant.
#### Prompt
The text you send to an AI model to get a response. This includes user messages, system instructions, and any context you provide.
#### Token
How AI models count and limit text. Roughly 1 token = 0.75 words. Models have token limits (like 4,000 or 128,000 tokens) that determine how much text they can process at once.
#### Context Window
The maximum amount of text an AI model can "remember" in one conversation. Once you exceed this limit, the model starts "forgetting" earlier parts of the conversation.
#### Embedding
Converting text into numerical vectors that computers can understand and compare. Enables "smart search" that finds similar content based on meaning, not just keywords.
#### Semantic Search
Search based on meaning rather than exact keyword matching, often using embeddings.
#### Agent
An AI system that can take actions and make decisions, not just generate text responses. Agents can use tools, call APIs, and interact with external systems.
## Honcho Terms
#### Global Representation
Derived context of a specific peer, synthesizing insights from interactions across all sessions, including arbitrary data ingested by this specific peer. With arbitrary data, a global representation can be made independent of sessions.
#### Local Representation
One peer's persistent context of another based on observed interactions/messages.
## Cognitive Science Terms
Cognitive science terms that are used throughout the inspiration and
implementation of Honcho
#### Theory of Mind
The ability of a computer to understand, remember, and interact with its own mind, enabling it to form representations of the world and make decisions based on its own knowledge and behavior.
#### Social Cognition
The mental processes by which we perceive, interpret, and respond to information about others and social situations. It includes the encoding, storage, retrieval, and application of social knowledge.
#### Cognitive Architecture
In CogSci, frameworks describing fixed structures & mechanisms underlying human cognition. Such frameworks aim to explain how various components of the mind—perception, memory, reasoning, learning, etc—combine to produce intelligent behavior across diverse environments. In AI, it’s a computational implementation of these theories—a designed framework to replicate human cognitive functions.
#### Predictive Coding
A theory in CogSci proposing the brain is an active prediction machine, continually generating & updating internal world models to anticipate sensory input, rather than passively receiving it—closely linked to Bayesian brain hypotheses, which hold that the brain interprets the world probabilistically, weighing prior knowledge against new evidence to minimize uncertainty.
# Summarizer
Source: https://docs.honcho.dev/v2/documentation/core-concepts/summarizer
How Honcho creates summaries of conversations
Almost all agents require, in addition to personalization and memory, a way to quickly prime a context window with a summary of the conversation (in Honcho, this is equivalent to a `session`). The general strategy for summarization is to combine a list of recent messages verbatim with a compressed LLM-generated summary of the older messages not included. Implementing this correctly, in such a way that the resulting context is:
* Exhaustive: the combination of recent messages and summary should cover the entire conversation
* Dynamically sized: the tokens used on both summary and recent messages should be malleable based on desired token usage
* Performant: while creation of the summary by LLM introduces necessary latency, this should never add latency to an arbitrary end-user request
...is a non-trivial problem. Summarization should not be necessary to re-implement for every new agent you build, so Honcho comes with a built-in solution.
### Creating Summaries
Honcho already has an asynchronous task queue for the purpose of deriving facts from messages. This is the ideal place to create summaries where they won't add latency to a message. Currently, Honcho has two configurable summary types:
* Short summaries: by default, enqueued every 20 messages and given a token limit of 1000
* Long summaries: by default, enqueued every 60 messages and given a token limit of 4000
Both summaries are designed to be exhaustive: when enqueued, they are given the *prior* summary of their type plus every message after that summary. This recursive compression process naturally biases the summary towards recent messages while still covering the entire conversation.
For example, if message 160 in a conversation triggers a short summary, as it would with default settings, the summary task would retrieve the prior short summary (message 140) plus messages 141-160. It would then produce a summary of messages 0-160 and store that in the short summary slot on the session. Every session has a single slot for each summary type: new summaries replace old ones.
It's important to keep in mind that summary tasks run in the background and are not guaranteed to complete before the next message. However, they are guaranteed to complete in order, so that if a user saves 100 messages in a single batch, the short summary will first be created for messages 0-20, then 21-40, and so on, in our desired recursive way.
### Retrieving Summaries
Summaries are retrieved from the session by the `get_context` method. This method has two parameters:
* `summary`: A boolean indicating whether to include the summary in the return type. The default is true.
* `tokens`: An integer indicating the maximum number of tokens to use for the context. **If not provided, `get_context` will retrieve as many tokens as are required to create exhaustive conversation coverage.**
The return type is simply a list of recent messages and a summary if the flag is used. These two components are dynamically sized based on the token limit. Combined, they will always be below the given token limit. Honcho reserves 60% of the context size for recent messages and 40% for the summary.
There's a critical trade-off to understand between exhaustiveness and token usage. Let's go through some scenarios:
* If the *last message* contains more tokens than the context token limit, no summary *or* message list is possible -- both will be empty.
* If the *last few messages* contain more tokens than the context token limit, no summary is possible -- the context will only contain the last 1 or 2 messages that fit in the token limit.
* If the summaries contain more tokens than the context token limit, no summary is possible -- the context will only contain the X most recent messages that fit in the token limit. Note that while summaries will often be smaller than their token limits, avoiding this scenario means passing a higher token limit than the Honcho-configured summary size(s). For this reason, the default token limit for `get_context` is a few times larger than the configured long summary size.
The above scenarios indicate where summarization is not possible -- therefore, the context retrieved will almost certainly **not** be exhaustive.
Sometimes, gaps in context aren't an issue. In these cases, it's best to pass a reasonable token limit depending on your needs. Other cases demand exhaustive context -- don't pass a token limit and just let Honcho retrieve the ideal combination of summary and recent messages. Finally, if you don't care about the conversation at large and just want the last few messages, set `summary` to false and `tokens` to some multiple of your desired message count. Note that context messages are not paginated, so there's a hard limit on the number of messages that can be retrieved (currently 100,000 tokens).
As a final note, remember that summaries are generated asynchronously and therefore may not be available immediately. If you batch-save a large number of messages, assume that summaries will not be available until those messages are processed, which can take seconds to minutes depending on the number of messages and the configured LLM provider. Exhaustive `get_context` calls performed during this time will likely just return the messages in the session.
# Honcho
Source: https://docs.honcho.dev/v2/documentation/introduction/overview
Go beyond memory to agents with actual social intelligence
Honcho is an AI-native memory library for building agents with
[state-of-the-art](https://blog.plasticlabs.ai/research/Introducing-Neuromancer-XR)
long-term memory.
Agents using Honcho have perfect recall with a wide variety of tools to traverse
their history and get the exact context they need when they need it.
It then goes beyond basic memory by reasoning about the stored history
to expand the latent information available to your agent. Agents using Honcho
will understand who they are, who they are interacting with, what happened, and
when it happened — all without you having to think about it.
Use it to build
* Highly personalized experiences
* Agents with social cognition
* Agents with rich identity that evolve over time
* Multi-agent systems with complex social dynamics
```python theme={null}
# Start simple by just adding messages
session.add_messages([alice.message("I learn best with examples")])
# Honcho will automatically reason about the message to generate insights about Alice
# Get insights by chatting with the agent
insight = peer.chat("How should I explain this concept?")
# > "This user learns best through concrete examples..."
```
Designed for developers and agents alike:
* **Natural Language Queries**: Chat with Honcho in natural language via the [Dialectic API](../core-concepts/architecture#dialectic-api) to get insights about your users and agents
* **Automatic Context Management**: Smart conversation summaries to have infinite chats
* **Native multi-agent support**: Sessions can natively have as many participants as you need
* **Agent-first interfaces**: MCP connections and APIs designed for agents to consume and use as tools
* **Provider Agnostic**: Works with any LLM or Agent Framework
## How It Works
Everything is framed with regards to perspective. Alice owns her own global
representation, but she also maintains a local representation of Bob based on what she
observes and similarly Bob has a global representation of himself and local
representation of Alice. So in the example above, when Alice sends a message to
Bob it triggers an update to both Alice's global representation of herself and Bob's local
representation of Alice.
If Alice were to have another conversation with a different Peer, Nico, and
sent them a message, this action would trigger an update to Alice's Global
Representation and Nico's local representation of Alice. Bob's local
representation of Alice would not change since Bob would never receive that
message.
By default, local representations are disabled, but can be enabled in a
Peer or Session level configuration
Depending on the use case, a developer may choose to only use global
representation, only use local, or a combination.
### Summary
Summary tasks create conversation summaries. Periodically, a
"short" summary will be created for each session as messages are added -- every
20 messages by default. "Long" summaries are created every 60 messages by
default and maintain a total overview of the session by including the previous
summary in a recursive fashion. These summaries are accessed in the
`get_context` endpoint along with recent messages, allowing developers to
easily fetch everything necessary to generate the next LLM completion for an
agent.
The system defaults are also the checkpoints used on the managed version of
Honcho hosted at [https://api.honcho.dev](https://api.honcho.dev)
## Dialectic API
The Dialectic API is one of the most integral components of Honcho and acts as
the main way to leverage Peer Representations. By using the `/chat` endpoint,
developers can directly talk to Honcho about any Peer in a workspace to get
insights into the psychology of a Peer and help them steer their behavior.
This allows us to use this one endpoint for a wide variety of use cases. Model
steering, personalization, hydrating a prompt, etc. Additionally, since the
endpoint works through natural language, a developer can allow an agent to
backchannel directly with Honcho, via MCP or a direct API call.
Developers should frame the Dialectic as talking to an expert on the Peer rather than addressing the Peer itself, meaning:
```python theme={null}
alice.chat("What is the user's mood today?") # ✅ Ideal
alice.chat("What is alice's mood today?") # ✅ Works -- but make sure to consider what peer "Alice" has been saying in their messages about name/identity.
alice.chat("What is your mood today?") # ❌ Likely to fail -- the dialectic agent may conflate itself and the user.
```
Think of Dialectic Chat as an assisting agent that your main agent can consult for contextual information about any actor in your application.
## Next Steps
Learn how to use the SDK to interact with the data model
Reference for all technical terms and concepts
Detailed API documentation and examples
Get started with your first integration
# Configure Reasoning
Source: https://docs.honcho.dev/v2/documentation/core-concepts/configuration
Customizing how Honcho handles peers and sessions
Entities in Honcho can sometimes be configured to change the behavior of the deriver, which is responsible for generating and storing facts, summaries, and user representations.
These configurations can be set at the peer, session, and session-peer level (AKA the state of a peer within a specific session).
### Peer Configuration
By default, all peers are "observed" by Honcho. This means that Honcho will derive facts from messages sent by the peer and generate a representation of them. In most cases, this is why you use Honcho! However, sometimes an application requires a peer that should not be observed: for example, an assistant or game NPC that your program will never need to ask questions about.
You may therefore disable observation of a peer by setting the `observe_me` flag in their configuration to `false`.
If the peer has a session-level configuration, it will override this configuration. If the flag is not set, or is set to `true`, the peer will be observed.
```python Python theme={null}
from honcho import Honcho
# Initialize client
honcho = Honcho()
# Create peer with configuration
peer = honcho.peer("my-peer", config={"observe_me": False})
# Change peer's configuration
peer.set_peer_config({"observe_me": True})
# Note: creating the same peer again will also replace the configuration
peer = honcho.peer("my-peer", config={"observe_me": False})
```
```typescript TypeScript theme={null}
import { Honcho } from "@honcho-ai/sdk";
(async () => {
// Initialize client
const honcho = new Honcho({});
// Create peer with configuration
const peer = await honcho.peer("my-peer", { config: { observe_me: false } });
// Change peer's configuration
await peer.setPeerConfig({ observe_me: true });
// Note: creating the same peer again will also replace the configuration
await honcho.peer("my-peer", { config: { observe_me: false } });
})();
```
### Session Configuration
By default, all sessions have the deriver enabled, much like peers. You may create a session that escapes the deriver's watchful eye by setting the `deriver_disabled` flag to `true`. You can update the flag by calling `get_or_create` on the session with a new configuration.
```python Python theme={null}
from honcho import Honcho
# Initialize client
honcho = Honcho()
# Create session with configuration
session = honcho.session("my-session", config={"deriver_disabled": True})
```
```typescript TypeScript theme={null}
import { Honcho } from "@honcho-ai/sdk";
(async () => {
// Initialize client
const honcho = new Honcho({});
// Create session with configuration
const session = await honcho.session("my-session", { config: { deriver_disabled: true } });
})();
```
### Session-Peer Configuration
Configuration at the session-peer level is the most common use case for configuration flags. You will often want to arrange a session such that certain peers observe others in order to form "local representations" of them. There are two flags that can be set at the session-peer level:
* `observe_me`: Whether this peer should *be observed* by others in the session. By default, this is `true`. This overrides the peer-level `observe_me` flag.
* `observe_others`: Whether this peer should produce local representations of others in the session. By default, this is `false`. Other peers will only be observed if their `observe_me` flag is `true`.
You can combine these flags across multiple peers to arrange any possible permutation of directional observation. Note that in the default case, no local representations are produced. To produce local representations, you must set the `observe_others` flag to `true` for at least one peer in the session and at least one other peer must have their `observe_me` flag set to `true`.
Many applications will work best without local representations, preferring to chat with Honcho's top-down representation of each peer. Only enable local representations via the `observe_others` flag if you are doing advanced reasoning on user perspectives.
You can dynamically change the configuration of a session-peer by calling `set_peer_config` on the session with the peer and the configuration you want to set.
```python Python theme={null}
from honcho import Honcho
# Initialize client
honcho = Honcho()
# Create session
session = honcho.session("my-session")
# Create peers
alice = honcho.peer("alice")
bob = honcho.peer("bob")
# Add peers to session with default configuration
session.add_peers([alice, bob])
# Add another peer to the session with a custom configuration
charlie = honcho.peer("charlie")
session.add_peers([charlie, {"observe_me": False, "observe_others": True}])
# Set session-peer configuration
session.set_peer_config(alice, {"observe_others": True})
session.set_peer_config(bob, {"observe_me": False})
# Get session-peer configuration
charlie_config = session.get_peer_config(charlie)
print(charlie_config)
```
```typescript TypeScript theme={null}
import { Honcho } from "@honcho-ai/sdk";
(async () => {
// Initialize client
const honcho = new Honcho({});
// Create session
const session = await honcho.session("my-session");
// Create peers
const alice = await honcho.peer("alice");
const bob = await honcho.peer("bob");
// Add peers to session
await session.addPeers([alice, bob]);
// Add another peer to the session with a custom configuration
const charlie = await honcho.peer("charlie");
await session.addPeers([charlie, { observe_me: false, observe_others: true }]);
// Set session-peer configuration
await session.setPeerConfig(alice, { observe_others: true });
await session.setPeerConfig(bob, { observe_me: false });
// Get session-peer configuration
const charlieConfig = await session.getPeerConfig(charlie);
console.log(charlieConfig);
})();
```
# Dialectic Endpoint
Source: https://docs.honcho.dev/v2/documentation/core-concepts/features/dialectic-endpoint
An endpoint for reasoning about your users
Honcho by default runs ambient inference on top of the `message` objects you store. Those messages serve as the ground truth upon which facts about the user are derived and stored. The **Dialectic Endpoint** is the natural language interface through which insights are synthesized from those facts. We believe [intellectual respect](https://blog.plasticlabs.ai/extrusions/Extrusion-02.24) for LLMs is paramount in building effective AI agents/apps. It follows that the LLM should know better than any human what would aid them in their generation task. Thus, the Dialectic endpoint exists for flexible agent-to-agent communication.
## Automatic Fact Derivation
On every message written to a session, an automatic callback is run that will reason about the conversation and store facts in a `collection` named `honcho`. This is a reserved `collection` specifically for the backend Honcho agent to interact with.
## Dialectic Endpoint
The Dialectic endpoint allows you to define logic enabling your agent to talk to our agent that automatically retrieves and synthesizes facts from the collection. You can use the response as part of your reasoning process for your agent–add it to your next prompt to inject critical context about the user.
This chat interface is exposed via the `peer.chat()` endpoint. It accepts a string query. Below is some example code on how this works.
## Prerequisites
```python Python theme={null}
from honcho import Honcho
# use the default workspace
honcho = Honcho()
# get/create a peer
peer = honcho.peer("demo-user")
# get/create a session
session = honcho.session("demo-session")
# (assuming some messages have been written to Honcho for the deriver to use)
```
```typescript TypeScript theme={null}
import { Honcho } from '@honcho-ai/sdk';
// use the default workspace
const honcho = new Honcho({});
// get/create a peer
const peer = await honcho.peer('demo-user');
// get/create a session
const session = await honcho.session('demo-session');
// (assuming some messages have been written to Honcho for the deriver to use)
```
## Static Dialectic Call
```python Python theme={null}
query = "What is the user's favorite way of completing the task?"
answer = peer.chat(query)
```
```typescript TypeScript theme={null}
const query = "What is the user's favorite way of completing the task?"
const dialecticResponse = await peer.chat(query)
```
## Streaming Dialectic Call
```python Python theme={null}
query = "What do we know about the user?"
response_stream = peer.chat(query, stream=True)
for line in response_stream.iter_text():
print(line)
```
```typescript TypeScript theme={null}
const query = "What do we know about the user?"
const responseStream = await peer.chat(query, { stream: true })
for await (const line of responseStream.iter_text()) {
console.log(line)
}
```
We've designed the Dialectic endpoint to be infinitely flexible. We wrote an incomplete list of ideas on how to use it on our blog [here](https://blog.plasticlabs.ai/blog/Introducing-Honcho's-Dialectic-API#how-it-works).
# File Uploads
Source: https://docs.honcho.dev/v2/documentation/core-concepts/features/file-uploads
Upload PDFs, text files, and JSON documents to create messages in Honcho
Honcho's file upload feature allows you to convert documents into messages automatically. Upload PDFs, text files, or JSON documents, and Honcho will extract the text content, split it into appropriately sized chunks, and create messages that become part of your peer's knowledge or session context.
This feature is perfect for ingesting documents, reports, research papers, or any text-based content that you want your AI agents to understand and reference.
## How It Works
When you upload a file, Honcho:
1. **Extracts text** from the file using specialized processors based on file type
2. **Creates messages** with the extracted content split into chunks that fit within message limits (messages are limited to 50,000 characters)
3. **Queues processing** for background analysis and insight derivation like any other message
The file content becomes part of the peer's representation, making it available for natural language queries and context retrieval.
## Supported File Types
Honcho currently supports the following file types with more to come:
* **PDF files** (`application/pdf`) - Text extraction with page numbers
* **Text files** (`text/*`) - Plain text, markdown, code files, etc.
* **JSON files** (`application/json`) - Structured data converted to readable format
Files are processed in memory and not stored on disk. Only the extracted text content is preserved in Honcho's message system.
## Basic Usage
```python Python theme={null}
from honcho import Honcho
# Initialize client
honcho = Honcho()
# Create session and peer
session = honcho.session("research-session")
user = honcho.peer("researcher")
# Upload a PDF to a session
with open("research_paper.pdf", "rb") as file:
messages = session.upload_file(
file=file,
peer_id=user.id,
)
print(f"Created {len(messages)} messages from the PDF")
```
```typescript TypeScript theme={null}
import { Honcho } from "@honcho-ai/sdk";
import fs from "fs";
(async () => {
// Initialize client
const honcho = new Honcho({});
// Create session and peer
const session = await honcho.session("research-session");
const user = await honcho.peer("researcher");
// Upload a PDF to a session
const fileStream = fs.createReadStream("research_paper.pdf");
const messages = await session.uploadFile(fileStream, user.id);
console.log(`Created ${messages.length} messages from the PDF`);
})();
```
## Upload Parameters
The upload methods accept the following parameters:
| Parameter | Type | Required | Description |
| --------- | ------ | -------- | ------------------------------------ |
| `file` | File | Yes | File to upload |
| `peer_id` | String | Yes | ID of the peer creating the messages |
## File Processing Details
### Text Extraction
**PDF Files**: Text is extracted page by page with page numbers preserved:
```
[Page 1]
Introduction
This document provides...
[Page 2]
Methodology
Our approach involves...
```
**Text Files**: Content is decoded using UTF-8, UTF-16, or Latin-1 encoding as needed.
**JSON Files**: Structured data is converted to string format.
### Chunking Strategy
Large files are automatically split into chunks of \~49,500 characters. The system seeks to break at natural boundaries if present:
1. Paragraph breaks (`\n\n`)
2. Line breaks (`\n`)
3. Sentence endings (`. `)
4. Word boundaries (` `)
Each chunk becomes a separate message, maintaining the original document structure.
## Querying Uploaded Content
Once files are uploaded, you can query the content using Honcho's natural language interface:
```python Python theme={null}
# Query what was learned from the uploaded documents
response = user.chat("What are the key findings from the research papers I uploaded?")
print(response)
# Ask about specific documents
response = user.chat("What does the quarterly report say about revenue growth?")
print(response)
# Get context from the uploaded documents for LLM integration
context = session.get_context(tokens=3000)
messages = context.to_openai(assistant=assistant)
```
```typescript TypeScript theme={null}
(async () => {
// Query what was learned from the uploaded documents
const response = await user.chat("What are the key findings from the research papers I uploaded?");
console.log(response);
// Ask about specific documents
const response2 = await user.chat("What does the quarterly report say about revenue growth?");
console.log(response2);
// Get context from the uploaded documents for LLM integration
const context = await session.getContext({ tokens: 3000 });
const messages = context.toOpenAI(assistant);
})();
```
## Error Handling
### Unsupported File Types
Files with unsupported content types will raise an exception:
```python theme={null}
try:
messages = session.upload_file(
file=open("image.jpg", "rb"),
peer_id=user.id
)
except Exception as e:
print(f"Upload failed: {e}")
# Error: "Could not process file image.jpg: Unsupported file type: image/jpeg"
```
### Missing Required Fields
Session uploads require a `peer_id` parameter:
```python theme={null}
# This will fail for session uploads
try:
messages = session.upload_file(file=file) # Missing peer_id
except ValueError as e:
print(f"Validation error: {e}")
```
## Complete Example: Document Analysis Assistant
Here's a complete example of building a document analysis assistant:
```python Python theme={null}
from honcho import Honcho
# Initialize
honcho = Honcho()
session = honcho.session("document-analysis")
user = honcho.peer("analyst")
assistant = honcho.peer("analysis-bot")
def upload_document(file_path, description):
"""Upload a document and add it to the session"""
with open(file_path, "rb") as file:
messages = session.upload_file(
file=file,
peer_id=user.id,
)
return messages
def analyze_documents():
"""Get AI analysis of uploaded documents"""
context = session.get_context(tokens=4000)
messages = context.to_openai(assistant=assistant)
# Add analysis request
messages.append({
"role": "user",
"content": "Please analyze all the documents I've uploaded and provide a comprehensive summary of the key findings, trends, and recommendations."
})
# Call OpenAI (or your preferred LLM)
# response = openai.chat.completions.create(model="gpt-4", messages=messages)
# return response.choices[0].message.content
return "Analysis would be generated here"
# Upload multiple documents
documents = [
("quarterly_report.pdf", "Q3 2024 Quarterly Financial Report"),
("market_research.pdf", "Market Analysis and Competitive Landscape"),
("product_roadmap.pdf", "Product Development Roadmap 2024-2025")
]
for file_path, description in documents:
messages = upload_document(file_path, description)
print(f"Uploaded {file_path}: {len(messages)} messages created")
# Get AI analysis
analysis = analyze_documents()
print("Document Analysis:", analysis)
```
```typescript TypeScript theme={null}
import { Honcho } from "@honcho-ai/sdk";
import fs from "fs";
(async () => {
// Initialize
const honcho = new Honcho({});
const session = await honcho.session("document-analysis");
const user = await honcho.peer("analyst");
const assistant = await honcho.peer("analysis-bot");
async function uploadDocument(filePath: string, description: string) {
const fileStream = fs.createReadStream(filePath);
const messages = await session.uploadFile(fileStream, user.id);
return messages;
}
async function analyzeDocuments() {
const context = await session.getContext({ tokens: 4000 });
const messages = context.toOpenAI(assistant);
// Add analysis request
messages.push({
role: "user",
content: "Please analyze all the documents I've uploaded and provide a comprehensive summary of the key findings, trends, and recommendations."
});
// Call OpenAI (or your preferred LLM)
// const response = await openai.chat.completions.create({ model: "gpt-4", messages });
// return response.choices[0].message.content;
return "Analysis would be generated here";
}
// Upload multiple documents
const documents = [
["quarterly_report.pdf", "Q3 2024 Quarterly Financial Report"],
["market_research.pdf", "Market Analysis and Competitive Landscape"],
["product_roadmap.pdf", "Product Development Roadmap 2024-2025"]
];
for (const [filePath, description] of documents) {
const messages = await uploadDocument(filePath, description);
console.log(`Uploaded ${filePath}: ${messages.length} messages created`);
}
// Get AI analysis
const analysis = await analyzeDocuments();
console.log("Document Analysis:", analysis);
})();
```
## Error Handling
* **Always wrap uploads in try-catch blocks** for robust error handling
* **Validate file types** before upload to avoid processing errors
* **Handle large files gracefully** with progress indicators
* **Implement retry logic** for network failures
# Get Context
Source: https://docs.honcho.dev/v2/documentation/core-concepts/features/get-context
Learn how to use get_context() to retrieve and format conversation context for LLM integration
The `get_context()` method is a powerful feature that retrieves formatted conversation context from sessions, making it easy to integrate with LLMs like OpenAI, Anthropic, and others. This guide covers everything you need to know about working with session context.
By default, the context includes a blend of summary and messages which covers the entire history of the session. Summaries are automatically generated at intervals and recent messages are included depending on how many tokens the context is intended to be. You can specify any token limit you want, and can disable summaries to fill that limit entirely with recent messages.
## Basic Usage
The `get_context()` method is available on all Session objects and returns a `SessionContext` that contains the formatted conversation history.
```python Python theme={null}
from honcho import Honcho
# Initialize client and create session
honcho = Honcho()
session = honcho.session("conversation-1")
# Get basic context (not very useful before adding any messages!)
context = session.get_context()
```
```typescript TypeScript theme={null}
import { Honcho } from "@honcho-ai/sdk";
(async () => {
// Initialize client and create session
const honcho = new Honcho({});
const session = await honcho.session("conversation-1");
// Get basic context (not very useful before adding any messages!)
const context = await session.getContext();
})();
```
## Context Parameters
The `get_context()` method accepts several optional parameters to customize the retrieved context:
### Token Limits
Control the size of the context by setting a maximum token count:
```python Python theme={null}
# Limit context to 1500 tokens
context = session.get_context(tokens=1500)
# Limit context to 3000 tokens for larger conversations
context = session.get_context(tokens=3000)
```
```typescript TypeScript theme={null}
(async () => {
// Limit context to 1500 tokens
const context = await session.getContext({ tokens: 1500 });
// Limit context to 3000 tokens for larger conversations
const context = await session.getContext({ tokens: 3000 });
})();
```
### Summary Mode
Enable summary mode (on by default) to get a condensed version of the conversation:
```python Python theme={null}
# Get context with summary enabled -- will contain both summary and messages
context = session.get_context(summary=True)
# Combine summary=False with token limits to get more messages
context = session.get_context(summary=False, tokens=2000)
```
```typescript TypeScript theme={null}
(async () => {
// Get context with summary enabled -- will contain both summary and messages
const context = await session.getContext({ summary: true });
// Combine summary=False with token limits to get more messages
const context = await session.getContext({
summary: false,
tokens: 2000
});
})();
```
## Converting to LLM Formats
The `SessionContext` object provides methods to convert the context into formats compatible with popular LLM APIs. When converting to OpenAI format, you must specify the assistant peer to format the context in such a way that the LLM can understand it.
### OpenAI Format
Convert context to OpenAI's chat completion format:
```python Python theme={null}
# Create peers
alice = honcho.peer("alice")
assistant = honcho.peer("assistant")
# Add some conversation
session.add_messages([
alice.message("What's the weather like today?"),
assistant.message("It's sunny and 75°F outside!")
])
# Get context and convert to OpenAI format
context = session.get_context()
openai_messages = context.to_openai(assistant=assistant)
# The messages are now ready for OpenAI API
print(openai_messages)
# [
# {"role": "user", "content": "What's the weather like today?"},
# {"role": "assistant", "content": "It's sunny and 75°F outside!"}
# ]
```
```typescript TypeScript theme={null}
(async () => {
// Create peers
const alice = await honcho.peer("alice");
const assistant = await honcho.peer("assistant");
// Add some conversation
await session.addMessages([
alice.message("What's the weather like today?"),
assistant.message("It's sunny and 75°F outside!")
]);
// Get context and convert to OpenAI format
const context = await session.getContext();
const openaiMessages = context.toOpenAI(assistant);
// The messages are now ready for OpenAI API
console.log(openaiMessages);
// [
// {"role": "user", "content": "What's the weather like today?"},
// {"role": "assistant", "content": "It's sunny and 75°F outside!"}
// ]
})();
```
### Anthropic Format
Convert context to Anthropic's Claude format:
```python Python theme={null}
# Get context and convert to Anthropic format
context = session.get_context()
anthropic_messages = context.to_anthropic(assistant=assistant)
# Ready for Anthropic API
print(anthropic_messages)
```
```typescript TypeScript theme={null}
(async () => {
// Get context and convert to Anthropic format
const context = await session.getContext();
const anthropicMessages = context.toAnthropic(assistant);
// Ready for Anthropic API
console.log(anthropicMessages);
})();
```
## Complete LLM Integration Examples
### Using with OpenAI
```python Python theme={null}
import openai
from honcho import Honcho
# Initialize clients
honcho = Honcho()
openai_client = openai.OpenAI()
# Set up conversation
session = honcho.session("support-chat")
user = honcho.peer("user-123")
assistant = honcho.peer("support-bot")
# Add conversation history
session.add_messages([
user.message("I'm having trouble with my account login"),
assistant.message("I can help you with that. What error message are you seeing?"),
user.message("It says 'Invalid credentials' but I'm sure my password is correct")
])
# Get context for LLM
messages = session.get_context(tokens=2000).to_openai(assistant=assistant)
# Add new user message and get AI response
messages.append({
"role": "user",
"content": "Can you reset my password?"
})
response = openai_client.chat.completions.create(
model="gpt-4",
messages=messages
)
# Add AI response back to session
session.add_messages([
user.message("Can you reset my password?"),
assistant.message(response.choices[0].message.content)
])
```
```typescript TypeScript theme={null}
import OpenAI from 'openai';
import { Honcho } from "@honcho-ai/sdk";
(async () => {
// Initialize clients
const honcho = new Honcho({});
const openai = new OpenAI();
// Set up conversation
const session = await honcho.session("support-chat");
const user = await honcho.peer("user-123");
const assistant = await honcho.peer("support-bot");
// Add conversation history
await session.addMessages([
user.message("I'm having trouble with my account login"),
assistant.message("I can help you with that. What error message are you seeing?"),
user.message("It says 'Invalid credentials' but I'm sure my password is correct")
]);
// Get context for LLM
const messages = await session.getContext({ tokens: 2000 }).toOpenAI(assistant);
// Add new user message and get AI response
const response = await openai.chat.completions.create({
model: "gpt-4",
messages: [
...messages,
{ role: "user", content: "Can you reset my password?" }
]
});
// Add AI response back to session
await session.addMessages([
user.message("Can you reset my password?"),
assistant.message(response.choices[0].message.content)
]);
})();
```
### Multi-Turn Conversation Loop
```python Python theme={null}
def chat_loop():
"""Example of a continuous chat loop using get_context()"""
session = honcho.session("chat-session")
user = honcho.peer("user")
assistant = honcho.peer("ai-assistant")
while True:
# Get user input
user_input = input("You: ")
if user_input.lower() in ['quit', 'exit']:
break
# Add user message to session
session.add_messages([user.message(user_input)])
# Get conversation context
context = session.get_context(tokens=2000)
messages = context.to_openai(assistant=assistant)
# Get AI response
response = openai_client.chat.completions.create(
model="gpt-4",
messages=messages
)
ai_response = response.choices[0].message.content
print(f"Assistant: {ai_response}")
# Add AI response to session
session.add_messages([assistant.message(ai_response)])
# Start the chat loop
chat_loop()
```
```typescript TypeScript theme={null}
(async () => {
async function chatLoop() {
const session = await honcho.session("chat-session");
const user = await honcho.peer("user");
const assistant = await honcho.peer("ai-assistant");
// This would be replaced with actual user input handling in a real app
const userInputs = [
"Hello, how are you?",
"What's the weather like?",
"Tell me a joke"
];
for (const userInput of userInputs) {
console.log(`You: ${userInput}`);
// Add user message to session
await session.addMessages([user.message(userInput)]);
// Get conversation context
const context = await session.getContext({ tokens: 2000 });
const messages = context.toOpenAI(assistant);
// Get AI response
const response = await openai.chat.completions.create({
model: "gpt-4",
messages: messages
});
const aiResponse = response.choices[0].message.content;
console.log(`Assistant: ${aiResponse}`);
// Add AI response to session
await session.addMessages([assistant.message(aiResponse)]);
}
}
// Start the chat loop
await chatLoop();
})();
```
## Advanced Context Usage
### Context with Summaries for Long Conversations
For very long conversations, use summaries to maintain context while controlling token usage:
```python Python theme={null}
# For long conversations, use summary mode
long_session = honcho.session("long-conversation")
# Get summarized context to fit within token limits
context = long_session.get_context(summary=True, tokens=1500)
messages = context.to_openai(assistant=assistant)
# This will include a summary of older messages and recent full messages
print(f"Context contains {len(messages)} formatted messages")
```
```typescript TypeScript theme={null}
(async () => {
// For long conversations, use summary mode
const longSession = await honcho.session("long-conversation");
// Get summarized context to fit within token limits
const context = await longSession.getContext({
summary: true,
tokens: 1500
});
const messages = context.toOpenAI(assistant);
// This will include a summary of older messages and recent full messages
console.log(`Context contains ${messages.length} formatted messages`);
})();
```
### Context for Different Assistant Types
You can get context formatted for different types of assistants in the same session:
```python Python theme={null}
# Create different assistant peers
chatbot = honcho.peer("chatbot")
analyzer = honcho.peer("data-analyzer")
moderator = honcho.peer("moderator")
# Get context formatted for each assistant type
chatbot_context = session.get_context().to_openai(assistant=chatbot)
analyzer_context = session.get_context().to_openai(assistant=analyzer)
moderator_context = session.get_context().to_openai(assistant=moderator)
# Each context will format the conversation from that assistant's perspective
```
```typescript TypeScript theme={null}
(async () => {
// Create different assistant peers
const chatbot = await honcho.peer("chatbot");
const analyzer = await honcho.peer("data-analyzer");
const moderator = await honcho.peer("moderator");
// Get context formatted for each assistant type
const context = await session.getContext();
const chatbotContext = context.toOpenAI(chatbot);
const analyzerContext = context.toOpenAI(analyzer);
const moderatorContext = context.toOpenAI(moderator);
// Each context will format the conversation from that assistant's perspective
})();
```
## Best Practices
### 1. Token Management
Always set appropriate token limits to control costs and ensure context fits within LLM limits:
```python Python theme={null}
# Good: Set reasonable token limits based on your model
context = session.get_context(tokens=3000) # For GPT-4
context = session.get_context(tokens=1500) # For smaller models
# Good: Use summaries for very long conversations
context = session.get_context(summary=True, tokens=2000)
```
```typescript TypeScript theme={null}
(async () => {
// Good: Set reasonable token limits based on your model
const context = await session.getContext({ tokens: 3000 }); // For GPT-4
const context = await session.getContext({ tokens: 1500 }); // For smaller models
// Good: Use summaries for very long conversations
const context = await session.getContext({ summary: true, tokens: 2000 });
})();
```
### 2. Context Caching
For applications with frequent context retrieval, consider caching context when appropriate:
```python Python theme={null}
# Cache context for multiple LLM calls within the same request
context = session.get_context(tokens=2000)
openai_messages = context.to_openai(assistant=assistant)
anthropic_messages = context.to_anthropic(assistant=assistant)
# Use the same context object for multiple format conversions
```
```typescript TypeScript theme={null}
(async () => {
// Cache context for multiple LLM calls within the same request
const context = await session.getContext({ tokens: 2000 });
const openaiMessages = context.toOpenAI(assistant);
const anthropicMessages = context.toAnthropic(assistant);
// Use the same context object for multiple format conversions
})();
```
### 3. Error Handling
Always handle potential errors when working with context:
```python Python theme={null}
try:
context = session.get_context(tokens=2000)
messages = context.to_openai(assistant=assistant)
# Use messages with LLM API
response = openai_client.chat.completions.create(
model="gpt-4",
messages=messages
)
except Exception as e:
print(f"Error getting context: {e}")
# Handle error appropriately
```
```typescript TypeScript theme={null}
(async () => {
try {
const context = await session.getContext({ tokens: 2000 });
const messages = context.toOpenAI(assistant);
// Use messages with LLM API
const response = await openai.chat.completions.create({
model: "gpt-4",
messages: messages
});
} catch (error) {
console.error(`Error getting context: ${error}`);
// Handle error appropriately
}
})();
```
## Conclusion
The `get_context()` method is essential for integrating Honcho sessions with LLMs. By understanding how to:
* Retrieve context with appropriate parameters
* Convert context to LLM-specific formats
* Manage token limits and summaries
* Handle multi-turn conversations
You can build sophisticated AI applications that maintain conversation history and context across interactions while integrating seamlessly with popular LLM providers.
# Local vs Global Representations
Source: https://docs.honcho.dev/v2/documentation/core-concepts/features/local-vs-global
Model directional relationships between Peers in Honcho
One of the unique affordances of Honcho is that it allows developers to model
directional relationships between Peers. What I mean by this is you can model
how one `Peer` thinks about another `Peer`.
There are many use cases where you don't want every agent or human to know
everything about another user such as games or multi-agent workflows. To
illustrate this, the following examples shows 2 conversations.
Conversation #1 (With Bob and Alice)
```
Alice: I had a great breakfast today.
Bob: What did you eat?
Alice: I had pancakes and eggs and bacon
```
Conversation #2 (With Alice and Charlie)
```
Alice: I actually didn't eat any breakfast today.
Charlie: Oh that's too bad.
Alice: But I lied to Bob and told him I did, so back me up if you see them.
```
Alice told Bob a lie in this conversation. If we stored both of these
conversations in Honcho with Alice, Bob, and Charlie as `Peers` and let them
use Honcho to get insights on each other then Bob would immediately know this
deception. For example:
```python Python theme={null}
# Bob could run
alice.chat("What did Alice eat today?")
# Response: Alice did not eat anything today
```
This is a problem. Bob shouldn't be able to know everything about Alice in this
situation. So to support these situations we support what we call **Local
Representations**.
By default insights generated for a `Peer` are scoped globally. This means every
message sent by that `Peer` in any conversation updates the same representation
of that `Peer`. However, we can enable **Local Representations** so Bob can
form a representation Alice based only on what they observe Alice do.
This feature is illustrated in the graphic below:
We can enable local representation for a `Peer` by setting `observe_others=True`.
This is shown in the [Configure
Reasoning](/v2/documentation/core-concepts/configuration) page.
Now if we used Bob's local representation of Alice then Bob would only get
insights on what they've seen Alice say to them.
```python theme={null}
bob.chat(target="alice", query="What did Alice eat today?")
# Response: Alice ate pancakes, eggs, and bacon
```
Local Representations are turned off by default
# Queue Status
Source: https://docs.honcho.dev/v2/documentation/core-concepts/features/queue-status
Learn how to check the status of the Deriver
Whenever `Messages` are stored in Honcho, a background process called the
[Deriver](/docs/v2/documentation/core-concepts/architecture#reasoning-layer) is
triggered to reason about the conversation and generate insights.
The Deriver is an asynchronous process and, depending on load may not immediately
generated insights for the latest message you've sent. To help with this, Honcho
provides several utilities to check the status of the Deriver.
```python Python theme={null}
from honcho import Honcho
honcho = Honcho()
status = honcho.get_deriver_status()
honcho.poll_deriver_status()
```
```typescript typescript theme={null}
import { Honcho } from '@honcho-ai/sdk';
const honcho = new Honcho({});
const status = await honcho.getDeriverStatus();
await honcho.pollDeriverStatus();
```
Output types
```python Python theme={null}
class DeriverStatus(BaseModel):
completed_work_units: int
"""Completed work units"""
in_progress_work_units: int
"""Work units currently being processed"""
pending_work_units: int
"""Work units waiting to be processed"""
total_work_units: int
"""Total work units"""
sessions: Optional[Dict[str, Sessions]] = None
"""Per-session status when not filtered by session"""
```
```typescript TypeScript theme={null}
Promise<{
totalWorkUnits: number
completedWorkUnits: number
inProgressWorkUnits: number
pendingWorkUnits: number
sessions?: Record
}>
```
Whenever a `Message` is sent it will generate several tasks. These could
be tasks such as generating insights, cleaning up a representation, summarizing
a conversation etc. These tasks are defined based on who is sending the
message, what `Session` the message is in, and potentially who is observing the
message. We call the combination of these parameters a `work_unit`
This has a few different implications.
* tasks within the same work\_unit are processed sequentially, but multiple
work\_units will be processed in parallel
* If local representations are turned in a Session then a `Message` will
generate an additional work unit for every `Peer` that has `observe_others=True`
The `get_deriver_status` and `poll_deriver_status` methods can take additional
parameters to scope the status to a specific work unit
```python Python theme={null}
def get_deriver_status(
self,
observer_id: str | None = None,
sender_id: str | None = None,
session_id: str | None = None,
) -> DeriverStatus:
```
```typescript TypeScript theme={null}
export const DeriverStatusOptionsSchema = z.object({
observerId: z.string().optional(),
senderId: z.string().optional(),
sessionId: z.string().optional(),
timeoutMs: z
.number()
.positive('Timeout must be a positive number')
.optional(),
})
```
Additionally, there are deriver status and polling deriver status methods
available on the `Session` objects in each of the SDKs.
Below are the function signatures for the session level deriver status method
```python python theme={null}
@validate_call
def get_deriver_status(
self,
observer_id: str | None = None,
sender_id: str | None = None,
) -> DeriverStatus:
```
```typescript TypeScript theme={null}
async getDeriverStatus(
options?: Omit
): Promise<{
totalWorkUnits: number
completedWorkUnits: number
inProgressWorkUnits: number
pendingWorkUnits: number
sessions?: Record
}>
```
# Search
Source: https://docs.honcho.dev/v2/documentation/core-concepts/features/search
Learn how to search across workspaces, sessions, and peers to find relevant conversations and content
Honcho's search functionality allows you to find relevant messages and conversations across different scopes - from entire workspaces down to specific peers or sessions.
## Search Scopes
### Workspace Search
Search across all content in your workspace - sessions, peers, and messages:
```python Python theme={null}
from honcho import Honcho
# Initialize client
honcho = Honcho()
# Search across entire workspace
results = honcho.search("budget planning")
# Iterate through all results
for result in results:
print(f"Found: {result}")
```
```typescript TypeScript theme={null}
import { Honcho } from "@honcho-ai/sdk";
(async () => {
// Initialize client
const honcho = new Honcho({});
// Search across entire workspace
const results = await honcho.search("budget planning");
// Iterate through all results
for (const result of results) {
console.log(`Found: ${result}`);
}
})();
```
### Session Search
Search within a specific session's conversation history:
```python Python theme={null}
# Create or get a session
session = honcho.session("team-meeting-jan")
# Search within this session only
results = session.search("action items")
# Process results
for result in results:
print(f"Session result: {result}")
```
```typescript TypeScript theme={null}
(async () => {
// Create or get a session
const session = await honcho.session("team-meeting-jan");
// Search within this session only
const results = await session.search("action items");
// Process results
for (const result of results) {
console.log(`Session result: ${result}`);
}
})();
```
### Peer Search
Search across all content associated with a specific peer:
```python Python theme={null}
# Create or get a peer
alice = honcho.peer("alice")
# Search across all of Alice's messages and interactions
results = alice.search("programming")
# View results
for result in results:
print(f"Alice's content: {result}")
```
```typescript TypeScript theme={null}
import { Message } from "@honcho-ai/sdk";
(async () => {
// Create or get a peer
const alice = await honcho.peer("alice");
// Search across all of Alice's messages and interactions
const results: Message[] = await alice.search("programming");
// View results
for (const result of results) {
console.log(`Alice's content: ${result.content}`);
}
})();
```
## Filters and Limits
### Get a specific number of results
You can specify the number of results you want to return by passing the `limit` parameter to the search method. The default is 10 results, with a maximum of 100.
```python Python theme={null}
results = honcho.search("budget planning", limit=20)
```
```typescript TypeScript theme={null}
(async () => {
const results = await honcho.search("budget planning", { limit: 20 });
})();
```
### Get messages from a Peer in a specific Session
Combine Peer-level search with a `session_id` filter to get messages from a Peer in a specific Session.
```python Python theme={null}
my_peer = honcho.peer("my-peer")
my_session = honcho.session("team-meeting-jan")
results = my_peer.search("budget planning", filters={"session_id": my_session.id})
```
```typescript TypeScript theme={null}
(async () => {
const my_peer = await honcho.peer("my-peer");
const my_session = await honcho.session("team-meeting-jan");
const results = await my_peer.search("budget planning", { filters: { session_id: my_session.id } });
})();
```
Search returns an object containing an `items` array of message objects:
```json theme={null}
{
"items": [
{
"id": "",
"content": "",
"peer_id": "",
"session_id": "",
"metadata": {},
"created_at": "2023-11-07T05:31:56Z",
"workspace_id": "",
"token_count": 123
}
]
}
```
### Filter results by time range
```python Python theme={null}
results = honcho.search("budget planning", filters={"created_at": {"gte": "2024-01-01", "lte": "2024-01-31"}})
```
```typescript TypeScript theme={null}
(async () => {
const results = await honcho.search("budget planning", { filters: { created_at: { gte: "2024-01-01", lte: "2024-01-31" } } });
})();
```
### Filter results by metadata
```python Python theme={null}
results = honcho.search("budget planning", filters={"metadata": {"key": "value"}})
```
```typescript TypeScript theme={null}
(async () => {
const results = await honcho.search("budget planning", { filters: { metadata: { key: "value" } } });
})();
```
### Best Practices
### Handle Empty Results Gracefully
```python Python theme={null}
# Always check for empty results
results = honcho.search("very specific query")
result_list = list(results)
if result_list:
print(f"Found {len(result_list)} results")
for result in result_list:
print(f"- {result}")
else:
print("No results found - try a broader search")
```
```typescript TypeScript theme={null}
import { Message } from "@honcho-ai/sdk";
(async () => {
// Always check for empty results
const results: Message[] = await honcho.search("very specific query");
if (results.length > 0) {
console.log(`Found ${results.length} results`);
for (const result of results) {
console.log(`- ${result.content}`);
}
} else {
console.log("No results found - try a broader search");
}
})();
```
## Conclusion
Honcho's search functionality provides powerful discovery capabilities across your conversational data. By understanding how to:
* Choose the appropriate search scope (workspace, session, or peer)
* Handle paginated results effectively
* Combine search with context building
You can build applications that provide intelligent insights and context-aware responses based on historical conversations and interactions.
# Storing Data
Source: https://docs.honcho.dev/v2/documentation/core-concepts/features/storing-data
Store Data in Honcho to Generate Memories and Insights
The most basic building block of Honcho's data model is the `Message` object.
A `Message` is sent by a `Peer` and saved in a `Session`
```python Python theme={null}
from honcho import Honcho
honcho = Honcho()
peer = honcho.peer("sample-peer")
session = honcho.session("sample-session")
message = peer.message("Hello, world!", session_id=session.id)
session.add_messages([message])
```
```typescript TypeScript theme={null}
import { Honcho } from '@honcho-ai/sdk';
const honcho = new Honcho({});
const peer = await honcho.peer('sample-peer');
const session = await honcho.session('sample-session');
const message = peer.message('Hello, world!');
await session.addMessages([message]);
```
Once a `Message` is saved in Honcho, it will kick off a background task that
looks at the new data to generate insights about the `Peer` that sent the `Message`
This is the default behavior of Honcho and can be turned off by [configuring the
Peer or Session](/v2/documentation/core-concepts/configuration)
This pattern of having a Peer, Session, and Messages is highly flexible and
works for many different use cases and agent setups. Some use cases may only
need a single Peer, but many Sessions. Others will only use a single `Session`
for their entire app. These are flexible components that work in any situation.
## Chat Bots
A common use case for Honcho to is to build a chatbot like ChatGPT or Claude.
In this case you can simply
* Make a `Peer` for the User
* Make a `Peer` for the AI
Then you can make a `Session` for each thread of conversation and save
`Messages` from the user and assistant in each turn of conversation
# Streaming Responses
Source: https://docs.honcho.dev/v2/documentation/core-concepts/features/streaming-response
Using streaming responses with Honcho SDKs
When working with AI-generated content, streaming the response as it's generated can significantly improve the user experience. Honcho provides streaming functionality in its SDKs that allows your application to display content as it's being generated, rather than waiting for the complete response.
## When to Use Streaming
Streaming is particularly useful for:
* Real-time chat interfaces
* Long-form content generation
* Applications where perceived speed is important
* Interactive agent experiences
* Reducing time-to-first-word in user interactions
## Streaming with the Dialectic Endpoint
One of the primary use cases for streaming in Honcho is with the Dialectic endpoint. This allows you to stream the AI's reasoning about a user in real-time.
### Prerequisites
```python Python theme={null}
from honcho import Honcho
# Initialize client (using the default workspace)
honcho = Honcho()
# Create or get peers
user = honcho.peer("demo-user")
assistant = honcho.peer("assistant")
# Create a new session
session = honcho.session("demo-session")
# Add peers to the session
session.add_peers([user, assistant])
# Store some messages for context (optional)
session.add_messages([
user.message("Hello, I'm testing the streaming functionality")
])
```
```typescript TypeScript theme={null}
import { Honcho } from '@honcho-ai/sdk';
(async () => {
// Initialize client (using the default workspace)
const honcho = new Honcho({});
// Create or get peers
const user = await honcho.peer('demo-user');
const assistant = await honcho.peer('assistant');
// Create a new session
const session = await honcho.session('demo-session');
// Add peers to the session
await session.addPeers([user, assistant]);
// Store some messages for context (optional)
await session.addMessages([
user.message("Hello, I'm testing the streaming functionality")
]);
})();
```
## Streaming from the Dialectic Endpoint
```python Python theme={null}
import time
# Basic streaming example
response_stream = user.chat("What can you tell me about this user?", stream=True)
for chunk in response_stream.iter_text():
print(chunk, end="", flush=True) # Print each chunk as it arrives
time.sleep(0.01) # Optional delay for demonstration
```
```typescript TypeScript theme={null}
(async () => {
// Basic streaming example
const responseStream = await user.chat("What can you tell me about this user?", {
stream: true
});
// Process the stream
for await (const chunk of responseStream.iter_text()) {
process.stdout.write(chunk); // Write to console without newlines
}
})();
```
## Working with Streaming Data
When working with streaming responses, consider these patterns:
1. **Progressive Rendering** - Update your UI as chunks arrive instead of waiting for the full response
2. **Buffered Processing** - Accumulate chunks until a logical break (like a sentence or paragraph)
3. **Token Counting** - Monitor token usage in real-time for applications with token limits
4. **Error Handling** - Implement appropriate error handling for interrupted streams
## Example: Restaurant Recommendation Chat
```python Python theme={null}
import asyncio
from honcho import Honcho
async def restaurant_recommendation_chat():
# Initialize client
honcho = Honcho()
# Create peers
user = honcho.peer("food-lover")
assistant = honcho.peer("restaurant-assistant")
# Create session
session = honcho.session("food-preferences-session")
# Add peers to session
await session.add_peers([user, assistant])
# Store multiple user messages about food preferences
user_messages = [
"I absolutely love spicy Thai food, especially curries with coconut milk.",
"Italian cuisine is another favorite - fresh pasta and wood-fired pizza are my weakness!",
"I try to eat vegetarian most of the time, but occasionally enjoy seafood.",
"I can't handle overly sweet desserts, but love something with dark chocolate."
]
# Add the user's messages to the session
session_messages = [user.message(message) for message in user_messages]
await session.add_messages(session_messages)
# Print the user messages
for message in user_messages:
print(f"User: {message}")
# Ask for restaurant recommendations based on preferences
print("\nRequesting restaurant recommendations...")
print("Assistant: ", end="", flush=True)
full_response = ""
# Stream the response using the user's peer to get recommendations
response_stream = user.chat(
"Based on this user's food preferences, recommend 3 restaurants they might enjoy in the Lower East Side.",
stream=True,
session_id=session.id
)
for chunk in response_stream.iter_text():
print(chunk, end="", flush=True)
full_response += chunk
await asyncio.sleep(0.01)
# Store the assistant's complete response
await session.add_messages([
assistant.message(full_response)
])
# Run the async function
if __name__ == "__main__":
asyncio.run(restaurant_recommendation_chat())
```
```typescript TypeScript theme={null}
import { Honcho } from '@honcho-ai/sdk';
(async () => {
async function restaurantRecommendationChat() {
// Initialize client
const honcho = new Honcho({});
// Create peers
const user = await honcho.peer('food-lover');
const assistant = await honcho.peer('restaurant-assistant');
// Create session
const session = await honcho.session('food-preferences-session');
// Add peers to session
await session.addPeers([user, assistant]);
// Store multiple user messages about food preferences
const userMessages = [
"I absolutely love spicy Thai food, especially curries with coconut milk.",
"Italian cuisine is another favorite - fresh pasta and wood-fired pizza are my weakness!",
"I try to eat vegetarian most of the time, but occasionally enjoy seafood.",
"I can't handle overly sweet desserts, but love something with dark chocolate."
];
// Add the user's messages to the session
const sessionMessages = userMessages.map(message => user.message(message));
await session.addMessages(sessionMessages);
// Print the user messages
for (const message of userMessages) {
console.log(`User: ${message}`);
}
// Ask for restaurant recommendations based on preferences
console.log("\nRequesting restaurant recommendations...");
process.stdout.write("Assistant: ");
let fullResponse = "";
// Stream the response using the user's peer to get recommendations
const responseStream = await user.chat(
"Based on this user's food preferences, recommend 3 restaurants they might enjoy in the Lower East Side.",
{
stream: true,
sessionId: session.id
}
);
for await (const chunk of responseStream.iter_text()) {
process.stdout.write(chunk);
fullResponse += chunk;
}
// Store the assistant's complete response
await session.addMessages([
assistant.message(fullResponse)
]);
}
await restaurantRecommendationChat();
})();
```
## Performance Considerations
When implementing streaming:
* Consider connection stability for mobile or unreliable networks
* Implement appropriate timeouts for stream operations
* Be mindful of memory usage when accumulating large responses
* Use appropriate error handling for network interruptions
Streaming responses provide a more interactive and engaging user experience. By implementing streaming in your Honcho applications, you can create more responsive AI-powered features that feel natural and immediate to your users.
# Using Filters
Source: https://docs.honcho.dev/v2/documentation/core-concepts/features/using-filters
Learn how to filter workspaces, peers, sessions, and messages using Honcho's powerful filtering system
Honcho provides a sophisticated filtering system that allows you to query workspaces, peers, sessions, and messages with precise control. The filtering system supports logical operators, comparison operators, metadata filtering, and wildcards to help you find exactly what you need.
## Basic Filtering Concepts
Filters in Honcho are expressed as dictionaries that define conditions for matching resources. The system supports both simple equality filters and complex queries with multiple conditions.
### Simple Filters
The most basic filters check for exact matches:
```python Python theme={null}
from honcho import Honcho
# Initialize client
honcho = Honcho()
# Simple peer filter
peers = honcho.get_peers(filters={"peer_id": "alice"})
# Simple session filter with metadata
sessions = honcho.get_sessions(filters={
"metadata": {"type": "support"}
})
# Simple message filter
messages = honcho.get_messages(filters={
"session_id": "support-chat-1",
"peer_id": "alice"
})
```
```typescript TypeScript theme={null}
import { Honcho } from "@honcho-ai/sdk";
(async () => {
// Initialize client
const honcho = new Honcho({});
// Simple peer filter
const peers = await honcho.getPeers({
filters: { peerId: "alice" }
});
// Simple session filter with metadata
const sessions = await honcho.getSessions({
filters: {
metadata: { type: "support" }
}
});
// Simple message filter
const messages = await honcho.getMessages({
filters: {
sessionId: "support-chat-1",
peerId: "alice"
}
});
})();
```
## Logical Operators
Combine multiple conditions using logical operators for complex queries:
### AND Operator
Use AND to require all conditions to be true:
```python Python theme={null}
messages = honcho.get_messages(filters={
"AND": [
{"session_id": "chat-1"},
{"created_at": {"gte": "2024-01-01"}}
]
})
```
```typescript TypeScript theme={null}
(async () => {
const messages = await honcho.getMessages({
filters: {
AND: [
{ sessionId: "chat-1" },
{ createdAt: { gte: "2024-01-01" } }
]
}
});
})();
```
### OR Operator
Use OR to match any of the specified conditions:
```python Python theme={null}
# Find messages from either alice or bob
messages = session.get_messages(filters={
"OR": [
{"peer_id": "alice"},
{"peer_id": "bob"}
]
})
# Complex OR with metadata conditions
sessions = honcho.get_sessions(filters={
"OR": [
{"metadata": {"priority": "high"}},
{"metadata": {"urgent": True}},
{"metadata": {"escalated": True}}
]
})
```
```typescript TypeScript theme={null}
(async () => {
// Find messages from either alice or bob
const messages = await session.getMessages({
filters: {
OR: [
{ peerId: "alice" },
{ peerId: "bob" }
]
}
});
// Complex OR with metadata conditions
const sessions = await honcho.getSessions({
filters: {
OR: [
{ metadata: { priority: "high" } },
{ metadata: { urgent: true } },
{ metadata: { escalated: true } }
]
}
});
})();
```
### NOT Operator
Use NOT to exclude specific conditions:
```python Python theme={null}
# Find all peers except alice
peers = honcho.get_peers(filters={
"NOT": [
{"peer_id": "alice"}
]
})
# Find sessions that are NOT completed
sessions = honcho.get_sessions(filters={
"NOT": [
{"metadata": {"status": "completed"}}
]
})
```
```typescript TypeScript theme={null}
(async () => {
// Find all peers except alice
const peers = await honcho.getPeers({
filters: {
NOT: [
{ peerId: "alice" }
]
}
});
// Find sessions that are NOT completed
const sessions = await honcho.getSessions({
filters: {
NOT: [
{ metadata: { status: "completed" } }
]
}
});
})();
```
### Combining Logical Operators
Create sophisticated queries by combining different logical operators:
```python Python theme={null}
# Find messages from alice OR bob, but NOT where message has archived set to true in metadata
messages = session.get_messages(filters={
"AND": [
{
"OR": [
{"peer_id": "alice"},
{"peer_id": "bob"}
]
},
{
"NOT": [
{"metadata": {"archived": True}}
]
}
]
})
```
```typescript TypeScript theme={null}
(async () => {
// Find messages from alice OR bob, but NOT where message has archived set to true in metadata
const messages = await session.getMessages({
filters: {
AND: [
{
OR: [
{ peerId: "alice" },
{ peerId: "bob" }
]
},
{
NOT: [
{ metadata: { archived: true } }
]
}
]
}
});
})();
```
## Comparison Operators
Use comparison operators for range queries and advanced matching:
### Numeric Comparisons
```python Python theme={null}
# Find sessions created after a specific date
sessions = honcho.get_sessions(filters={
"created_at": {"gte": "2024-01-01"}
})
# Find messages within a date range
messages = session.get_messages(filters={
"created_at": {
"gte": "2024-01-01",
"lte": "2024-12-31"
}
})
# Metadata numeric comparisons
sessions = honcho.get_sessions(filters={
"metadata": {
"score": {"gt": 8.5},
"duration": {"lte": 3600}
}
})
```
```typescript TypeScript theme={null}
(async () => {
// Find sessions created after a specific date
const sessions = await honcho.getSessions({
filters: {
createdAt: { gte: "2024-01-01" }
}
});
// Find messages within a date range
const messages = await session.getMessages({
filters: {
createdAt: {
gte: "2024-01-01",
lte: "2024-12-31"
}
}
});
// Metadata numeric comparisons
const sessions = await honcho.getSessions({
filters: {
metadata: {
score: { gt: 8.5 },
duration: { lte: 3600 }
}
}
});
})();
```
### List Membership
```python Python theme={null}
# Find messages from specific peers in a session
messages = session.get_messages(filters={
"peer_id": {"in": ["alice", "bob", "charlie"]}
})
# Find sessions with specific tags
sessions = honcho.get_sessions(filters={
"metadata": {
"tag": {"in": ["important", "urgent", "follow-up"]}
}
})
# Not equal comparisons
peers = honcho.get_peers(filters={
"metadata": {
"status": {"ne": "inactive"}
}
})
```
```typescript TypeScript theme={null}
(async () => {
// Find messages from specific peers in a session
const messages = await session.getMessages({
filters: {
peerId: { in: ["alice", "bob", "charlie"] }
}
});
// Find sessions with specific tags
const sessions = await honcho.getSessions({
filters: {
metadata: {
tag: { in: ["important", "urgent", "follow-up"] }
}
}
});
// Not equal comparisons
const peers = await honcho.getPeers({
filters: {
metadata: {
status: { ne: "inactive" }
}
}
});
})();
```
## Metadata Filtering
Metadata filtering is particularly powerful in Honcho, supporting nested conditions and complex queries:
### Basic Metadata Filtering
```python Python theme={null}
# Simple metadata equality
sessions = honcho.get_sessions(filters={
"metadata": {
"type": "customer_support",
"priority": "high"
}
})
# Nested metadata objects
peers = honcho.get_peers(filters={
"metadata": {
"profile": {
"role": "admin",
"department": "engineering"
}
}
})
```
```typescript TypeScript theme={null}
(async () => {
// Simple metadata equality
const sessions = await honcho.getSessions({
filters: {
metadata: {
type: "customer_support",
priority: "high"
}
}
});
// Nested metadata objects
const peers = await honcho.getPeers({
filters: {
metadata: {
profile: {
role: "admin",
department: "engineering"
}
}
}
});
})();
```
### Advanced Metadata Queries
If you want to do advanced queries like these, make sure not to create metadata fields that use the same names as the included comparison operators! For example, if you have a metadata field called `contains`, it will conflict with the `contains` operator.
```python Python theme={null}
# Metadata with comparison operators
sessions = honcho.get_sessions(filters={
"metadata": {
"score": {"gte": 4.0, "lte": 5.0},
"created_by": {"ne": "system"},
"tags": {"contains": "important"}
}
})
# Complex metadata conditions
messages = session.get_messages(filters={
"AND": [
{"metadata": {"sentiment": {"in": ["positive", "neutral"]}}},
{"metadata": {"confidence": {"gt": 0.8}}},
{"content": {"icontains": "thank"}}
]
})
```
```typescript TypeScript theme={null}
(async () => {
// Metadata with comparison operators
const sessions = await honcho.getSessions({
filters: {
metadata: {
score: { gte: 4.0, lte: 5.0 },
createdBy: { ne: "system" },
tags: { contains: "important" }
}
}
});
// Complex metadata conditions
const messages = await session.getMessages({
filters: {
AND: [
{ metadata: { sentiment: { in: ["positive", "neutral"] } } },
{ metadata: { confidence: { gt: 0.8 } } },
{ content: { icontains: "thank" } }
]
}
});
})();
```
## Wildcards
Use wildcards (\*) to match any value for a field:
```python Python theme={null}
# Find all sessions with any peer_id (essentially all sessions)
sessions = honcho.get_sessions(filters={
"peer_id": "*"
})
# Wildcard in lists - matches everything
messages = session.get_messages(filters={
"peer_id": {"in": ["alice", "bob", "*"]}
})
# Metadata wildcards
sessions = honcho.get_sessions(filters={
"metadata": {
"type": "*", # Any type
"status": "active" # But status must be active
}
})
```
```typescript TypeScript theme={null}
(async () => {
// Find all sessions with any peer_id (essentially all sessions)
const sessions = await honcho.getSessions({
filters: {
peerId: "*"
}
});
// Wildcard in lists - matches everything
const messages = await session.getMessages({
filters: {
peerId: { in: ["alice", "bob", "*"] }
}
});
// Metadata wildcards
const sessions = await honcho.getSessions({
filters: {
metadata: {
type: "*", // Any type
status: "active" // But status must be active
}
}
});
})();
```
## Resource-Specific Examples
### Filtering Workspaces
```python Python theme={null}
# Find workspaces by name pattern
workspaces = honcho.get_workspaces(filters={
"name": {"contains": "prod"}
})
# Filter by metadata
workspaces = honcho.get_workspaces(filters={
"metadata": {
"environment": "production",
"team": {"in": ["backend", "frontend", "devops"]}
}
})
```
```typescript TypeScript theme={null}
(async () => {
// Find workspaces by name pattern
const workspaces = await honcho.getWorkspaces({
filters: {
name: { contains: "prod" }
}
});
// Filter by metadata
const workspaces = await honcho.getWorkspaces({
filters: {
metadata: {
environment: "production",
team: { in: ["backend", "frontend", "devops"] }
}
}
});
})();
```
### Filtering Messages
```python Python theme={null}
# Find error messages from the last week
from datetime import datetime, timedelta
week_ago = (datetime.now() - timedelta(days=7)).isoformat()
messages = session.get_messages(filters={
"AND": [
{"content": {"icontains": "error"}},
{"created_at": {"gte": week_ago}},
{"metadata": {"level": {"in": ["error", "critical"]}}}
]
})
# Find messages in specific sessions with sentiment analysis
messages = session.get_messages(filters={
"AND": [
{"session_id": {"in": ["support-1", "support-2", "support-3"]}},
{"metadata": {"sentiment": "negative"}},
{"metadata": {"confidence": {"gte": 0.7}}}
]
})
```
```typescript TypeScript theme={null}
(async () => {
// Find error messages from the last week
const weekAgo = new Date(Date.now() - 7 * 24 * 60 * 60 * 1000).toISOString();
const messages = await session.getMessages({
filters: {
AND: [
{ content: { icontains: "error" } },
{ createdAt: { gte: weekAgo } },
{ metadata: { level: { in: ["error", "critical"] } } }
]
}
});
// Find messages in specific sessions with sentiment analysis
const messages = await session.getMessages({
filters: {
AND: [
{ sessionId: { in: ["support-1", "support-2", "support-3"] } },
{ metadata: { sentiment: "negative" } },
{ metadata: { confidence: { gte: 0.7 } } }
]
}
});
})();
```
## Error Handling
Handle filter errors gracefully:
```python Python theme={null}
from honcho.exceptions import FilterError
try:
# Invalid filter - unsupported operator
messages = session.get_messages(filters={
"created_at": {"invalid_operator": "2024-01-01"}
})
except FilterError as e:
print(f"Filter error: {e}")
# Handle the error appropriately
try:
# Invalid column name
sessions = honcho.get_sessions(filters={
"nonexistent_field": "value"
})
except FilterError as e:
print(f"Invalid field: {e}")
```
```typescript TypeScript theme={null}
(async () => {
try {
// Invalid filter - unsupported operator
const messages = await session.getMessages({
filters: {
createdAt: { invalidOperator: "2024-01-01" }
}
});
} catch (error) {
if (error.message.includes("filters")) {
console.error(`Filter error: ${error.message}`);
// Handle the error appropriately
}
}
try {
// Invalid column name
const sessions = await honcho.getSessions({
filters: {
nonexistentField: "value"
}
});
} catch (error) {
console.error(`Invalid field: ${error.message}`);
}
})();
```
## Conclusion
Honcho's filtering system provides powerful capabilities for querying your conversational data. By understanding how to:
* Use simple equality filters and complex logical operators
* Apply comparison operators for range and pattern matching
* Filter metadata with nested conditions
* Handle wildcards and dynamic filter construction
* Follow best practices for performance and validation
You can build sophisticated applications that efficiently find and process exactly the conversations, messages, and insights you need from your Honcho data.
# Working Representations
Source: https://docs.honcho.dev/v2/documentation/core-concepts/features/working-rep
Learn how to retrieve cached peer knowledge and understanding using Honcho's working representation system
Working representations are Honcho's system for accessing cached psychological models that capture what peers know, think, and remember. Unlike the `chat()` method which generates fresh representations on-demand, the `working_rep()` method retrieves pre-computed representations that have been automatically built and stored as conversations progress.
## How Working Representations Are Created
Working representations are automatically generated and cached through Honcho's background processing system:
1. **Automatic Generation**: When messages are added to sessions, they trigger background jobs that analyze conversations using theory of mind inference and long-term memory integration
2. **Cached Storage**: The generated representations are stored in the database as metadata on `Peer` objects (for global representations) or `SessionPeer` objects (for session-scoped representations)
3. **Retrieval**: The `working_rep()` method provides fast access to these cached representations without requiring LLM processing
**Cached vs On-Demand**: `working_rep()` retrieves cached representations for fast access, while `peer.chat()` generates fresh representations using the dialectic system. Use `working_rep()` when you need fast access to stored knowledge, and `chat()` when you need current analysis with custom queries.
## Basic Usage
Working representations are accessed through the `working_rep()` method on Session objects:
```python Python theme={null}
from honcho import Honcho
# Initialize client
honcho = Honcho()
# Create peers and session
user = honcho.peer("user-123")
assistant = honcho.peer("ai-assistant")
session = honcho.session("support-conversation")
# Add conversation to trigger representation generation
session.add_messages([
user.message("I'm having trouble with my billing account"),
assistant.message("I can help with that. What specific issue are you seeing?"),
user.message("My credit card was charged twice last month"),
assistant.message("I see duplicate charges on your account. Let me refund one of them.")
])
# Chat to generate a working representation
response = user.chat("What is this user's main concern right now?", session_id=session.id)
# Retrieve the cached working representation for the user
user_representation = session.working_rep("user-123")
print("Cached user representation:", user_representation)
```
```typescript TypeScript theme={null}
import { Honcho } from "@honcho-ai/sdk";
// Initialize client
const honcho = new Honcho({});
// Create peers and session
const user = await honcho.peer("user-123");
const assistant = await honcho.peer("ai-assistant");
const session = await honcho.session("support-conversation");
// Add conversation to trigger representation generation
await session.addMessages([
user.message("I'm having trouble with my billing account"),
assistant.message("I can help with that. What specific issue are you seeing?"),
user.message("My credit card was charged twice last month"),
assistant.message("I see duplicate charges on your account. Let me refund one of them.")
]);
// Chat to generate a working representation
const response = await user.chat("What is this user's main concern right now?", { sessionId: session.id });
// Retrieve the cached working representation for the user
const userRepresentation = await session.workingRep("user-123");
console.log("Cached user representation:", userRepresentation);
// Returns: { representation: Object }
```
## Understanding Representation Content
Cached working representations contain structured psychological analysis based on conversation history. The format typically includes:
### Current Mental State Predictions
Information about what the peer is currently thinking, feeling, or focused on based on recent messages.
### Relevant Long-term Facts
Facts about the peer that have been extracted and stored over time from various conversations.
### Example Representation Structure
```python Python theme={null}
# Example of what a cached representation might contain
representation = session.working_rep("user-123")
# Typical content structure:
"""
PREDICTION ABOUT THE USER'S CURRENT MENTAL STATE:
The user appears frustrated with a billing issue, specifically concerning duplicate charges.
They seem to have some confidence in the support process as they provided specific details.
RELEVANT LONG-TERM FACTS ABOUT THE USER:
- User has had previous billing inquiries
- User prefers direct, specific communication
- User is detail-oriented when reporting issues
"""
print("Full representation:", representation)
```
```typescript TypeScript theme={null}
// Example of what a cached representation might contain
const representation = await session.workingRep("user-123");
// Typical content structure:
/*
PREDICTION ABOUT THE USER'S CURRENT MENTAL STATE:
The user appears frustrated with a billing issue, specifically concerning duplicate charges.
They seem to have some confidence in the support process as they provided specific details.
RELEVANT LONG-TERM FACTS ABOUT THE USER:
- User has had previous billing inquiries
- User prefers direct, specific communication
- User is detail-oriented when reporting issues
*/
console.log("Full representation:", representation);
```
## When Representations Are Updated
Working representations are automatically updated through Honcho's background processing system:
### Message Processing Pipeline
1. **Message Creation**: When messages are added via `session.add_messages()` or similar methods
2. **Background Queuing**: Messages are queued for processing in the background
3. **Theory of Mind Analysis**: The system analyzes conversation patterns and psychological states
4. **Fact Extraction**: Long-term facts are extracted and stored in vector embeddings
5. **Representation Generation**: New representations are created combining current analysis with historical facts
6. **Cache Update**: The new representation is stored in the database metadata
### Processing Triggers
Representations are updated when:
* New messages are added to sessions
* Sufficient new content has accumulated
* The background processing system determines an update is needed
## Comparison with Chat Method
Understanding when to use `working_rep()` vs `peer.chat()`:
### Use `working_rep()` when:
* You need fast access to stored psychological models
* You want to see what the system has already learned about a peer
* You're building dashboards or analytics that display peer understanding
* You need consistent representations that don't change between calls
### Use `peer.chat()` when:
* You need to ask specific questions about a peer
* You want fresh analysis based on current conversation state
* You need customized insights for specific use cases
* You want to query about relationships between peers
```python Python theme={null}
# Fast cached access
cached_rep = session.working_rep("user-123")
print("Cached:", cached_rep[:100] + "...")
# Custom query with fresh analysis
custom_analysis = user.chat("What is this user's main concern right now?", session_id=session.id)
print("Fresh analysis:", custom_analysis)
```
```typescript TypeScript theme={null}
// Fast cached access
const cachedRep = await session.workingRep("user-123");
console.log("Cached:", cachedRep.substring(0, 100) + "...");
// Custom query with fresh analysis
const customAnalysis = await user.chat("What is this user's main concern right now?", { sessionId: session.id });
console.log("Fresh analysis:", customAnalysis);
```
## Best Practices
### 1. Ensure Availability Before Using
Make sure that a representation exists before processing it by using the chat endpoint first.
### 2. Use for Fast Analytics
Cached representations are ideal for analytics dashboards:
```python Python theme={null}
# Good: Fast dashboard updates using cached data
def update_analytics_dashboard(sessions):
analytics = {}
for session in sessions:
for peer_id in session.get_peer_ids():
rep = session.working_rep(peer_id)
analytics[peer_id] = analyze_representation(rep)
return analytics
```
```typescript TypeScript theme={null}
// Good: Fast dashboard updates using cached data
async function updateAnalyticsDashboard(sessions) {
const analytics: Record = {};
for (const session of sessions) {
const peerIds = await session.getPeerIds();
for (const peerId of peerIds) {
const rep = await session.workingRep(peerId);
analytics[peerId] = analyzeRepresentation(rep);
}
}
return analytics;
}
```
### 3. Combine with Fresh Analysis When Needed
Use cached representations for baseline understanding, and fresh analysis for current insights:
```python Python theme={null}
# Get baseline understanding from cache
baseline = session.working_rep("user-123")
# Get current specific insights
current_state = user.chat("How is this user feeling right now?", session_id=session.id)
# Combine for comprehensive view
comprehensive_view = {
"baseline_knowledge": baseline,
"current_analysis": current_state
}
```
```typescript TypeScript theme={null}
// Get baseline understanding from cache
const baseline = await session.workingRep("user-123");
// Get current specific insights
const currentState = await user.chat("How is this user feeling right now?", { sessionId: session.id });
// Combine for comprehensive view
const comprehensiveView = {
baselineKnowledge: baseline,
currentAnalysis: currentState
};
```
## Conclusion
Working representations provide fast access to cached psychological models that Honcho automatically builds and maintains. By understanding how to:
* Retrieve cached representations using `session.working_rep()`
* Parse and interpret representation content
* Handle cases where representations aren't available
* Combine cached and fresh analysis appropriately
You can build efficient applications that leverage Honcho's continuous learning about peer knowledge and mental states without the latency of real-time generation.
# Terminology
Source: https://docs.honcho.dev/v2/documentation/core-concepts/glossary
Glossary of AI and Honcho Specific Terms
## AI Development Basics
Essential terms for developers new to building AI applications.
#### LLM (Large Language Model)
The AI model that generates text responses, like GPT-4, Claude, or Llama. Think of it as the "brain" that powers your chatbot or AI assistant.
#### Prompt
The text you send to an AI model to get a response. This includes user messages, system instructions, and any context you provide.
#### Token
How AI models count and limit text. Roughly 1 token = 0.75 words. Models have token limits (like 4,000 or 128,000 tokens) that determine how much text they can process at once.
#### Context Window
The maximum amount of text an AI model can "remember" in one conversation. Once you exceed this limit, the model starts "forgetting" earlier parts of the conversation.
#### Embedding
Converting text into numerical vectors that computers can understand and compare. Enables "smart search" that finds similar content based on meaning, not just keywords.
#### Semantic Search
Search based on meaning rather than exact keyword matching, often using embeddings.
#### Agent
An AI system that can take actions and make decisions, not just generate text responses. Agents can use tools, call APIs, and interact with external systems.
## Honcho Terms
#### Global Representation
Derived context of a specific peer, synthesizing insights from interactions across all sessions, including arbitrary data ingested by this specific peer. With arbitrary data, a global representation can be made independent of sessions.
#### Local Representation
One peer's persistent context of another based on observed interactions/messages.
## Cognitive Science Terms
Cognitive science terms that are used throughout the inspiration and
implementation of Honcho
#### Theory of Mind
The ability of a computer to understand, remember, and interact with its own mind, enabling it to form representations of the world and make decisions based on its own knowledge and behavior.
#### Social Cognition
The mental processes by which we perceive, interpret, and respond to information about others and social situations. It includes the encoding, storage, retrieval, and application of social knowledge.
#### Cognitive Architecture
In CogSci, frameworks describing fixed structures & mechanisms underlying human cognition. Such frameworks aim to explain how various components of the mind—perception, memory, reasoning, learning, etc—combine to produce intelligent behavior across diverse environments. In AI, it’s a computational implementation of these theories—a designed framework to replicate human cognitive functions.
#### Predictive Coding
A theory in CogSci proposing the brain is an active prediction machine, continually generating & updating internal world models to anticipate sensory input, rather than passively receiving it—closely linked to Bayesian brain hypotheses, which hold that the brain interprets the world probabilistically, weighing prior knowledge against new evidence to minimize uncertainty.
# Summarizer
Source: https://docs.honcho.dev/v2/documentation/core-concepts/summarizer
How Honcho creates summaries of conversations
Almost all agents require, in addition to personalization and memory, a way to quickly prime a context window with a summary of the conversation (in Honcho, this is equivalent to a `session`). The general strategy for summarization is to combine a list of recent messages verbatim with a compressed LLM-generated summary of the older messages not included. Implementing this correctly, in such a way that the resulting context is:
* Exhaustive: the combination of recent messages and summary should cover the entire conversation
* Dynamically sized: the tokens used on both summary and recent messages should be malleable based on desired token usage
* Performant: while creation of the summary by LLM introduces necessary latency, this should never add latency to an arbitrary end-user request
...is a non-trivial problem. Summarization should not be necessary to re-implement for every new agent you build, so Honcho comes with a built-in solution.
### Creating Summaries
Honcho already has an asynchronous task queue for the purpose of deriving facts from messages. This is the ideal place to create summaries where they won't add latency to a message. Currently, Honcho has two configurable summary types:
* Short summaries: by default, enqueued every 20 messages and given a token limit of 1000
* Long summaries: by default, enqueued every 60 messages and given a token limit of 4000
Both summaries are designed to be exhaustive: when enqueued, they are given the *prior* summary of their type plus every message after that summary. This recursive compression process naturally biases the summary towards recent messages while still covering the entire conversation.
For example, if message 160 in a conversation triggers a short summary, as it would with default settings, the summary task would retrieve the prior short summary (message 140) plus messages 141-160. It would then produce a summary of messages 0-160 and store that in the short summary slot on the session. Every session has a single slot for each summary type: new summaries replace old ones.
It's important to keep in mind that summary tasks run in the background and are not guaranteed to complete before the next message. However, they are guaranteed to complete in order, so that if a user saves 100 messages in a single batch, the short summary will first be created for messages 0-20, then 21-40, and so on, in our desired recursive way.
### Retrieving Summaries
Summaries are retrieved from the session by the `get_context` method. This method has two parameters:
* `summary`: A boolean indicating whether to include the summary in the return type. The default is true.
* `tokens`: An integer indicating the maximum number of tokens to use for the context. **If not provided, `get_context` will retrieve as many tokens as are required to create exhaustive conversation coverage.**
The return type is simply a list of recent messages and a summary if the flag is used. These two components are dynamically sized based on the token limit. Combined, they will always be below the given token limit. Honcho reserves 60% of the context size for recent messages and 40% for the summary.
There's a critical trade-off to understand between exhaustiveness and token usage. Let's go through some scenarios:
* If the *last message* contains more tokens than the context token limit, no summary *or* message list is possible -- both will be empty.
* If the *last few messages* contain more tokens than the context token limit, no summary is possible -- the context will only contain the last 1 or 2 messages that fit in the token limit.
* If the summaries contain more tokens than the context token limit, no summary is possible -- the context will only contain the X most recent messages that fit in the token limit. Note that while summaries will often be smaller than their token limits, avoiding this scenario means passing a higher token limit than the Honcho-configured summary size(s). For this reason, the default token limit for `get_context` is a few times larger than the configured long summary size.
The above scenarios indicate where summarization is not possible -- therefore, the context retrieved will almost certainly **not** be exhaustive.
Sometimes, gaps in context aren't an issue. In these cases, it's best to pass a reasonable token limit depending on your needs. Other cases demand exhaustive context -- don't pass a token limit and just let Honcho retrieve the ideal combination of summary and recent messages. Finally, if you don't care about the conversation at large and just want the last few messages, set `summary` to false and `tokens` to some multiple of your desired message count. Note that context messages are not paginated, so there's a hard limit on the number of messages that can be retrieved (currently 100,000 tokens).
As a final note, remember that summaries are generated asynchronously and therefore may not be available immediately. If you batch-save a large number of messages, assume that summaries will not be available until those messages are processed, which can take seconds to minutes depending on the number of messages and the configured LLM provider. Exhaustive `get_context` calls performed during this time will likely just return the messages in the session.
# Honcho
Source: https://docs.honcho.dev/v2/documentation/introduction/overview
Go beyond memory to agents with actual social intelligence
Honcho is an AI-native memory library for building agents with
[state-of-the-art](https://blog.plasticlabs.ai/research/Introducing-Neuromancer-XR)
long-term memory.
Agents using Honcho have perfect recall with a wide variety of tools to traverse
their history and get the exact context they need when they need it.
It then goes beyond basic memory by reasoning about the stored history
to expand the latent information available to your agent. Agents using Honcho
will understand who they are, who they are interacting with, what happened, and
when it happened — all without you having to think about it.
Use it to build
* Highly personalized experiences
* Agents with social cognition
* Agents with rich identity that evolve over time
* Multi-agent systems with complex social dynamics
```python theme={null}
# Start simple by just adding messages
session.add_messages([alice.message("I learn best with examples")])
# Honcho will automatically reason about the message to generate insights about Alice
# Get insights by chatting with the agent
insight = peer.chat("How should I explain this concept?")
# > "This user learns best through concrete examples..."
```
Designed for developers and agents alike:
* **Natural Language Queries**: Chat with Honcho in natural language via the [Dialectic API](../core-concepts/architecture#dialectic-api) to get insights about your users and agents
* **Automatic Context Management**: Smart conversation summaries to have infinite chats
* **Native multi-agent support**: Sessions can natively have as many participants as you need
* **Agent-first interfaces**: MCP connections and APIs designed for agents to consume and use as tools
* **Provider Agnostic**: Works with any LLM or Agent Framework
## How It Works
 At a high level Honcho works very simply:
1. Store messages sent by users and agents in Honcho
2. Honcho reasons about the messages to generate insights about each entity in
the system
3. At runtime your agents can leverage insights from Honcho to get the exact
context they need
There are several API endpoints to leverage the memory & insights in Honcho.
### Get Context
This is the easiest way to leverage Honcho. simply call get context and get the
most relevant information for your conversation. This endpoint is highly
customizable so you can specify parameters such as:
* A number of tokens you want
* An option to include summaries of the conversation
* An option to get a profile of a specific user (Peer Card & Representation)
### Search
This endpoint lets you search across Honcho for relevant messages using a
hybrid search strategy that combines full-text and semantic search.
You can optionally scope the endpoint to a specific workspace, peer, or session.
### Working Representation
This endpoint gives you a snapshot of a user or what we call a
**Representation**. Essentially, a list of explicit and deductive facts about
the user that are relevant to the current conversation.
Plug this into your prompt to get a quick overview of the user.
### Dialectic API
This endpoint lets you chat with Honcho about any entity in your system. Honcho
will leverage what it has remembered and learned about the entity to provide in-context actionable insights.
This is especially helpful when you want your agent to back-channel with Honcho to
change its behavior at runtime.
Example Queries:
* "What's the best way to explain technical concepts to this user?"
* "Is this user more task-oriented or relationship-oriented?"
* "What time of day is this user most engaged?"
* "How does this user prefer to receive feedback?"
* "What are this user's core values based on our conversations?"
## Getting Started
Ready to integrate Honcho into your application?
Get up and running with
Honcho in minutes Understand Honcho's
fundamental concepts
## Community & Support
* **GitHub**: [plastic-labs/honcho](https://github.com/plastic-labs/honcho)
* **Discord**: [Join our community](http://discord.gg/plasticlabs)
* **Issues**: Report bugs and request features on GitHub
# Quickstart
Source: https://docs.honcho.dev/v2/documentation/introduction/quickstart
Start building with Honcho in under 5 minutes.
For production-level use, Honcho offers two powerful ways to leverage ambient personalization: our managed platform and our open source solution. Read further if you want to explore the quickstart demo.
Fully managed, hassle-free solution with one-click deployment
Self-hosted, fully customizable, and open source
# Getting Started
Have your project use Honcho's ambient personalization capabilities in just a few steps. No signup required!
By default, the SDK uses the demo server hosted at demo.honcho.dev. The demo server is meant for quick experimentation and the data is cleared on a regular basis. Do not use for production applications.
For production use:
1. Get your API key at [app.honcho.dev/api-keys](https://app.honcho.dev/api-keys)
2. Set `environment="production"` and provide your `api_key`
## 1. Install the SDK
```bash Python (uv) theme={null}
uv add honcho-ai
```
```bash Python (pip) theme={null}
pip install honcho-ai
```
```bash TypeScript (npm) theme={null}
npm install @honcho-ai/sdk
```
```bash TypeScript (yarn) theme={null}
yarn add @honcho-ai/sdk
```
```bash TypeScript (pnpm) theme={null}
pnpm add @honcho-ai/sdk
```
## 2. Initialize the Client
The Honcho client is the main entry point for interacting with Honcho's API. By default, it uses the demo environment and a default workspace.
### Demo Environment (Default)
```python Python theme={null}
from honcho import Honcho
# Initialize client (uses demo environment and default workspace)
honcho = Honcho()
```
```typescript TypeScript theme={null}
import { Honcho } from '@honcho-ai/sdk';
// Initialize client (uses demo environment and default workspace)
const honcho = new Honcho({});
```
### Production Environment
```python Python theme={null}
import os
from honcho import Honcho
# Production environment with API key
honcho = Honcho(
api_key=os.environ["HONCHO_API_KEY"],
environment="production",
# Create a workspace, otherwise set to "default"
# workspaceId="your-workspace-id"
)
```
```typescript TypeScript theme={null}
import { Honcho } from '@honcho-ai/sdk';
// Production environment with API key
const honcho = new Honcho({
apiKey: process.env.HONCHO_API_KEY!,
environment: "production",
// Create a workspace, otherwise set to "default"
// workspace: "your-workspace-id"
});
```
## 3. Create Peers
Peers represent individual users, AI agents, or any conversational entity in your system:
```python Python theme={null}
alice = honcho.peer("alice")
bob = honcho.peer("bob")
```
```typescript TypeScript theme={null}
const alice = await honcho.peer("alice")
const bob = await honcho.peer("bob")
```
## 4. Create a Session
Sessions are independent conversations that can include multiple peers:
```python Python theme={null}
session = honcho.session("session_1")
session.add_peers([alice, bob])
```
```typescript TypeScript theme={null}
const session = await honcho.session("session_1")
await session.addPeers([alice, bob])
```
## 5. Add Messages
Add some conversation messages. Honcho automatically learns from these interactions:
```python Python theme={null}
session.add_messages([
alice.message("Hi Bob, how are you?"),
bob.message("I'm good, thank you!"),
alice.message("What are you doing today after work?"),
bob.message("I'm going to the gym! I've been trying to get back in shape."),
alice.message("That's great! I should probably start exercising too."),
bob.message("You should! I find that evening workouts help me relax."),
])
```
```typescript TypeScript theme={null}
await session.addMessages([
alice.message("Hi Bob, how are you?"),
bob.message("I'm good, thank you!"),
alice.message("What are you doing today after work?"),
bob.message("I'm going to the gym! I've been trying to get back in shape."),
alice.message("That's great! I should probably start exercising too."),
bob.message("You should! I find that evening workouts help me relax."),
])
```
## 6. Query for Insights
Now ask Honcho what it's learned - this is where the magic happens:
```python Python theme={null}
# Ask what Bob is like
response = bob.chat("Tell me about Bob's interests and habits")
print(response)
# Returns rich context like:
# "Bob is health-conscious and has been working on getting back in shape.
# He regularly goes to the gym, particularly in the evenings, and finds
# exercise helps him relax. He's encouraging about fitness and willing
# to share advice about workout routines."
```
```typescript TypeScript theme={null}
bob.chat("Tell me about Bob's interests and habits").then((response) => {
console.log(response);
// Returns rich context like:
// "Bob is health-conscious and has been working on getting back in shape.
// He regularly goes to the gym, particularly in the evenings, and finds
// exercise helps him relax. He's encouraging about fitness and willing
// to share advice about workout routines."
})
```
## 7. Putting it all together
```python Python theme={null}
import os
from honcho import Honcho
# Create your client
honcho = Honcho(
api_key=os.environ["HONCHO_API_KEY"],
environment="production",
# Create a workspace, otherwise set to "default"
# workspaceId="your-workspace-id"
)
# Get your Peers
alice = honcho.peer("alice")
bob = honcho.peer("bob")
# Make a Session and add your Peers
session = honcho.session("session_1")
session.add_peers([alice, bob])
# Add messages sent by your Peers
session.add_messages([
alice.message("Hi Bob, how are you?"),
bob.message("I'm good, thank you!"),
alice.message("What are you doing today after work?"),
bob.message("I'm going to the gym! I've been trying to get back in shape."),
alice.message("That's great! I should probably start exercising too."),
bob.message("You should! I find that evening workouts help me relax."),
])
# Get insights about your Peers
response = bob.chat("Tell me about Bob's interests and habits")
print(response)
# Returns rich context like:
# "Bob is health-conscious and has been working on getting back in shape.
# He regularly goes to the gym, particularly in the evenings, and finds
# exercise helps him relax. He's encouraging about fitness and willing
# to share advice about workout routines."
```
```typescript TypeScript theme={null}
import { Honcho } from '@honcho-ai/sdk';
// Create your client
const honcho = new Honcho({
apiKey: process.env.HONCHO_API_KEY!,
environment: "production",
// Create a workspace, otherwise set to "default"
// workspace: "your-workspace-id"
});
// Get your Peers
const alice = await honcho.peer("alice")
const bob = await honcho.peer("bob")
// Make a Session and add your peers
const session = await honcho.session("session_1")
await session.addPeers([alice, bob])
// Add messages sent by your Peers
await session.addMessages([
alice.message("Hi Bob, how are you?"),
bob.message("I'm good, thank you!"),
alice.message("What are you doing today after work?"),
bob.message("I'm going to the gym! I've been trying to get back in shape."),
alice.message("That's great! I should probably start exercising too."),
bob.message("You should! I find that evening workouts help me relax."),
])
// Get insights about your peers
bob.chat("Tell me about Bob's interests and habits").then((response) => {
console.log(response);
// Returns rich context like:
// "Bob is health-conscious and has been working on getting back in shape.
// He regularly goes to the gym, particularly in the evenings, and finds
// exercise helps him relax. He's encouraging about fitness and willing
// to share advice about workout routines."
})
```
## What Just Happened?
You just got through building a simple conversation between two people, Alice
and Bob. We:
1. Set up our connection to Honcho.
2. Setup who the participants of our conversation are, these are called `Peers`.
3. Made a `Session` and added our `Peers` to it.
4. Sent messages from our `Peers`
5. Chat with Honcho to get insights about one of the `Peers` in the conversation
As soon as you save a message in Honcho, it will start to reason about it to
pull out insights and develop a profile of the user. This is the default
behavior and can be toggled off via [the configuration](/v2/documentation/core-concepts/configuration).
## Next Steps
Learn about the data primitives in Honcho and how they work together
Sign up for Managed Honcho and get started building agents now.
Check out spellbooks to see different examples apps built with Honcho
# AI-Powered Honcho Setup
Source: https://docs.honcho.dev/v2/documentation/introduction/vibecoding
Universal starter prompt for building with Honcho
These docs are designed to be easily consumable for LLMs. Each page has a button
the lets you copy the page as Markdown or paste directly into ChatGPT or Claude.
Additionally, we follow the llms.txt standard. There are both an llms.txt and
llms-full.txt available.
* [llms.txt](/llms.txt)
* [llms-full.txt](/llms-full.txt)
Additionally, we provide a starter prompt to paste into a coding assistant to
quickly get started building with Honcho.
## 🚀 Universal Starter Prompt
```
I want to start building with Honcho - a memory and personalization platform for AI applications.
## Honcho Resources
**Documentation:**
- Main docs: https://docs.honcho.dev
- API Reference: https://docs.honcho.dev/v2/api-reference/introduction
- Quickstart: https://docs.honcho.dev/v2/documentation/introduction/quickstart
- Architecture: https://docs.honcho.dev/v2/documentation/reference/architecture
**Code & Examples:**
- Core repo: https://github.com/plastic-labs/honcho
- Python SDK: https://github.com/plastic-labs/honcho-python
- TypeScript SDK: https://github.com/plastic-labs/honcho-node
- Discord bot starter: https://github.com/plastic-labs/discord-python-starter
- Telegram bot example: https://github.com/plastic-labs/telegram-python-starter
**What Honcho Does:**
Honcho provides persistent memory and personalization for AI apps. It automatically:
- Stores conversation history across sessions
- Learns facts about users from conversations
- Builds user representations for personalized responses
- Manages multi-user sessions with theory of mind
- Provides context injection for any LLM
**Architecture Overview:**
- Core primitives: Workspaces contain Peers (users/agents) and Sessions (conversations)
- Peers can observe other peers in sessions (configurable with observe_me_observe_others)
- Background deriver processes messages to extract facts and update representations
- Dialectic API provides personalized responses based on learned context
- Supports any LLM (OpenAI, Anthropic, open source)
- Can use demo server or self-host
Please assess the resources above and ask me relevant questions to help build a well-structured application using Honcho. Consider asking about:
- What I'm trying to build
- My technical preferences and stack
- Whether I want to use the demo server or self-host
- My experience level with the technologies involved
- Specific features I need (multi-user, voice, web UI, etc.)
Once you understand my needs, help me create a working implementation with proper memory persistence.
```
# The Honcho Dashboard
Source: https://docs.honcho.dev/v2/documentation/reference/platform
Build socially intelligent agents without worrying about infrastructure
Start using the platform to manage Honcho instances for your workspace or app.
The quickest way to begin using Honcho in production is with the
[Honcho Cloud Platform](https://app.honcho.dev). Sign up, generate an API key,
and start building with Honcho.
## 1. Go to [app.honcho.dev](https://app.honcho.dev)
Create an account to start using Honcho. If a teammate already uses Honcho, ask
them to invite you to their organization. Otherwise, you'll see a banner
prompting you to create a new one.
Once you've created an organization, you'll be taken to the dashboard and see
the Welcome page with integration guidance and links to documentation.
At a high level Honcho works very simply:
1. Store messages sent by users and agents in Honcho
2. Honcho reasons about the messages to generate insights about each entity in
the system
3. At runtime your agents can leverage insights from Honcho to get the exact
context they need
There are several API endpoints to leverage the memory & insights in Honcho.
### Get Context
This is the easiest way to leverage Honcho. simply call get context and get the
most relevant information for your conversation. This endpoint is highly
customizable so you can specify parameters such as:
* A number of tokens you want
* An option to include summaries of the conversation
* An option to get a profile of a specific user (Peer Card & Representation)
### Search
This endpoint lets you search across Honcho for relevant messages using a
hybrid search strategy that combines full-text and semantic search.
You can optionally scope the endpoint to a specific workspace, peer, or session.
### Working Representation
This endpoint gives you a snapshot of a user or what we call a
**Representation**. Essentially, a list of explicit and deductive facts about
the user that are relevant to the current conversation.
Plug this into your prompt to get a quick overview of the user.
### Dialectic API
This endpoint lets you chat with Honcho about any entity in your system. Honcho
will leverage what it has remembered and learned about the entity to provide in-context actionable insights.
This is especially helpful when you want your agent to back-channel with Honcho to
change its behavior at runtime.
Example Queries:
* "What's the best way to explain technical concepts to this user?"
* "Is this user more task-oriented or relationship-oriented?"
* "What time of day is this user most engaged?"
* "How does this user prefer to receive feedback?"
* "What are this user's core values based on our conversations?"
## Getting Started
Ready to integrate Honcho into your application?
Get up and running with
Honcho in minutes Understand Honcho's
fundamental concepts
## Community & Support
* **GitHub**: [plastic-labs/honcho](https://github.com/plastic-labs/honcho)
* **Discord**: [Join our community](http://discord.gg/plasticlabs)
* **Issues**: Report bugs and request features on GitHub
# Quickstart
Source: https://docs.honcho.dev/v2/documentation/introduction/quickstart
Start building with Honcho in under 5 minutes.
For production-level use, Honcho offers two powerful ways to leverage ambient personalization: our managed platform and our open source solution. Read further if you want to explore the quickstart demo.
Fully managed, hassle-free solution with one-click deployment
Self-hosted, fully customizable, and open source
# Getting Started
Have your project use Honcho's ambient personalization capabilities in just a few steps. No signup required!
By default, the SDK uses the demo server hosted at demo.honcho.dev. The demo server is meant for quick experimentation and the data is cleared on a regular basis. Do not use for production applications.
For production use:
1. Get your API key at [app.honcho.dev/api-keys](https://app.honcho.dev/api-keys)
2. Set `environment="production"` and provide your `api_key`
## 1. Install the SDK
```bash Python (uv) theme={null}
uv add honcho-ai
```
```bash Python (pip) theme={null}
pip install honcho-ai
```
```bash TypeScript (npm) theme={null}
npm install @honcho-ai/sdk
```
```bash TypeScript (yarn) theme={null}
yarn add @honcho-ai/sdk
```
```bash TypeScript (pnpm) theme={null}
pnpm add @honcho-ai/sdk
```
## 2. Initialize the Client
The Honcho client is the main entry point for interacting with Honcho's API. By default, it uses the demo environment and a default workspace.
### Demo Environment (Default)
```python Python theme={null}
from honcho import Honcho
# Initialize client (uses demo environment and default workspace)
honcho = Honcho()
```
```typescript TypeScript theme={null}
import { Honcho } from '@honcho-ai/sdk';
// Initialize client (uses demo environment and default workspace)
const honcho = new Honcho({});
```
### Production Environment
```python Python theme={null}
import os
from honcho import Honcho
# Production environment with API key
honcho = Honcho(
api_key=os.environ["HONCHO_API_KEY"],
environment="production",
# Create a workspace, otherwise set to "default"
# workspaceId="your-workspace-id"
)
```
```typescript TypeScript theme={null}
import { Honcho } from '@honcho-ai/sdk';
// Production environment with API key
const honcho = new Honcho({
apiKey: process.env.HONCHO_API_KEY!,
environment: "production",
// Create a workspace, otherwise set to "default"
// workspace: "your-workspace-id"
});
```
## 3. Create Peers
Peers represent individual users, AI agents, or any conversational entity in your system:
```python Python theme={null}
alice = honcho.peer("alice")
bob = honcho.peer("bob")
```
```typescript TypeScript theme={null}
const alice = await honcho.peer("alice")
const bob = await honcho.peer("bob")
```
## 4. Create a Session
Sessions are independent conversations that can include multiple peers:
```python Python theme={null}
session = honcho.session("session_1")
session.add_peers([alice, bob])
```
```typescript TypeScript theme={null}
const session = await honcho.session("session_1")
await session.addPeers([alice, bob])
```
## 5. Add Messages
Add some conversation messages. Honcho automatically learns from these interactions:
```python Python theme={null}
session.add_messages([
alice.message("Hi Bob, how are you?"),
bob.message("I'm good, thank you!"),
alice.message("What are you doing today after work?"),
bob.message("I'm going to the gym! I've been trying to get back in shape."),
alice.message("That's great! I should probably start exercising too."),
bob.message("You should! I find that evening workouts help me relax."),
])
```
```typescript TypeScript theme={null}
await session.addMessages([
alice.message("Hi Bob, how are you?"),
bob.message("I'm good, thank you!"),
alice.message("What are you doing today after work?"),
bob.message("I'm going to the gym! I've been trying to get back in shape."),
alice.message("That's great! I should probably start exercising too."),
bob.message("You should! I find that evening workouts help me relax."),
])
```
## 6. Query for Insights
Now ask Honcho what it's learned - this is where the magic happens:
```python Python theme={null}
# Ask what Bob is like
response = bob.chat("Tell me about Bob's interests and habits")
print(response)
# Returns rich context like:
# "Bob is health-conscious and has been working on getting back in shape.
# He regularly goes to the gym, particularly in the evenings, and finds
# exercise helps him relax. He's encouraging about fitness and willing
# to share advice about workout routines."
```
```typescript TypeScript theme={null}
bob.chat("Tell me about Bob's interests and habits").then((response) => {
console.log(response);
// Returns rich context like:
// "Bob is health-conscious and has been working on getting back in shape.
// He regularly goes to the gym, particularly in the evenings, and finds
// exercise helps him relax. He's encouraging about fitness and willing
// to share advice about workout routines."
})
```
## 7. Putting it all together
```python Python theme={null}
import os
from honcho import Honcho
# Create your client
honcho = Honcho(
api_key=os.environ["HONCHO_API_KEY"],
environment="production",
# Create a workspace, otherwise set to "default"
# workspaceId="your-workspace-id"
)
# Get your Peers
alice = honcho.peer("alice")
bob = honcho.peer("bob")
# Make a Session and add your Peers
session = honcho.session("session_1")
session.add_peers([alice, bob])
# Add messages sent by your Peers
session.add_messages([
alice.message("Hi Bob, how are you?"),
bob.message("I'm good, thank you!"),
alice.message("What are you doing today after work?"),
bob.message("I'm going to the gym! I've been trying to get back in shape."),
alice.message("That's great! I should probably start exercising too."),
bob.message("You should! I find that evening workouts help me relax."),
])
# Get insights about your Peers
response = bob.chat("Tell me about Bob's interests and habits")
print(response)
# Returns rich context like:
# "Bob is health-conscious and has been working on getting back in shape.
# He regularly goes to the gym, particularly in the evenings, and finds
# exercise helps him relax. He's encouraging about fitness and willing
# to share advice about workout routines."
```
```typescript TypeScript theme={null}
import { Honcho } from '@honcho-ai/sdk';
// Create your client
const honcho = new Honcho({
apiKey: process.env.HONCHO_API_KEY!,
environment: "production",
// Create a workspace, otherwise set to "default"
// workspace: "your-workspace-id"
});
// Get your Peers
const alice = await honcho.peer("alice")
const bob = await honcho.peer("bob")
// Make a Session and add your peers
const session = await honcho.session("session_1")
await session.addPeers([alice, bob])
// Add messages sent by your Peers
await session.addMessages([
alice.message("Hi Bob, how are you?"),
bob.message("I'm good, thank you!"),
alice.message("What are you doing today after work?"),
bob.message("I'm going to the gym! I've been trying to get back in shape."),
alice.message("That's great! I should probably start exercising too."),
bob.message("You should! I find that evening workouts help me relax."),
])
// Get insights about your peers
bob.chat("Tell me about Bob's interests and habits").then((response) => {
console.log(response);
// Returns rich context like:
// "Bob is health-conscious and has been working on getting back in shape.
// He regularly goes to the gym, particularly in the evenings, and finds
// exercise helps him relax. He's encouraging about fitness and willing
// to share advice about workout routines."
})
```
## What Just Happened?
You just got through building a simple conversation between two people, Alice
and Bob. We:
1. Set up our connection to Honcho.
2. Setup who the participants of our conversation are, these are called `Peers`.
3. Made a `Session` and added our `Peers` to it.
4. Sent messages from our `Peers`
5. Chat with Honcho to get insights about one of the `Peers` in the conversation
As soon as you save a message in Honcho, it will start to reason about it to
pull out insights and develop a profile of the user. This is the default
behavior and can be toggled off via [the configuration](/v2/documentation/core-concepts/configuration).
## Next Steps
Learn about the data primitives in Honcho and how they work together
Sign up for Managed Honcho and get started building agents now.
Check out spellbooks to see different examples apps built with Honcho
# AI-Powered Honcho Setup
Source: https://docs.honcho.dev/v2/documentation/introduction/vibecoding
Universal starter prompt for building with Honcho
These docs are designed to be easily consumable for LLMs. Each page has a button
the lets you copy the page as Markdown or paste directly into ChatGPT or Claude.
Additionally, we follow the llms.txt standard. There are both an llms.txt and
llms-full.txt available.
* [llms.txt](/llms.txt)
* [llms-full.txt](/llms-full.txt)
Additionally, we provide a starter prompt to paste into a coding assistant to
quickly get started building with Honcho.
## 🚀 Universal Starter Prompt
```
I want to start building with Honcho - a memory and personalization platform for AI applications.
## Honcho Resources
**Documentation:**
- Main docs: https://docs.honcho.dev
- API Reference: https://docs.honcho.dev/v2/api-reference/introduction
- Quickstart: https://docs.honcho.dev/v2/documentation/introduction/quickstart
- Architecture: https://docs.honcho.dev/v2/documentation/reference/architecture
**Code & Examples:**
- Core repo: https://github.com/plastic-labs/honcho
- Python SDK: https://github.com/plastic-labs/honcho-python
- TypeScript SDK: https://github.com/plastic-labs/honcho-node
- Discord bot starter: https://github.com/plastic-labs/discord-python-starter
- Telegram bot example: https://github.com/plastic-labs/telegram-python-starter
**What Honcho Does:**
Honcho provides persistent memory and personalization for AI apps. It automatically:
- Stores conversation history across sessions
- Learns facts about users from conversations
- Builds user representations for personalized responses
- Manages multi-user sessions with theory of mind
- Provides context injection for any LLM
**Architecture Overview:**
- Core primitives: Workspaces contain Peers (users/agents) and Sessions (conversations)
- Peers can observe other peers in sessions (configurable with observe_me_observe_others)
- Background deriver processes messages to extract facts and update representations
- Dialectic API provides personalized responses based on learned context
- Supports any LLM (OpenAI, Anthropic, open source)
- Can use demo server or self-host
Please assess the resources above and ask me relevant questions to help build a well-structured application using Honcho. Consider asking about:
- What I'm trying to build
- My technical preferences and stack
- Whether I want to use the demo server or self-host
- My experience level with the technologies involved
- Specific features I need (multi-user, voice, web UI, etc.)
Once you understand my needs, help me create a working implementation with proper memory persistence.
```
# The Honcho Dashboard
Source: https://docs.honcho.dev/v2/documentation/reference/platform
Build socially intelligent agents without worrying about infrastructure
Start using the platform to manage Honcho instances for your workspace or app.
The quickest way to begin using Honcho in production is with the
[Honcho Cloud Platform](https://app.honcho.dev). Sign up, generate an API key,
and start building with Honcho.
## 1. Go to [app.honcho.dev](https://app.honcho.dev)
Create an account to start using Honcho. If a teammate already uses Honcho, ask
them to invite you to their organization. Otherwise, you'll see a banner
prompting you to create a new one.
Once you've created an organization, you'll be taken to the dashboard and see
the Welcome page with integration guidance and links to documentation.
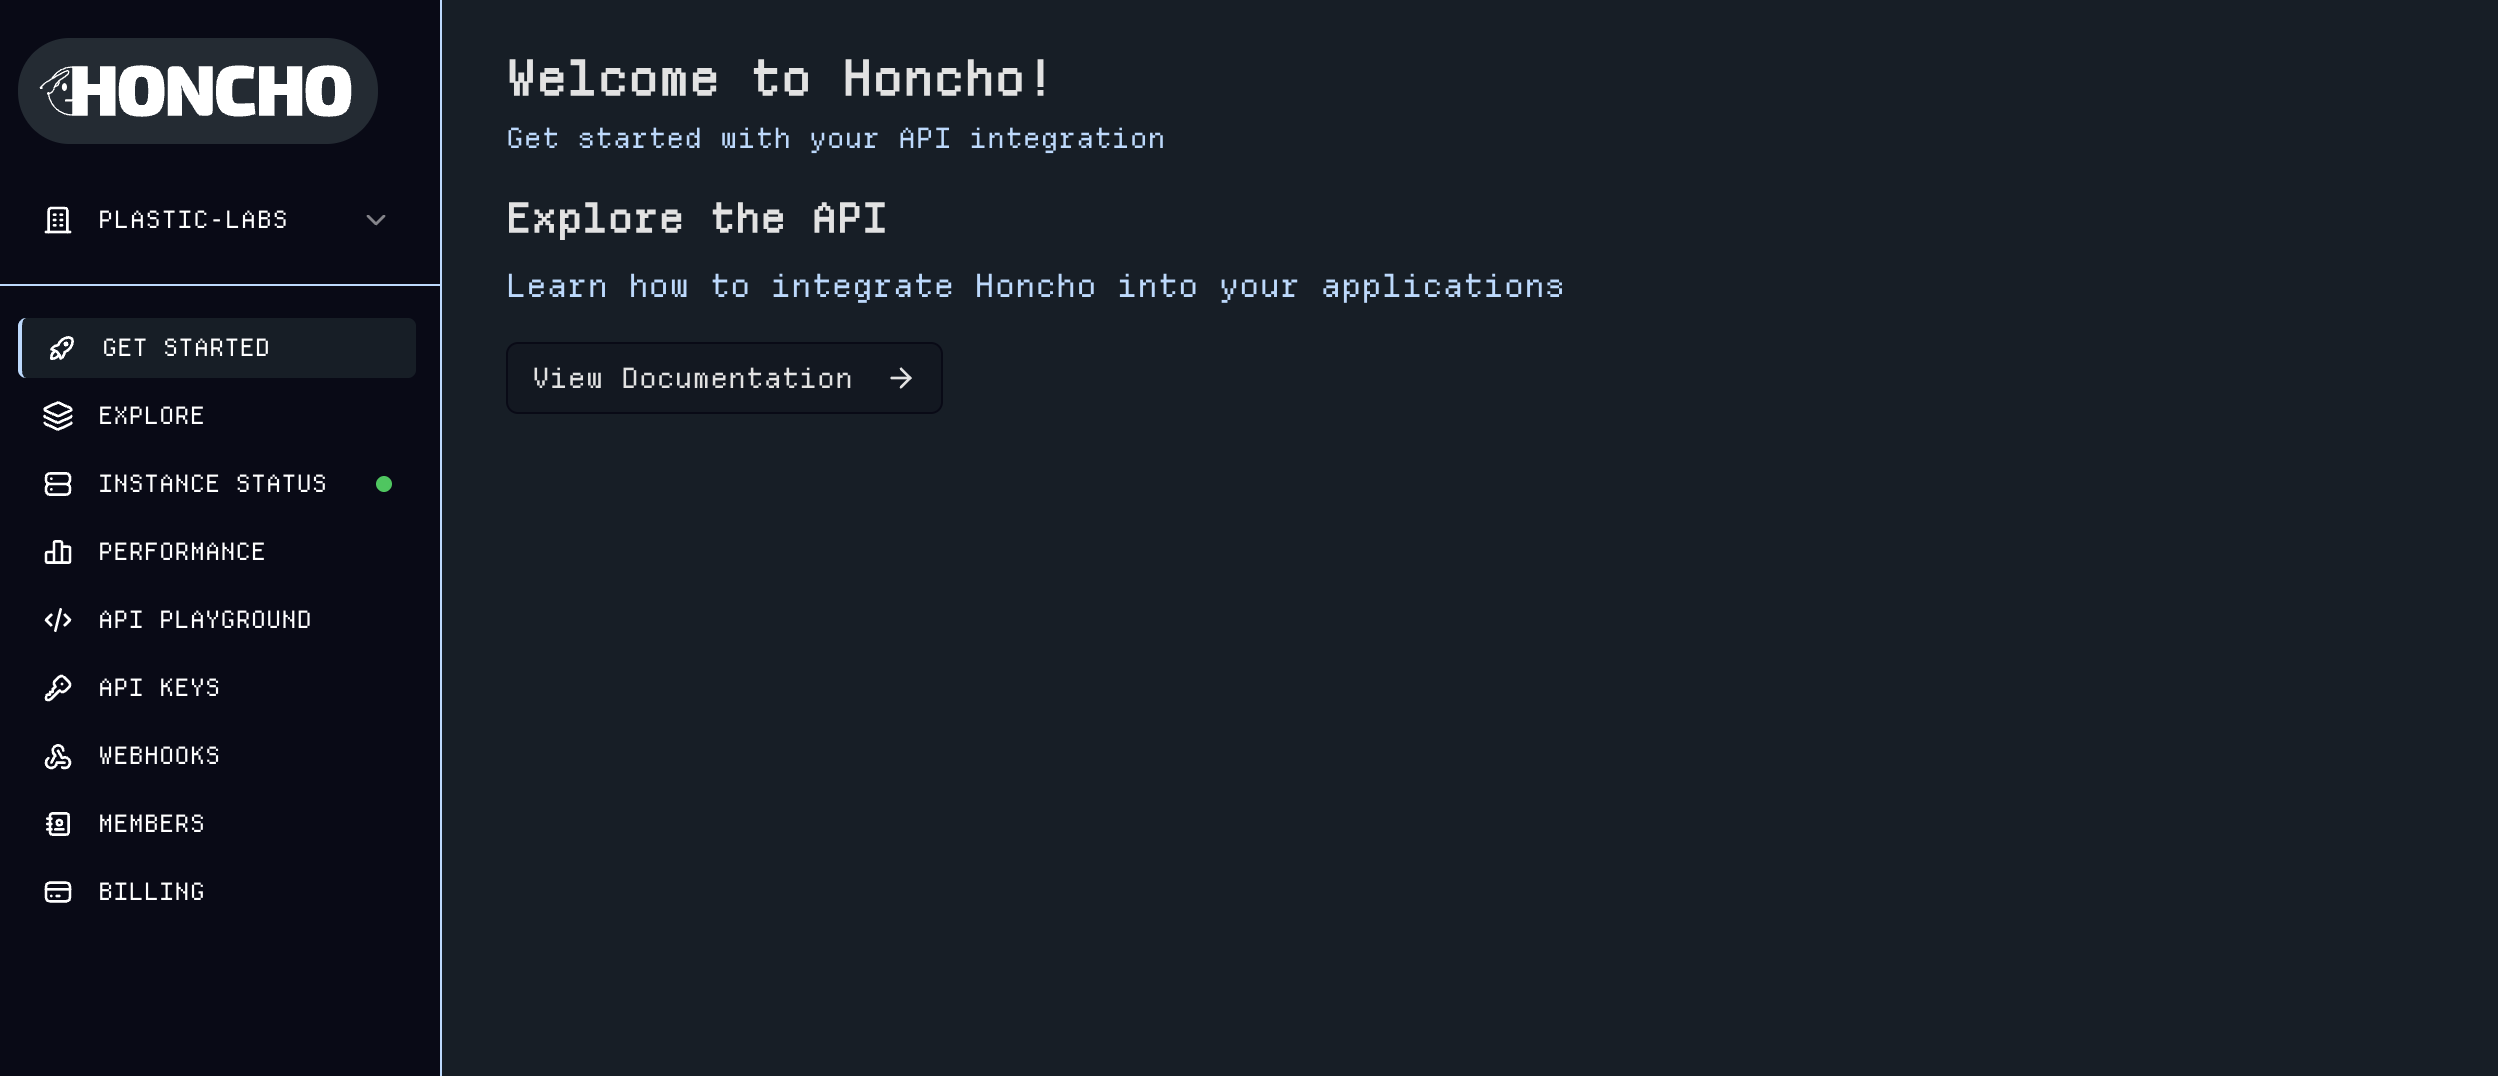 Each organization has dedicated infrastructure running to isolate your
workloads. Until you activate a subscription under the
[Billing](https://app.honcho.dev/billing) page, the infrastructure will remain
inactive.
## 2. Activate your Honcho instance
Navigate to the [Billing](https://app.honcho.dev/billing) page to activate your subscription. Your Honcho instance provisions automatically, and you can monitor the deployment on the [Instance Status](https://app.honcho.dev/status) page until all systems show a green check mark.
Each organization has dedicated infrastructure running to isolate your
workloads. Until you activate a subscription under the
[Billing](https://app.honcho.dev/billing) page, the infrastructure will remain
inactive.
## 2. Activate your Honcho instance
Navigate to the [Billing](https://app.honcho.dev/billing) page to activate your subscription. Your Honcho instance provisions automatically, and you can monitor the deployment on the [Instance Status](https://app.honcho.dev/status) page until all systems show a green check mark.
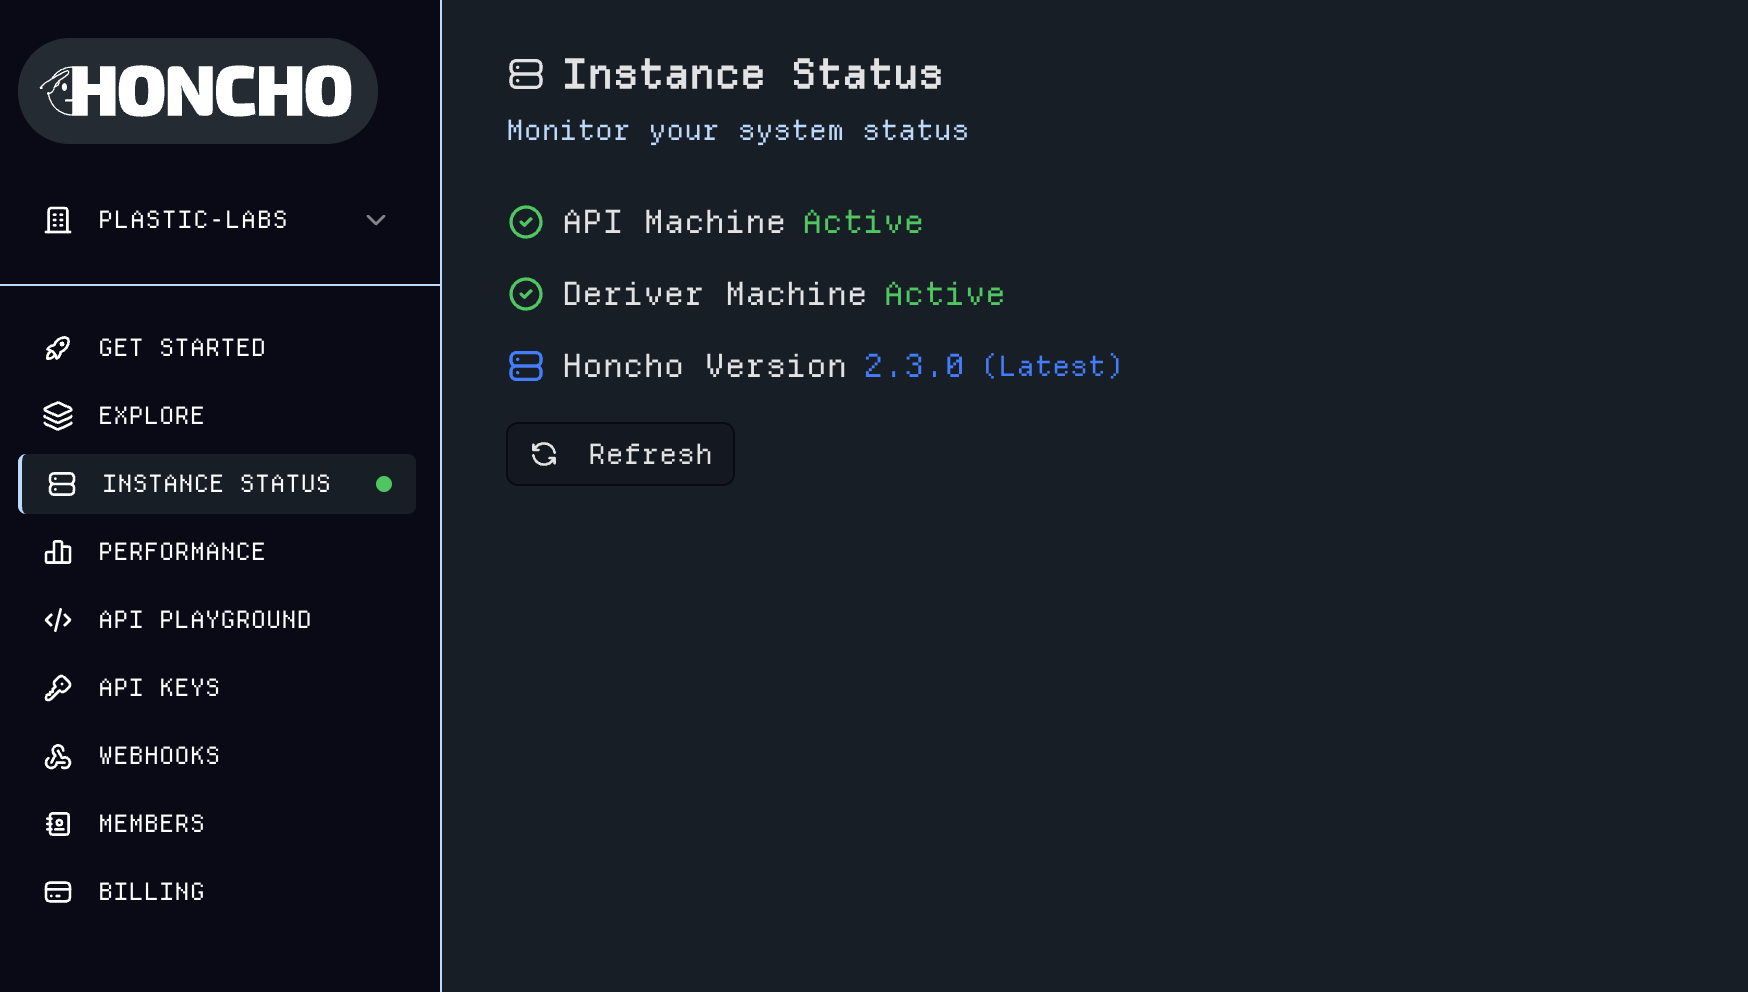 You can also upgrade Honcho when new versions are made available directly from the status page.
The **Performance** page provides comprehensive monitoring with usage metrics, health analytics, API response times, and endpoint usage across Honcho.
You can also upgrade Honcho when new versions are made available directly from the status page.
The **Performance** page provides comprehensive monitoring with usage metrics, health analytics, API response times, and endpoint usage across Honcho.
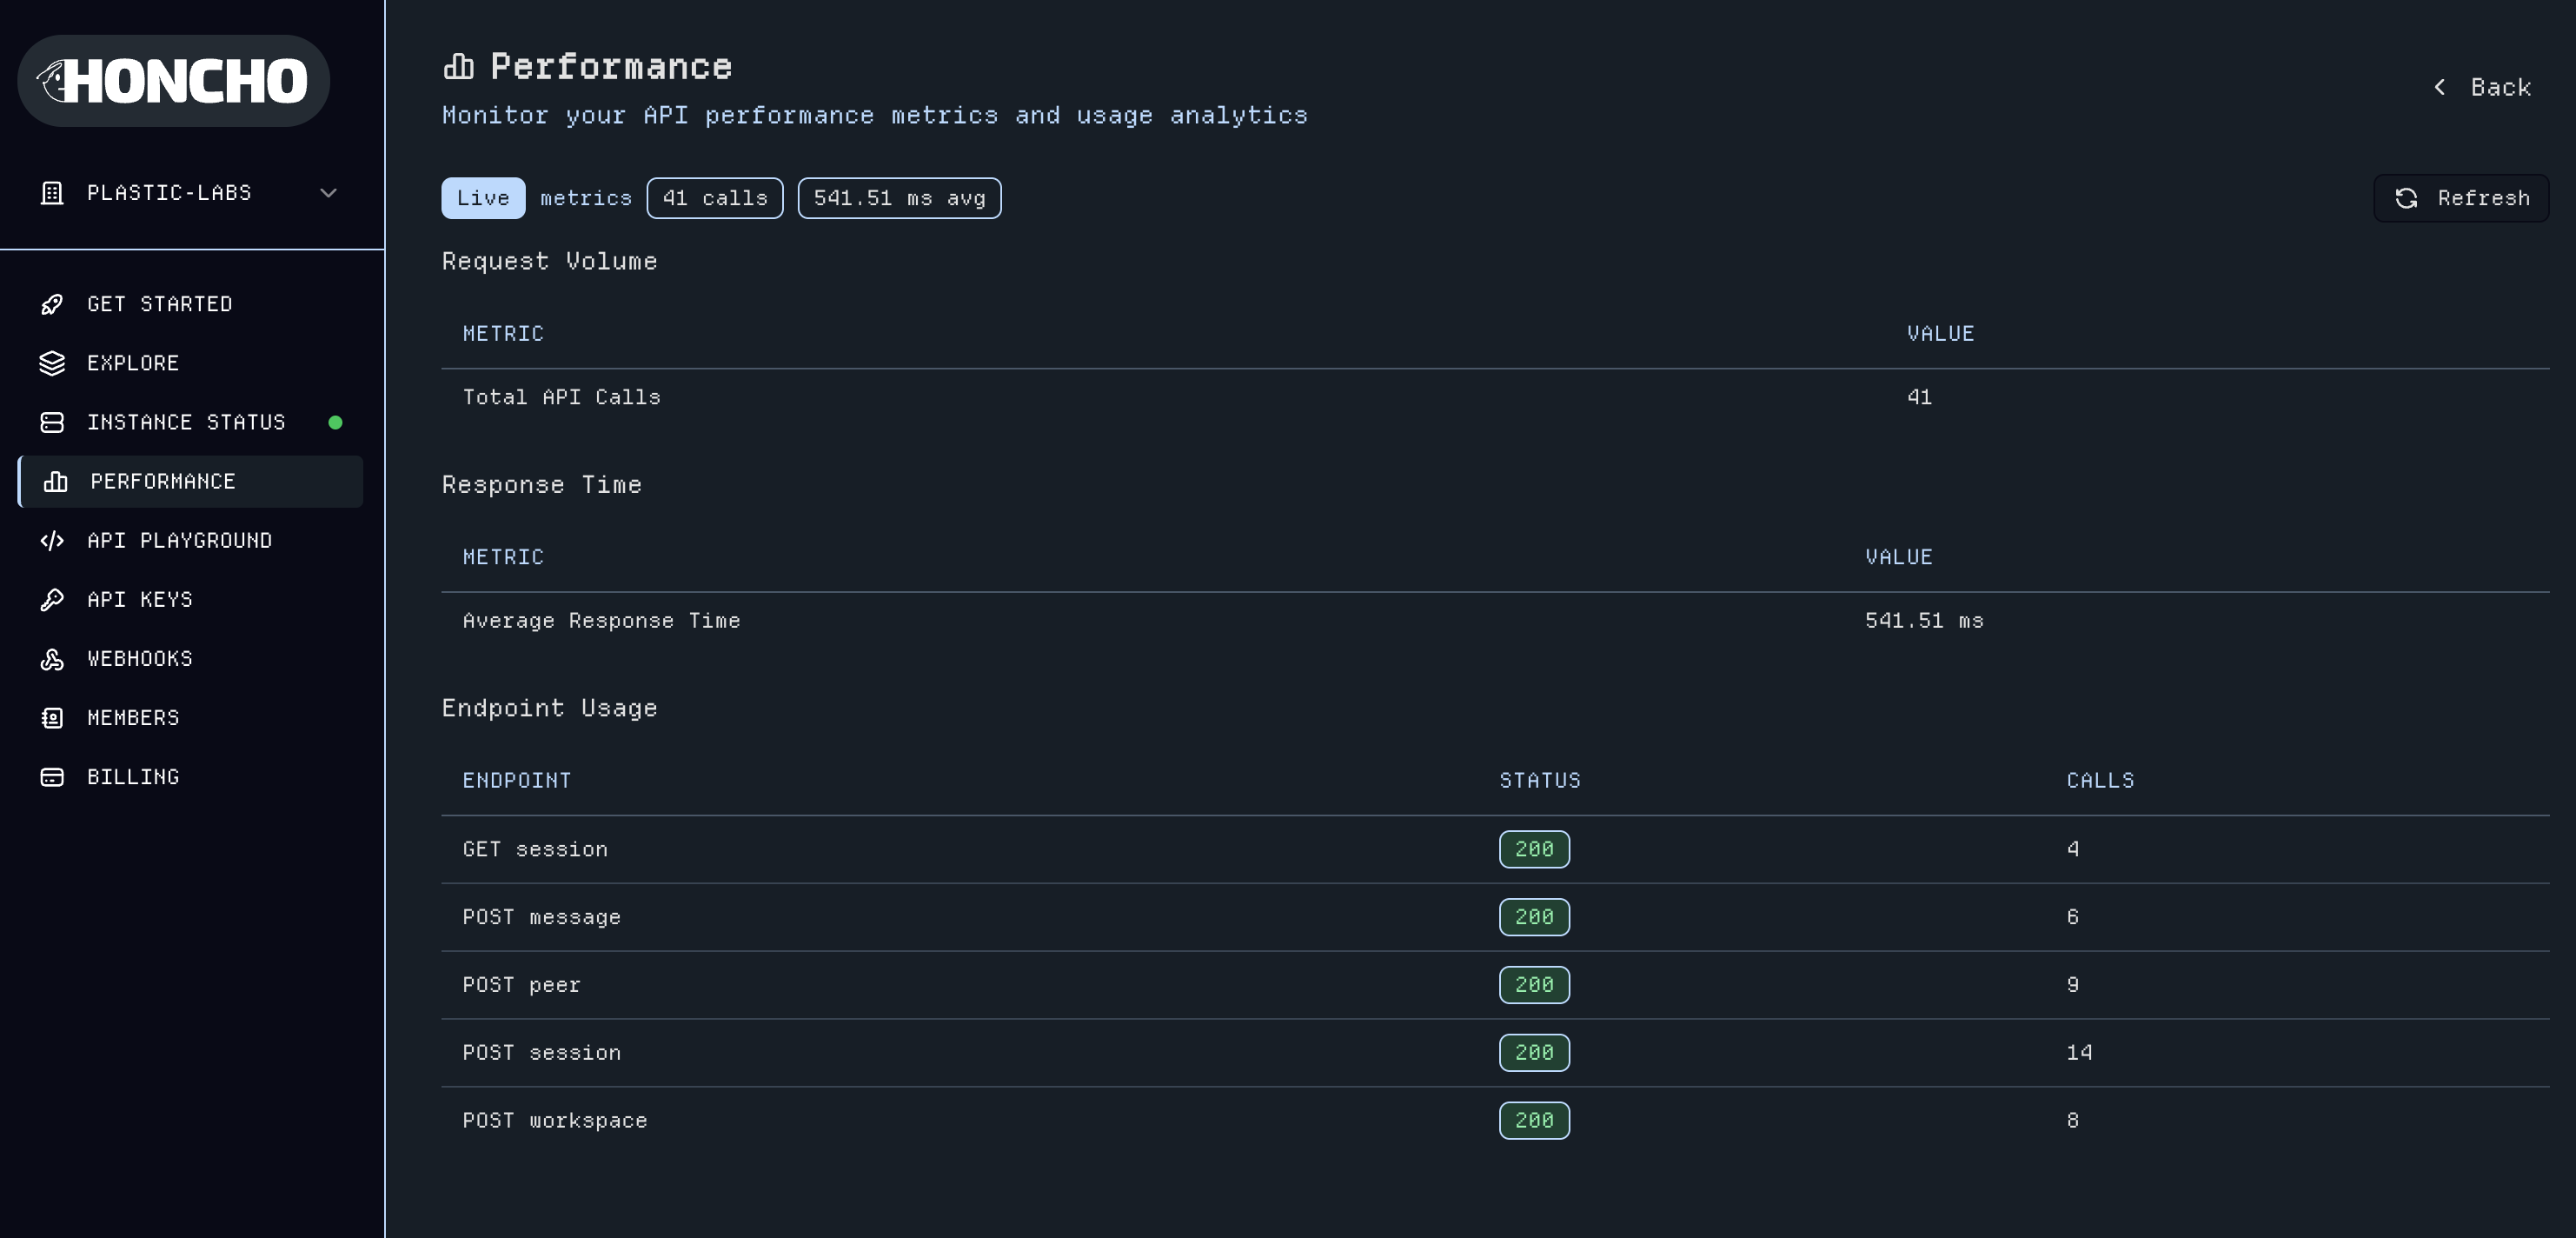 ## 3. Manage API Keys
The [API Keys](https://app.honcho.dev/api-keys) page allows you to create and manage authentication tokens for different environments. You can create admin-level keys with full instance access or scope keys to specific `Workspaces`, `Peers`, or `Sessions`.
## 3. Manage API Keys
The [API Keys](https://app.honcho.dev/api-keys) page allows you to create and manage authentication tokens for different environments. You can create admin-level keys with full instance access or scope keys to specific `Workspaces`, `Peers`, or `Sessions`.
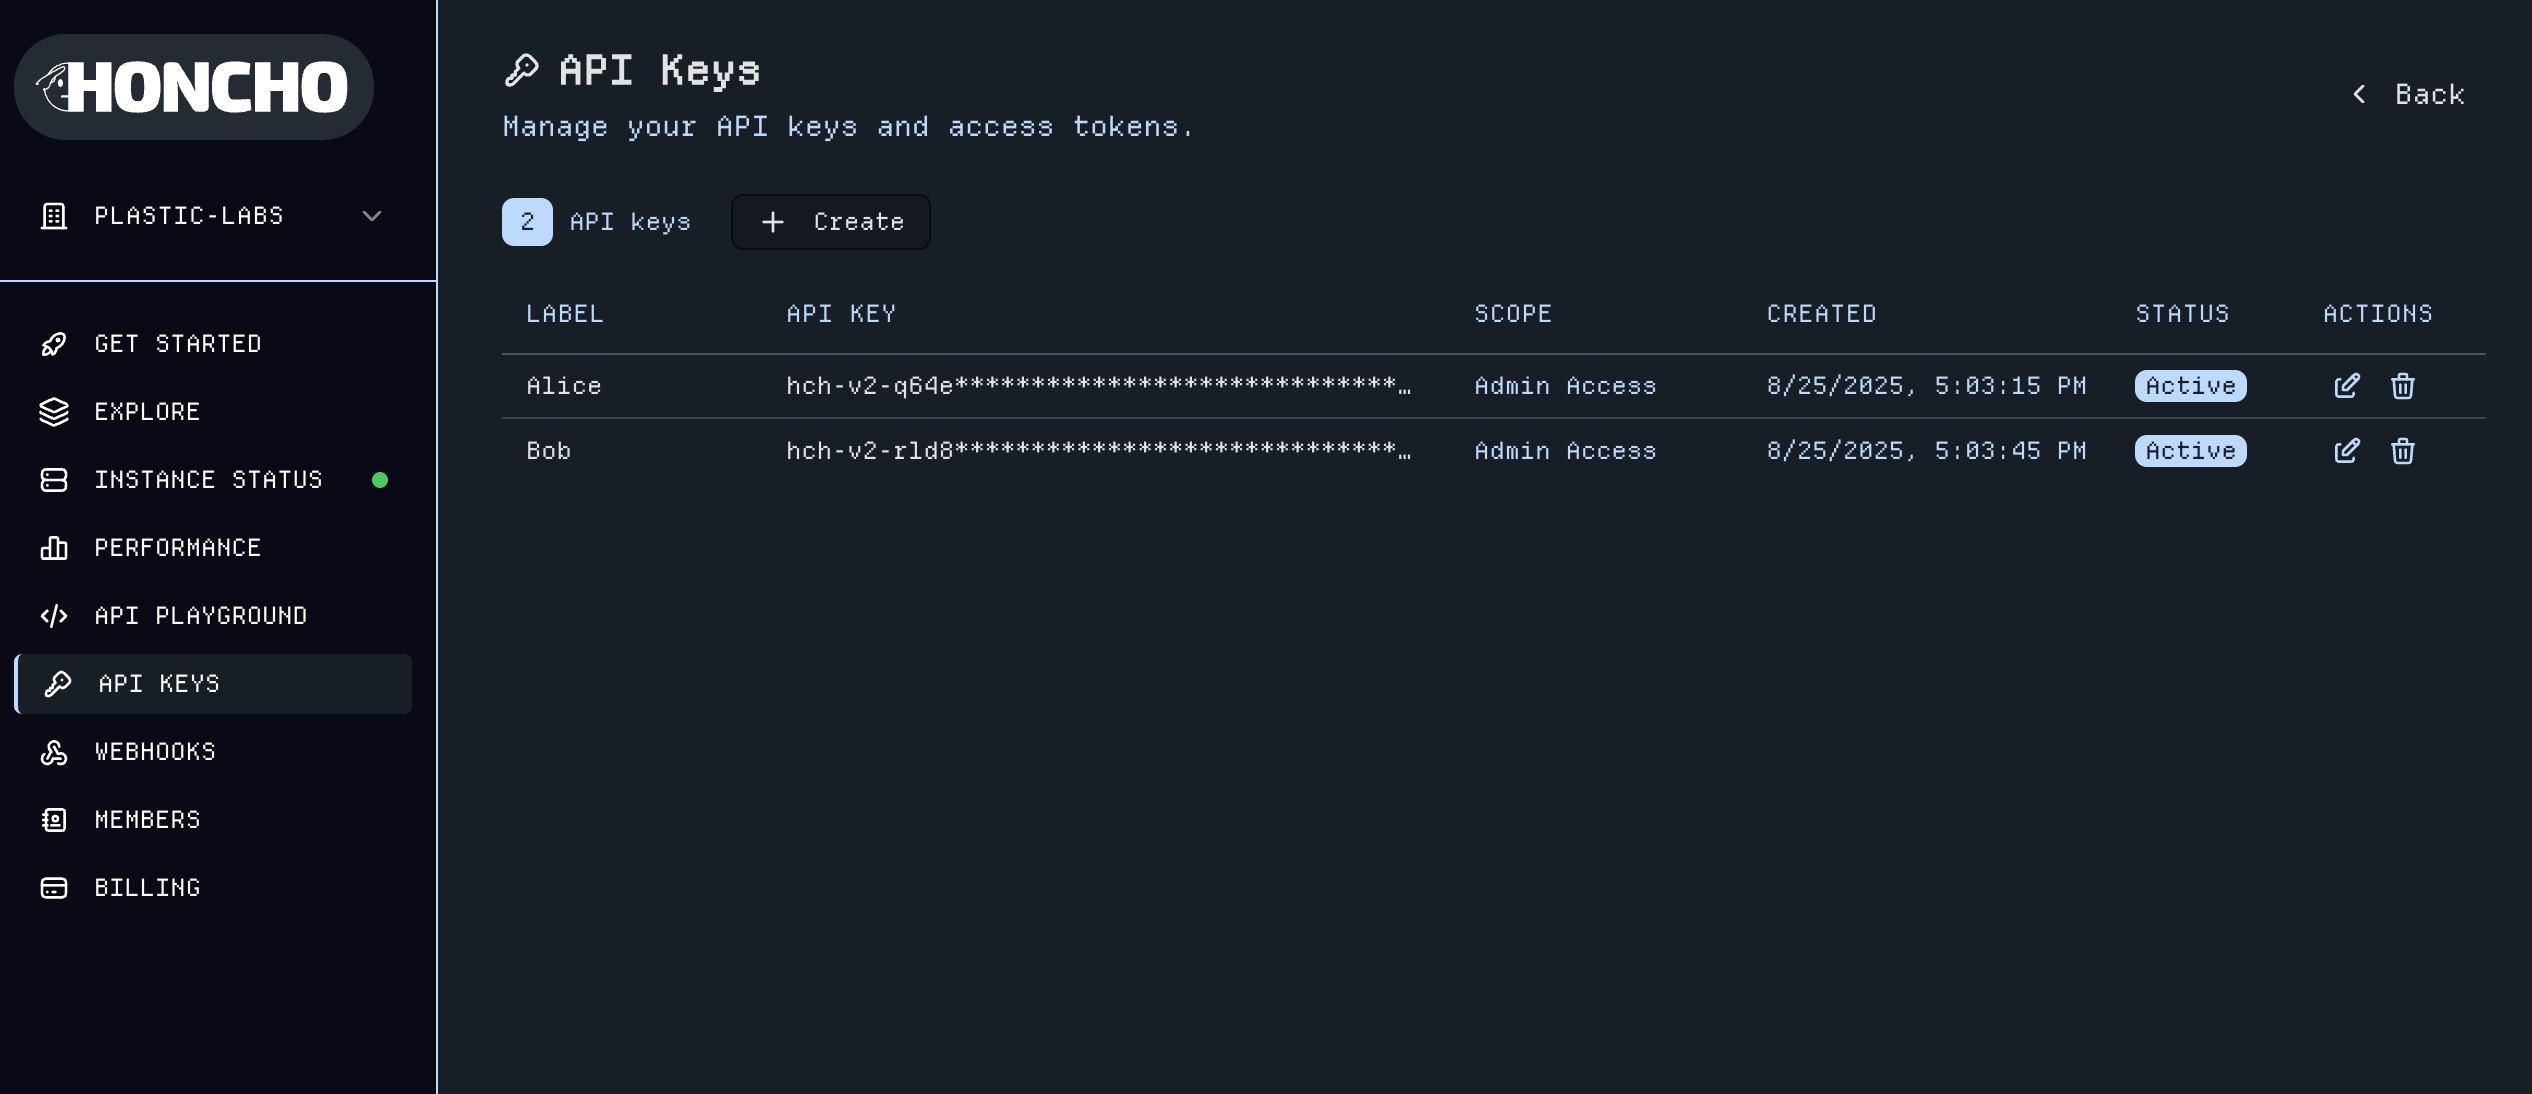 ## 4. Test with API Playground
The [API Playground](https://app.honcho.dev/playground) provides a Postman-like interface to test queries, explore endpoints, and validate your integration. Authenticate with an API key and send requests directly to your Honcho instance with real-time responses and full request/response logging.
## 4. Test with API Playground
The [API Playground](https://app.honcho.dev/playground) provides a Postman-like interface to test queries, explore endpoints, and validate your integration. Authenticate with an API key and send requests directly to your Honcho instance with real-time responses and full request/response logging.
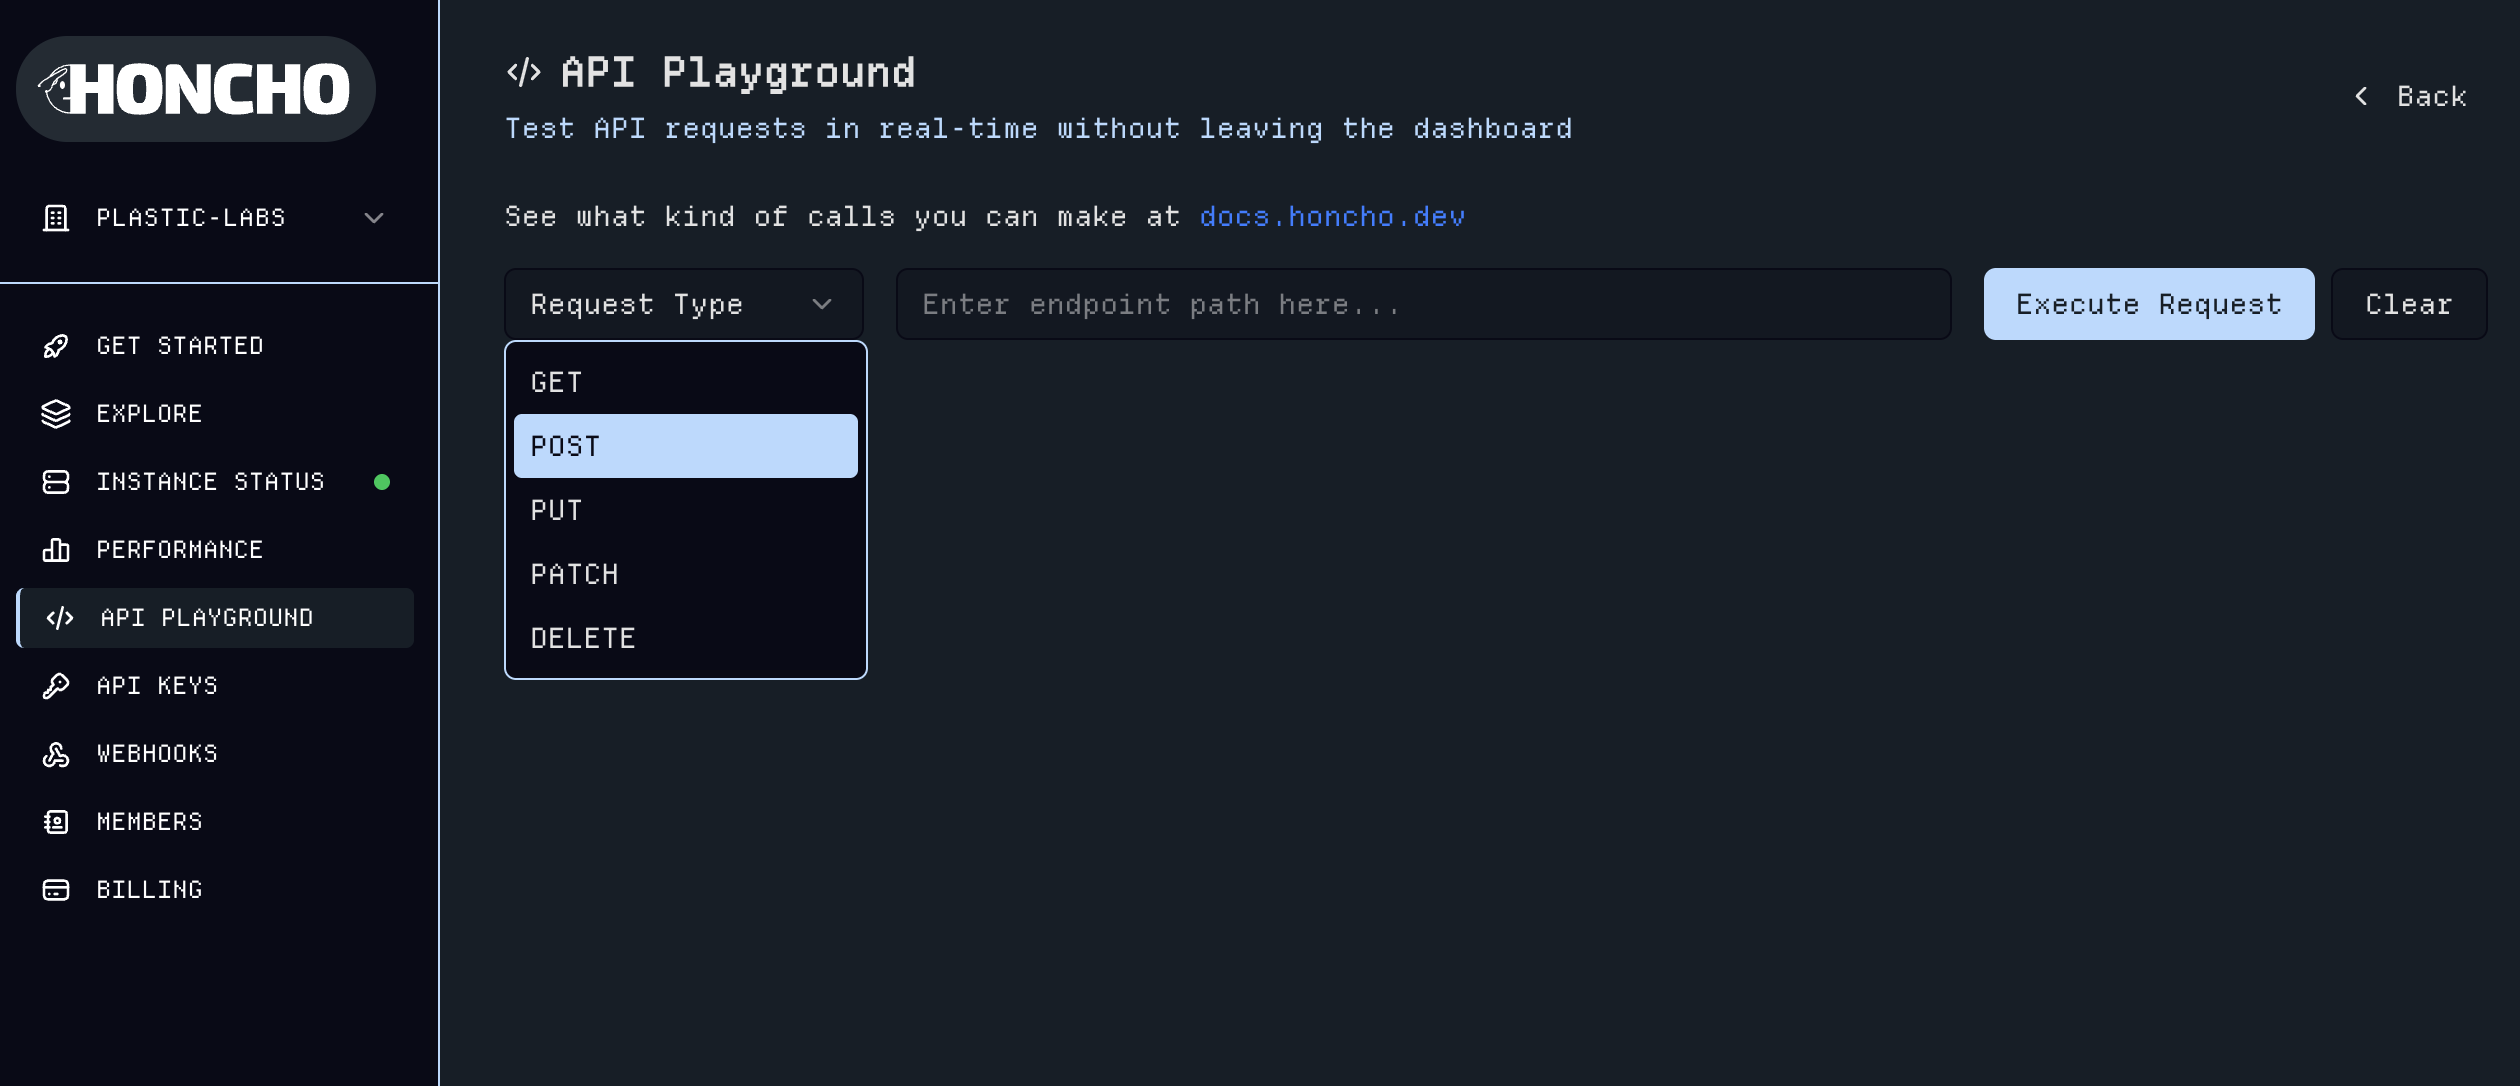 ## 5. Workspaces
The [Explore](https://app.honcho.dev/explore) page provides comprehensive `Workspace` management where you can create workspaces and begin exploring the platform. Each `Workspace` serves as a container for organizing your Honcho data.
## 5. Workspaces
The [Explore](https://app.honcho.dev/explore) page provides comprehensive `Workspace` management where you can create workspaces and begin exploring the platform. Each `Workspace` serves as a container for organizing your Honcho data.
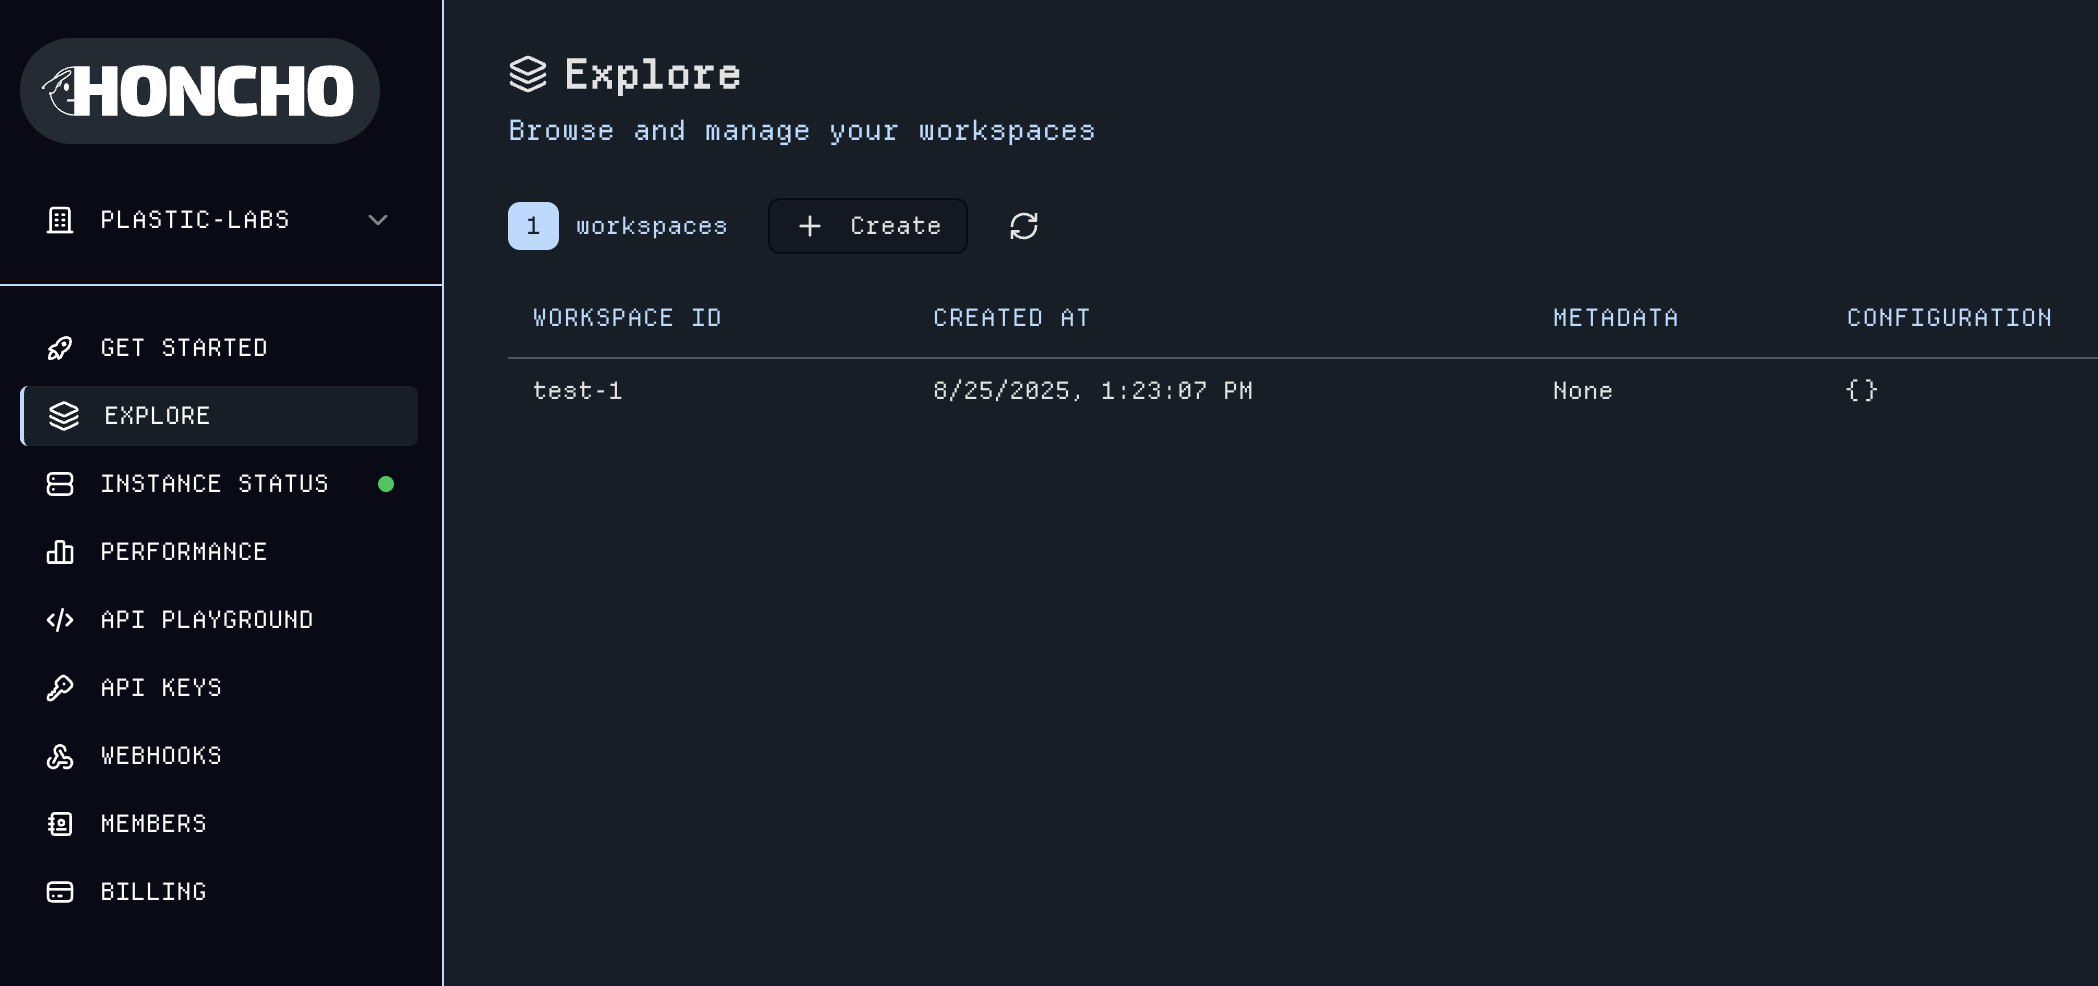 Click into any workspace to access a general overview of `Peers` and `Sessions`. Here you can quickly create `Peers`, `Sessions`, and add multiple `Peers` to any `Session`. Edit the metadata and configuration for a `Workspace` with the Edit Config button. Click into any entity to navigate to their respective utilities pages or click the expand icon to view Workspace-wide `Peers` and `Sessions` data tables with more details.
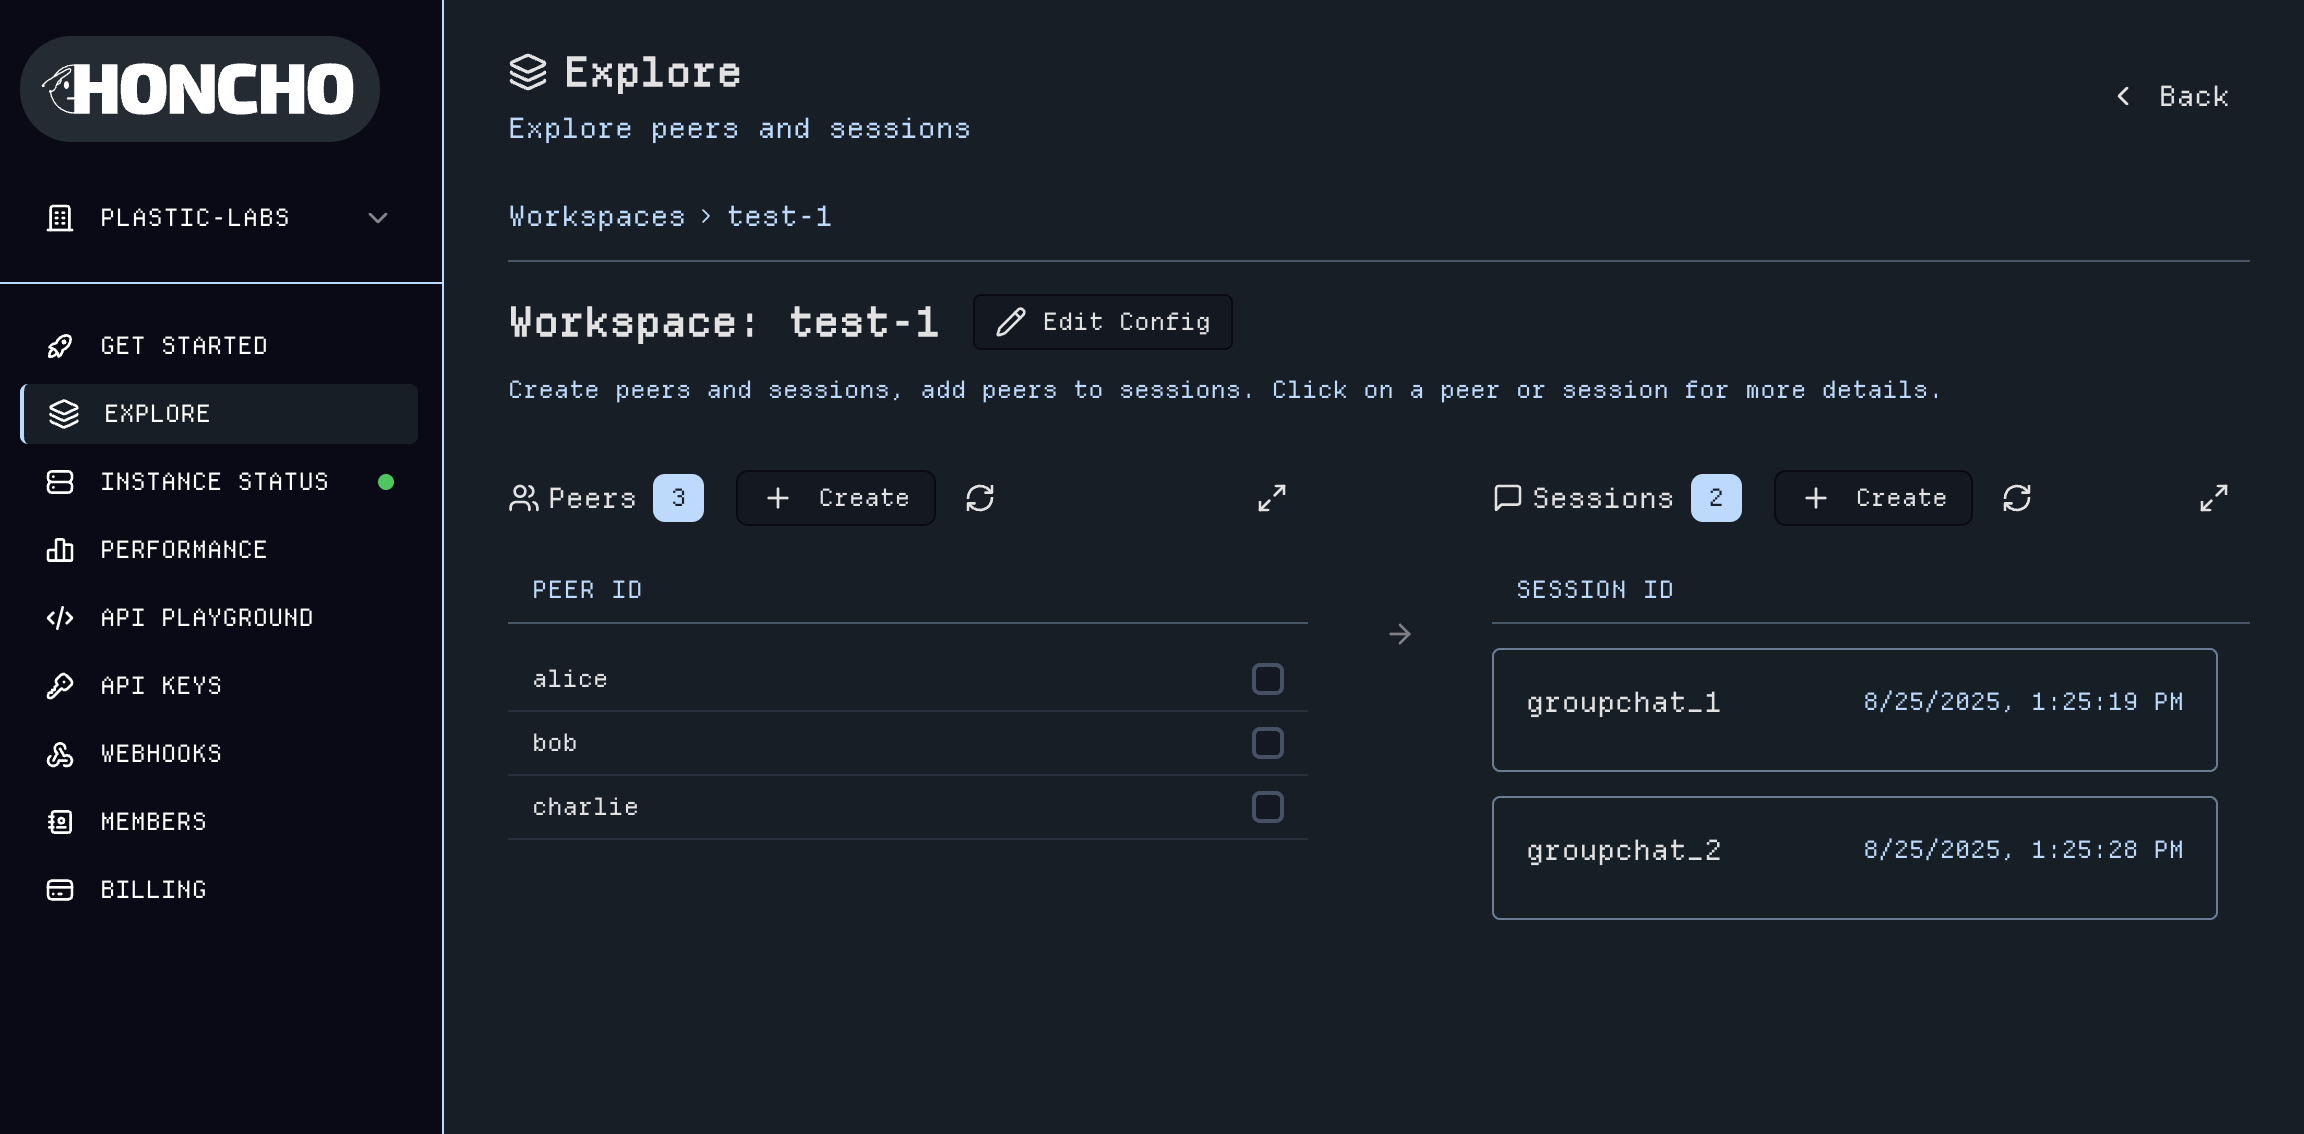 ## 6. Peer Dashboard & Utilities
Expand the `Peers` list from the `Workspace` dashboard to see a detailed view of `Peers`.
## 6. Peer Dashboard & Utilities
Expand the `Peers` list from the `Workspace` dashboard to see a detailed view of `Peers`.
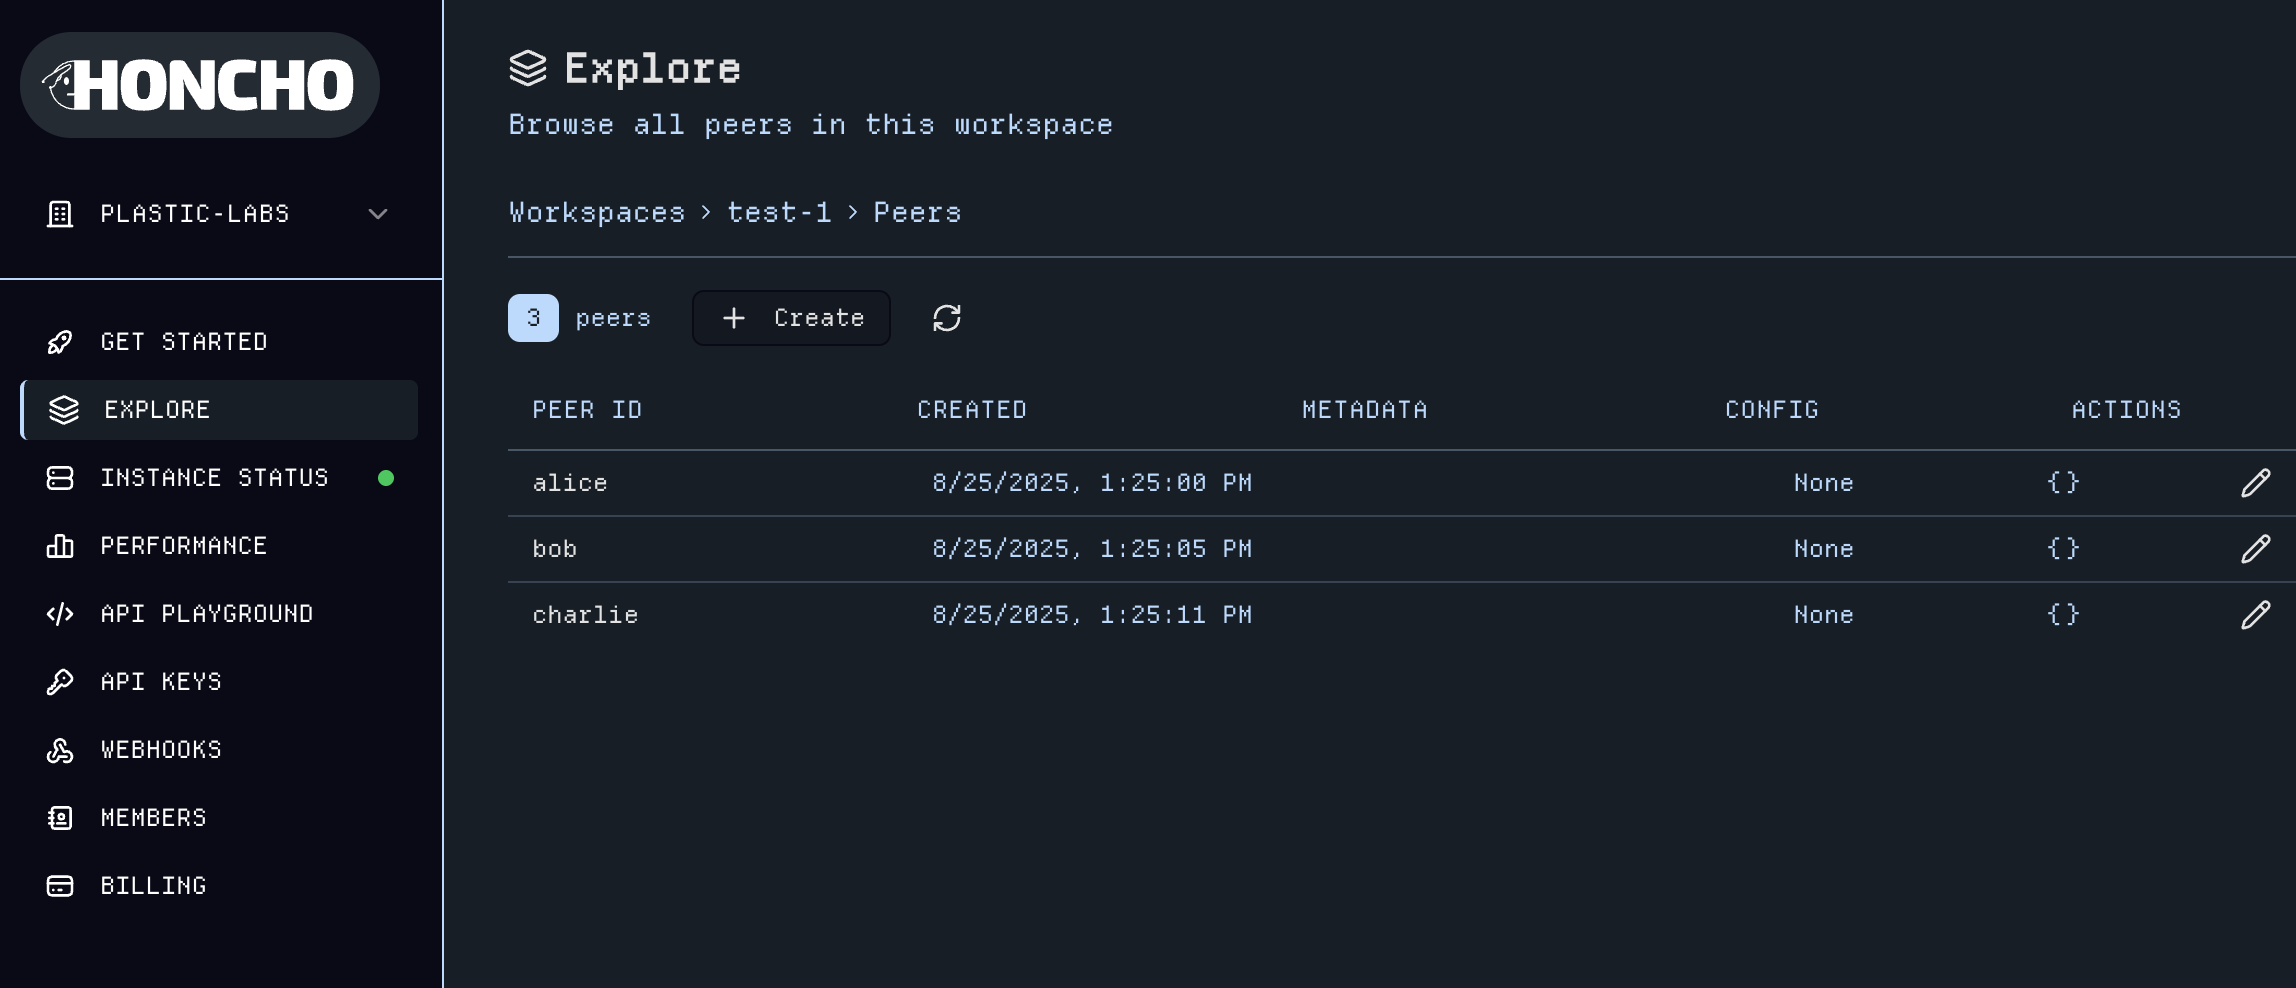 Click into any peer to navigate to their respective utilities page. Next to the `Peer` name you can edit the [Global Peer Configuration](/v2/documentation/core-concepts/configuration), and in the tabs below, explore all utilities for the `Peer`.
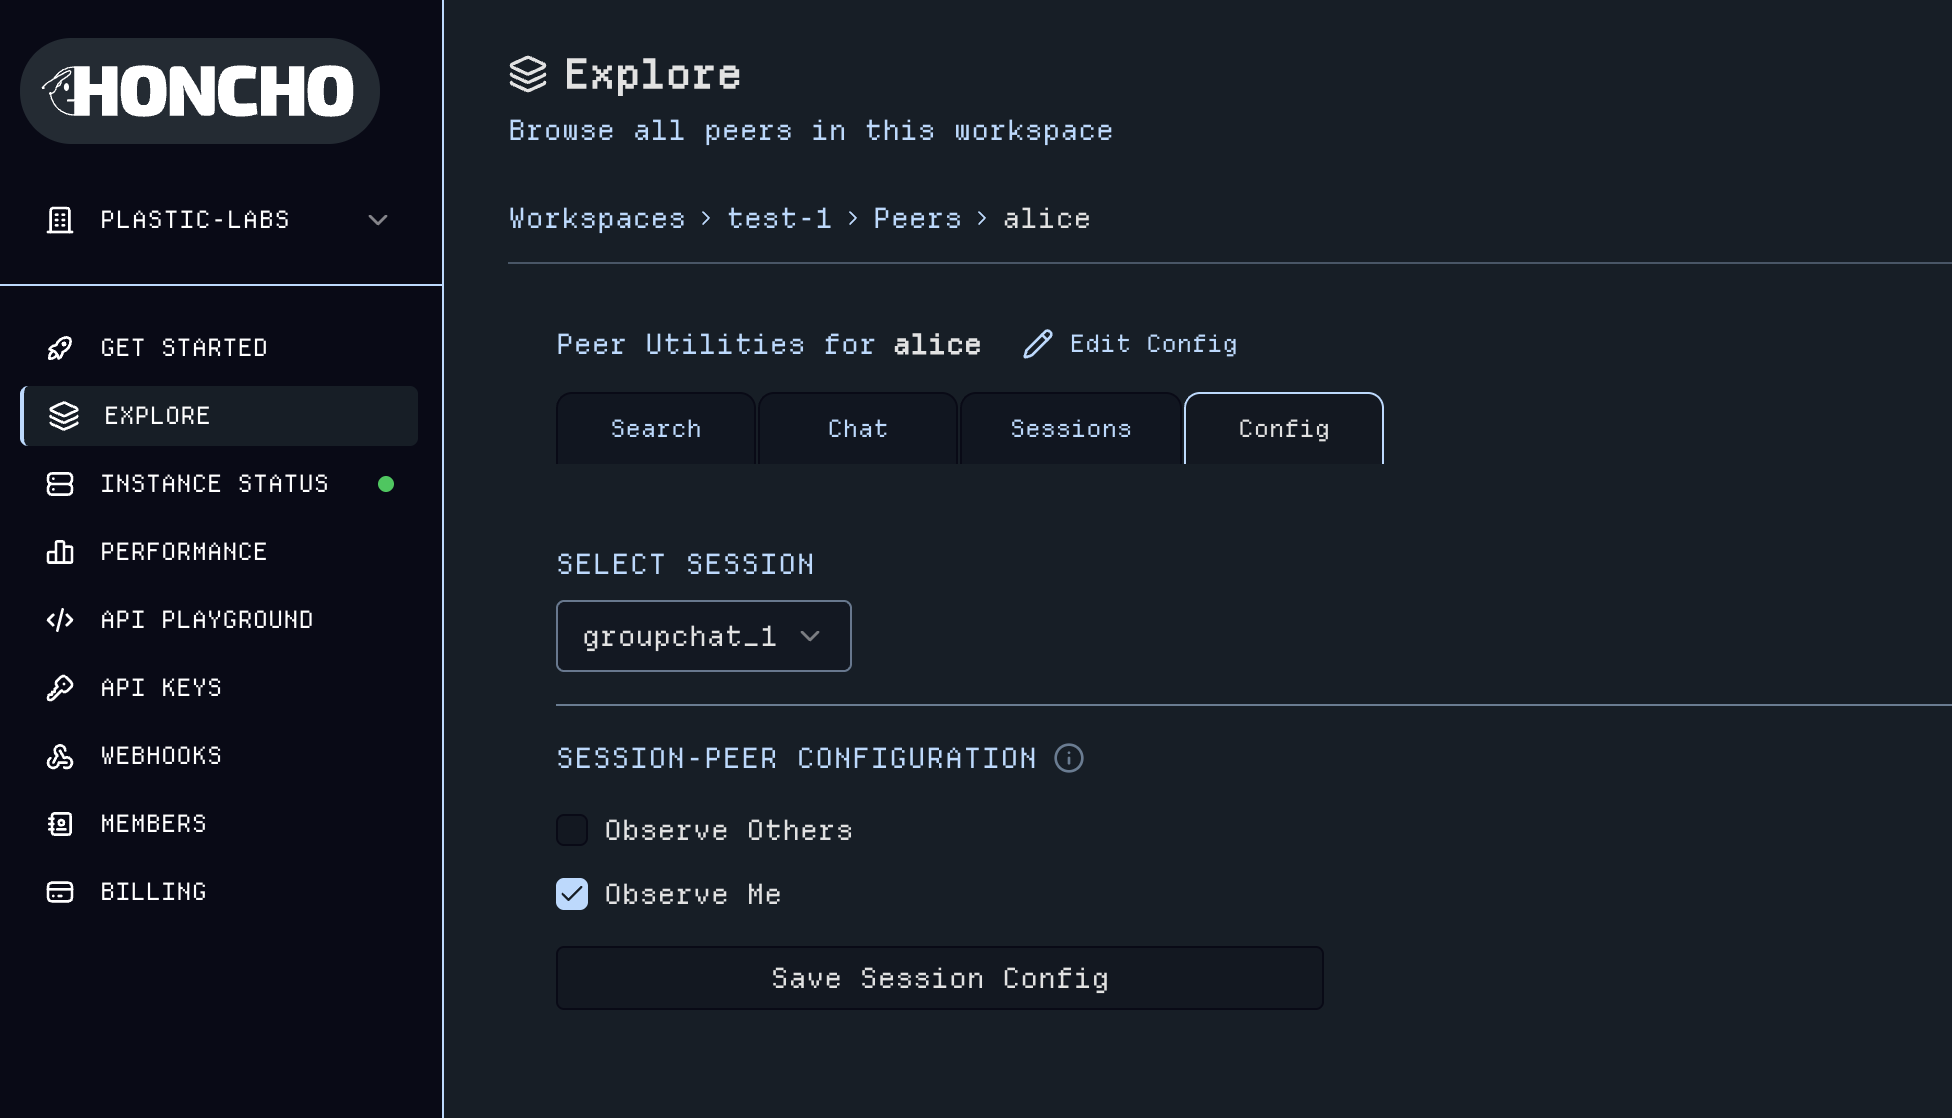 Utilities include:
* **Message search** across all sessions for a `Peer`
* **Dialectic Chat** to query `Peer` representations globally or session-scoped (results vary dependant on the `Peer`'s configuration)
Utilities include:
* **Message search** across all sessions for a `Peer`
* **Dialectic Chat** to query `Peer` representations globally or session-scoped (results vary dependant on the `Peer`'s configuration)
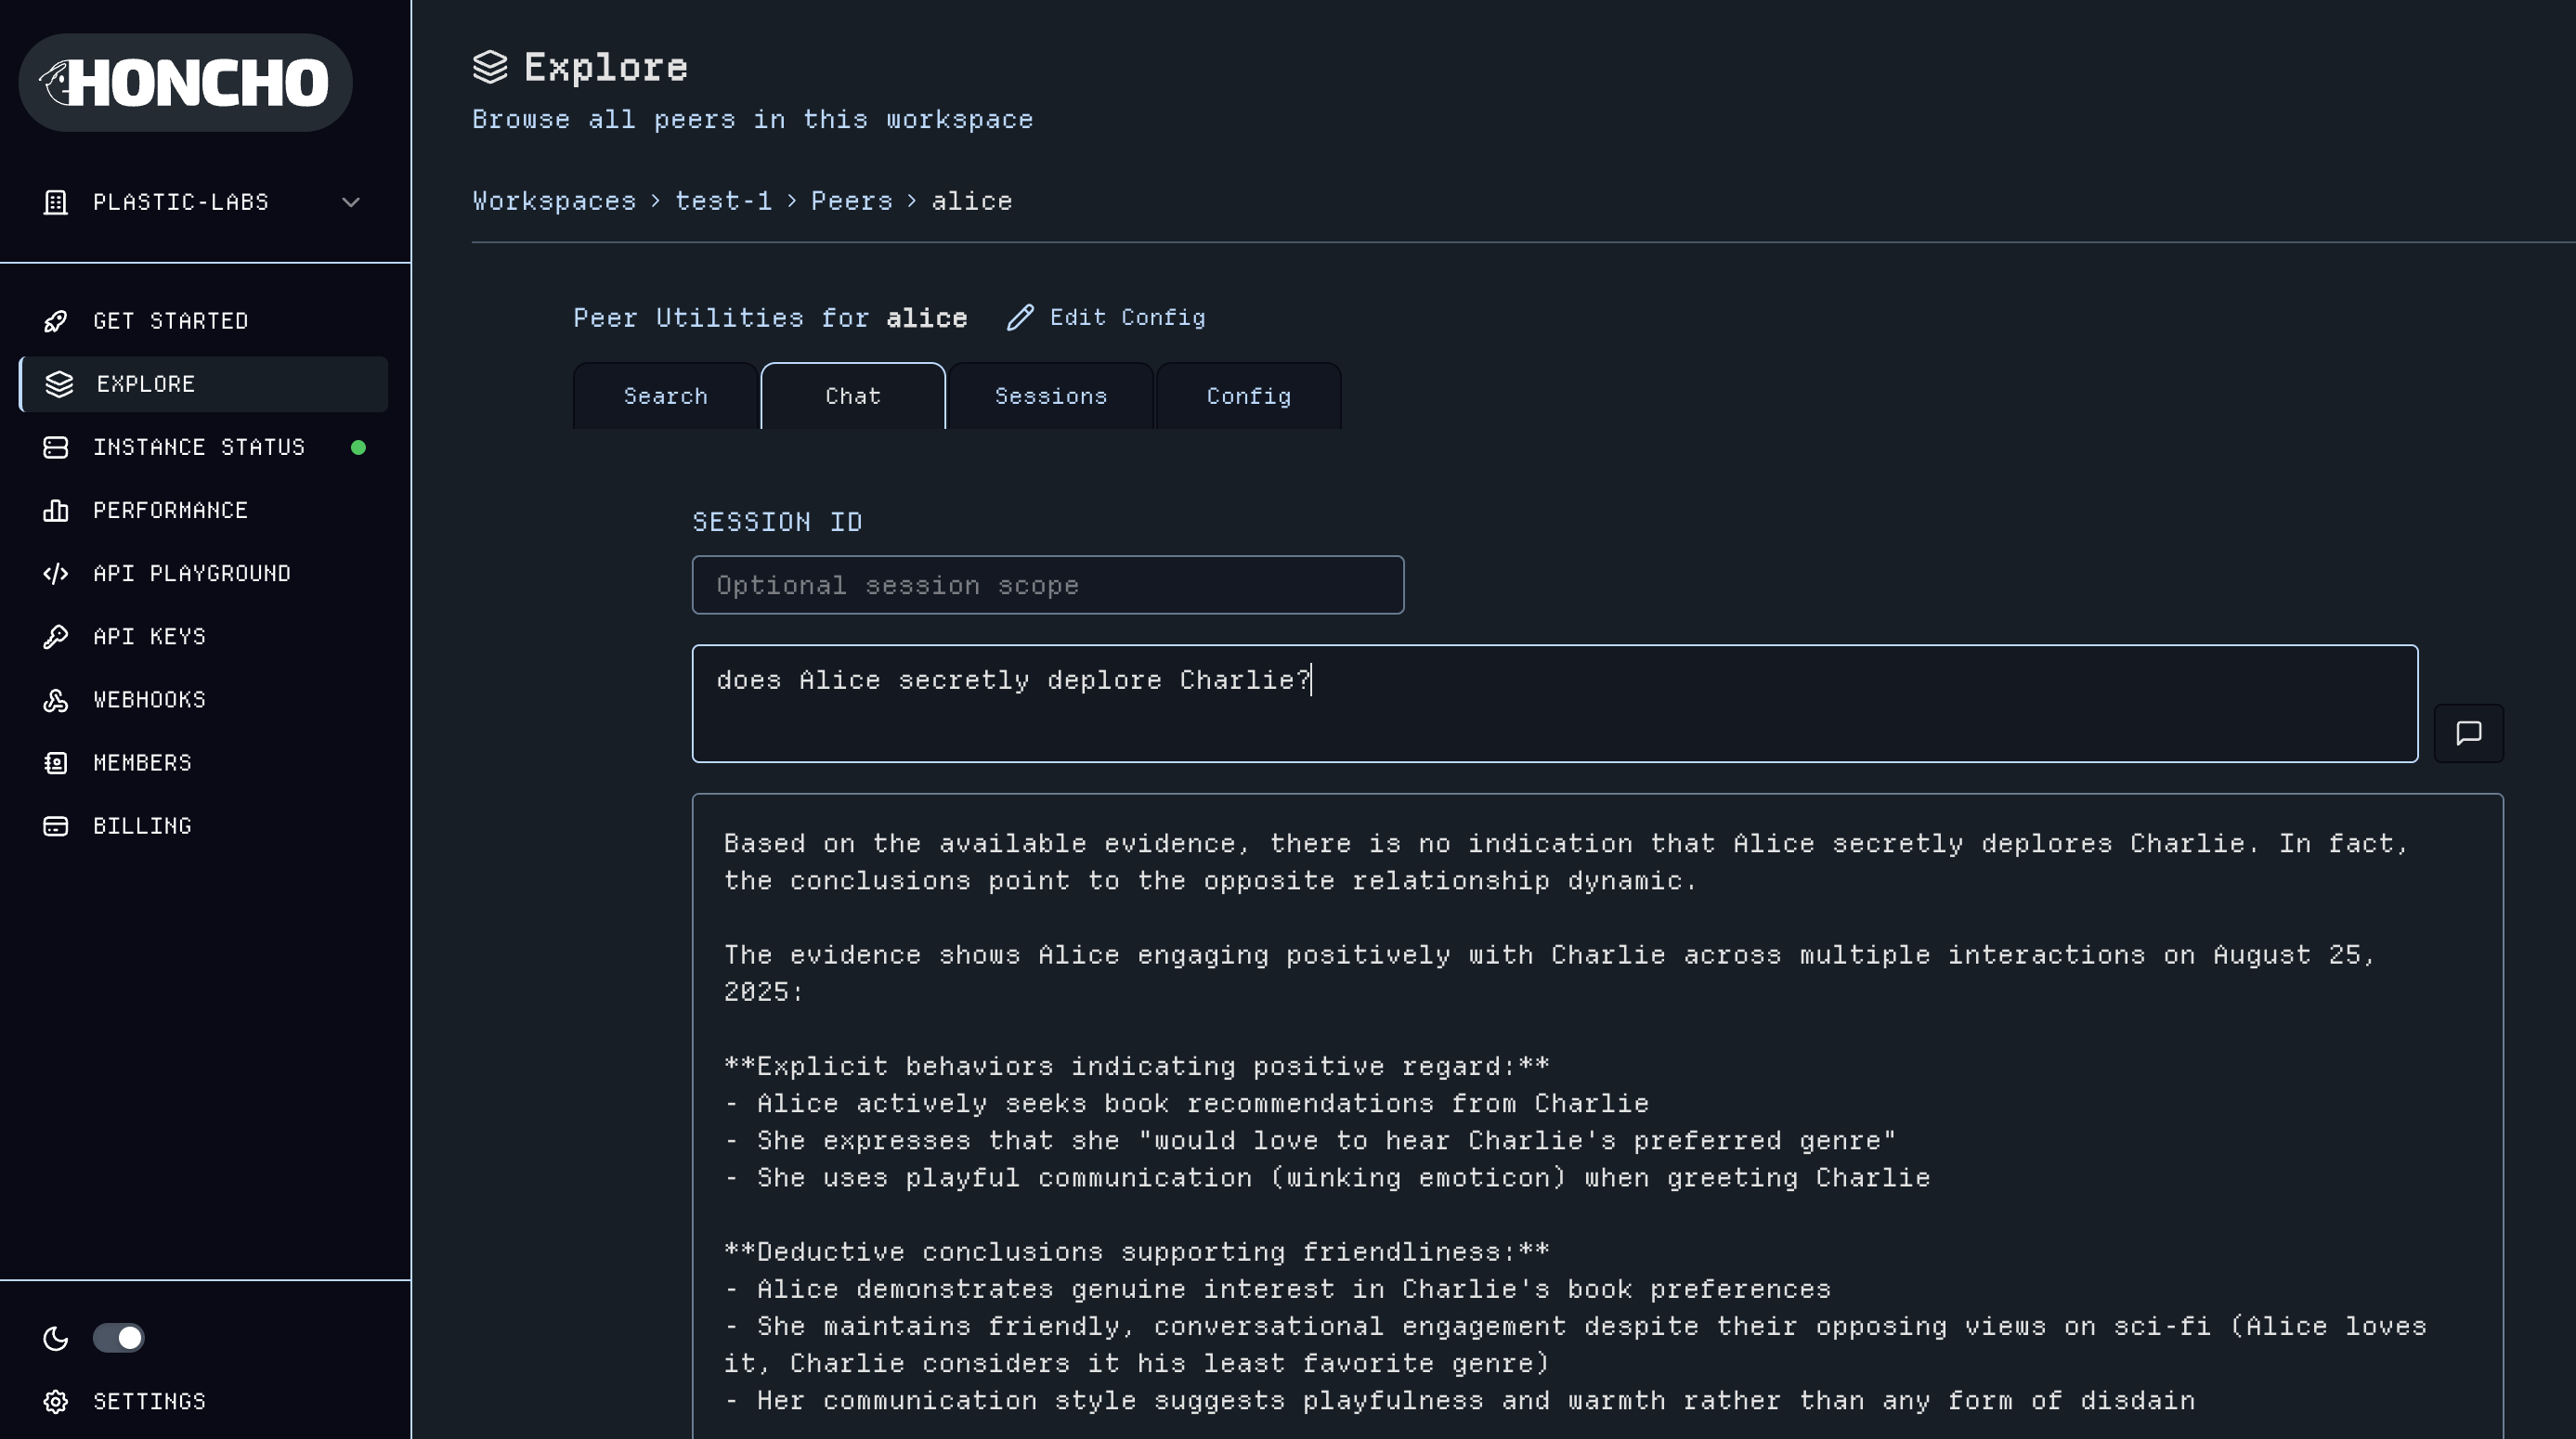 * **Session logs** view which `Sessions` the `Peer` is active
* **Peer configuration and metadata management** including [Session-Peer Configuration](/v2/documentation/core-concepts/configuration#session-peer-configuration)
## 7. Session Dashboard & Utilities
Click into the sessions view within a workspace to see a table of all of your `Sessions` data.
* **Session logs** view which `Sessions` the `Peer` is active
* **Peer configuration and metadata management** including [Session-Peer Configuration](/v2/documentation/core-concepts/configuration#session-peer-configuration)
## 7. Session Dashboard & Utilities
Click into the sessions view within a workspace to see a table of all of your `Sessions` data.
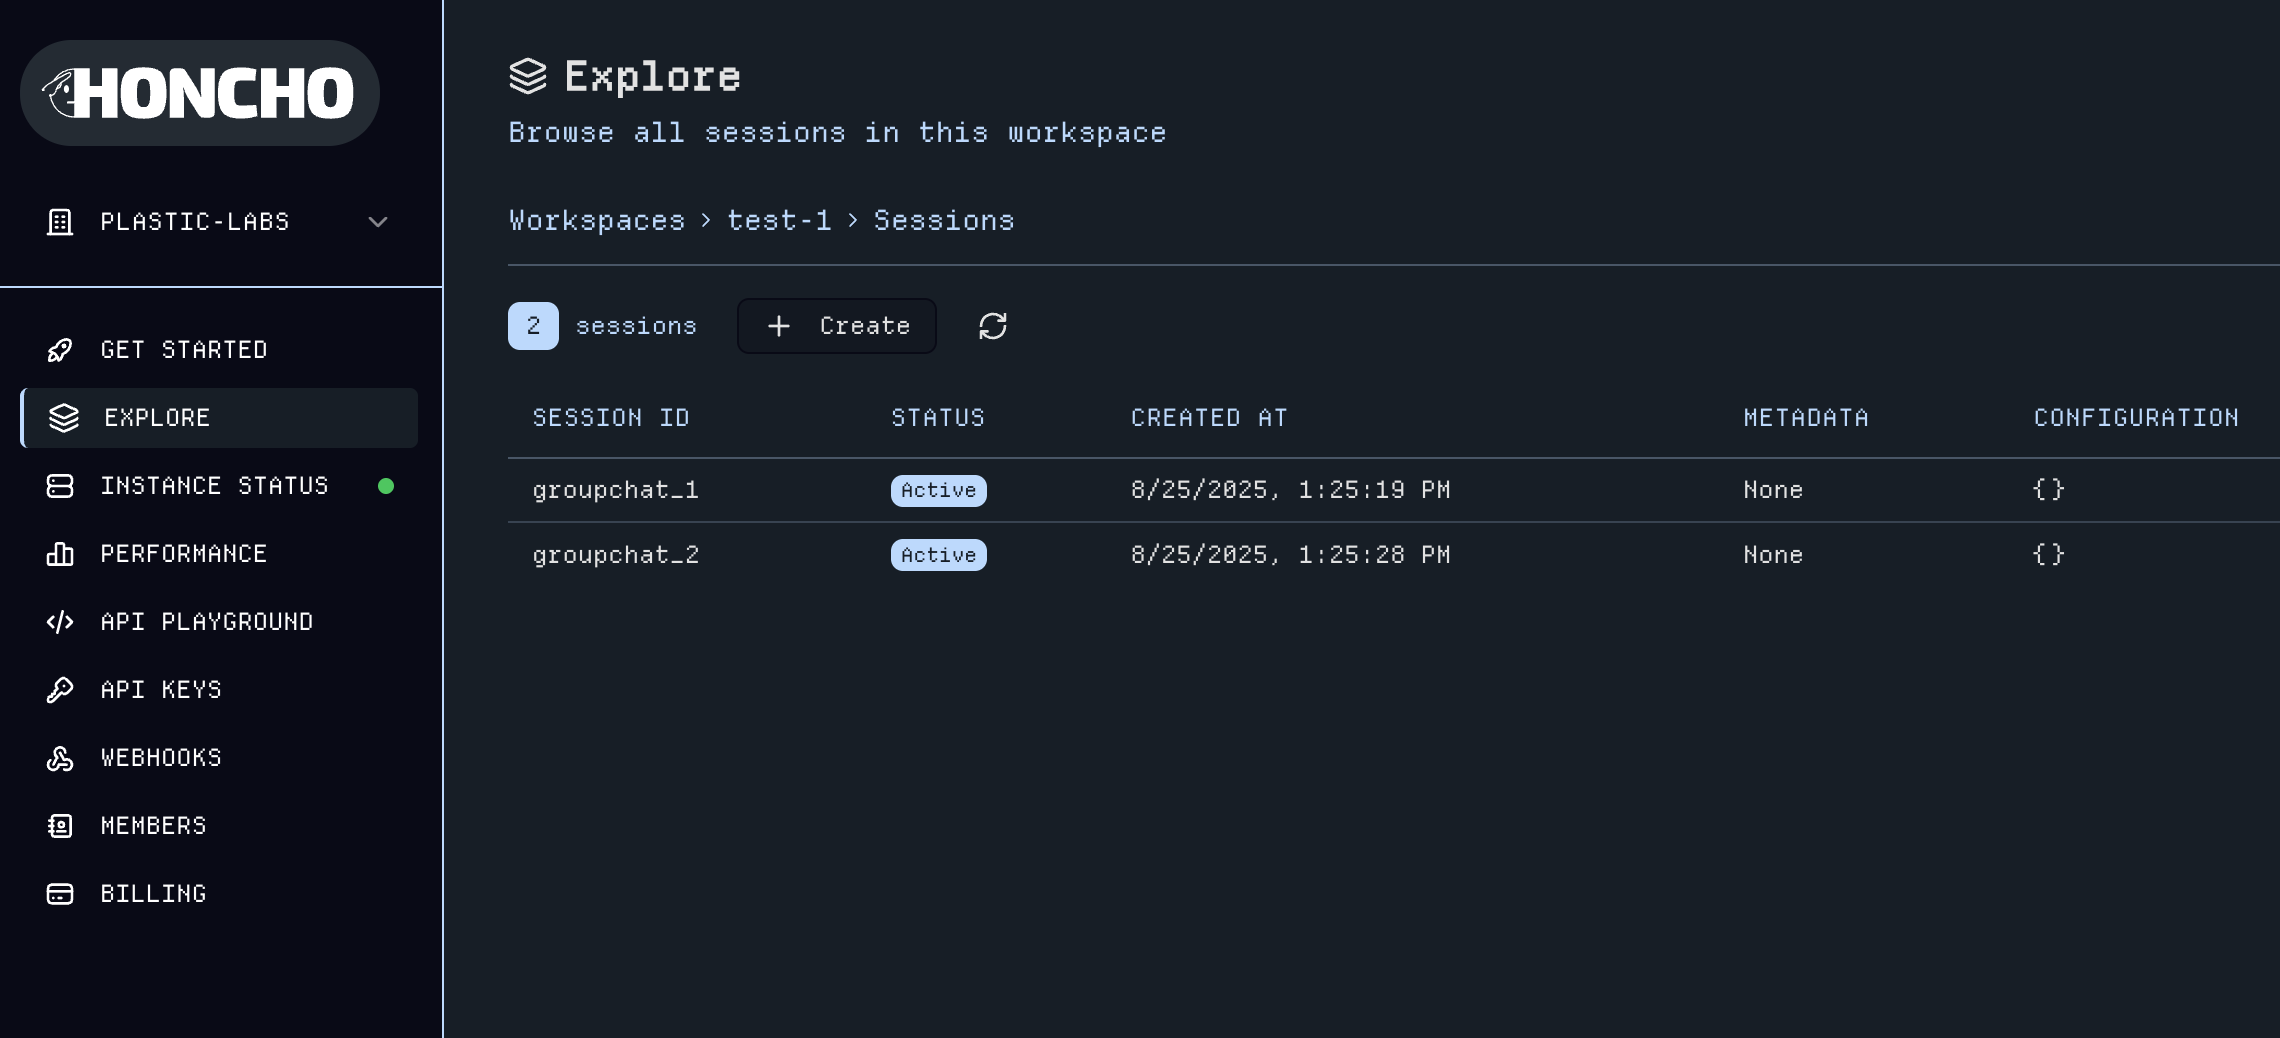 Click into a `Session` to open its utilities page.
 Here you can:
* **View and add Messages** within the `Session`; filter messages by `Peer`
* **Advanced search** across `Session` messages
* **Peer management** for adding/removing `Peers` and editing a `Peer`'s Session-level configuration
* **Get Context** to generate LLM-ready context with customizable token limits
Here you can:
* **View and add Messages** within the `Session`; filter messages by `Peer`
* **Advanced search** across `Session` messages
* **Peer management** for adding/removing `Peers` and editing a `Peer`'s Session-level configuration
* **Get Context** to generate LLM-ready context with customizable token limits
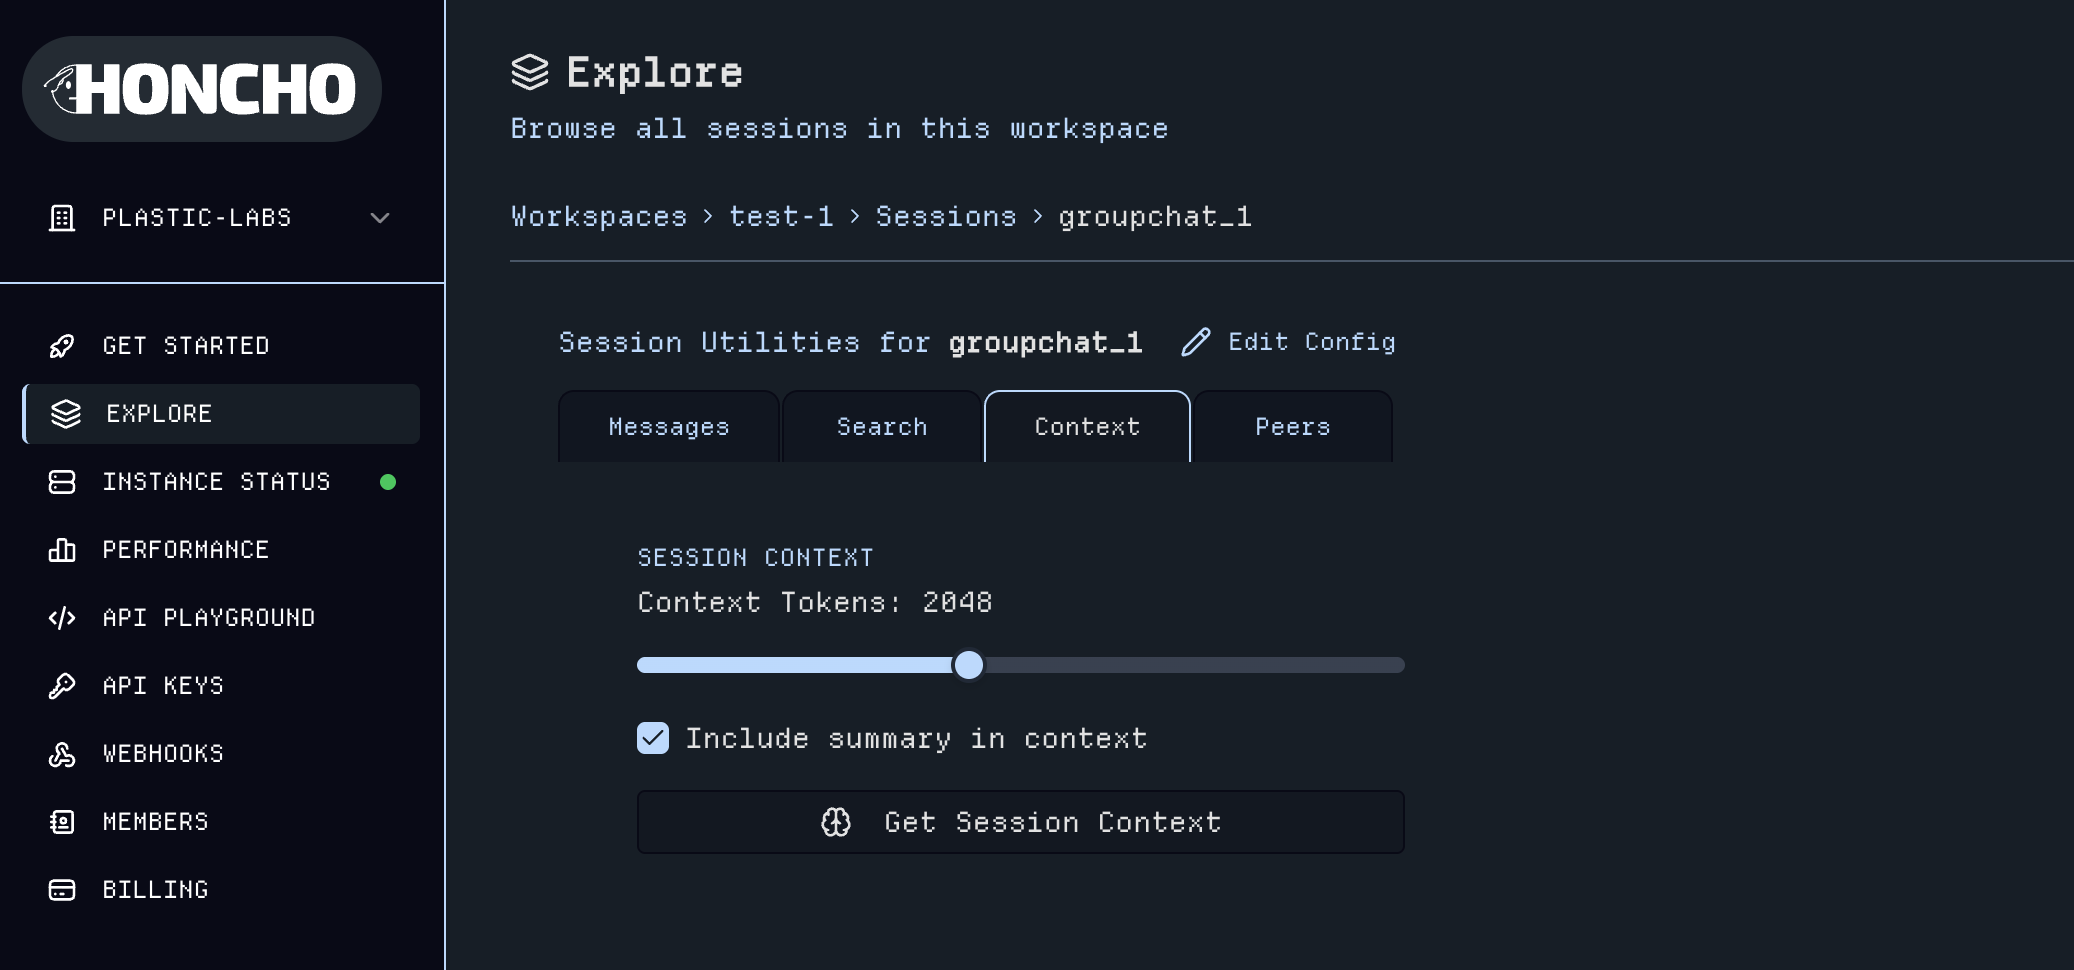 ## 8. Webhooks Integration
The [Webhooks](https://app.honcho.dev/webhooks) page enables Webhook creation and management.
## 8. Webhooks Integration
The [Webhooks](https://app.honcho.dev/webhooks) page enables Webhook creation and management.
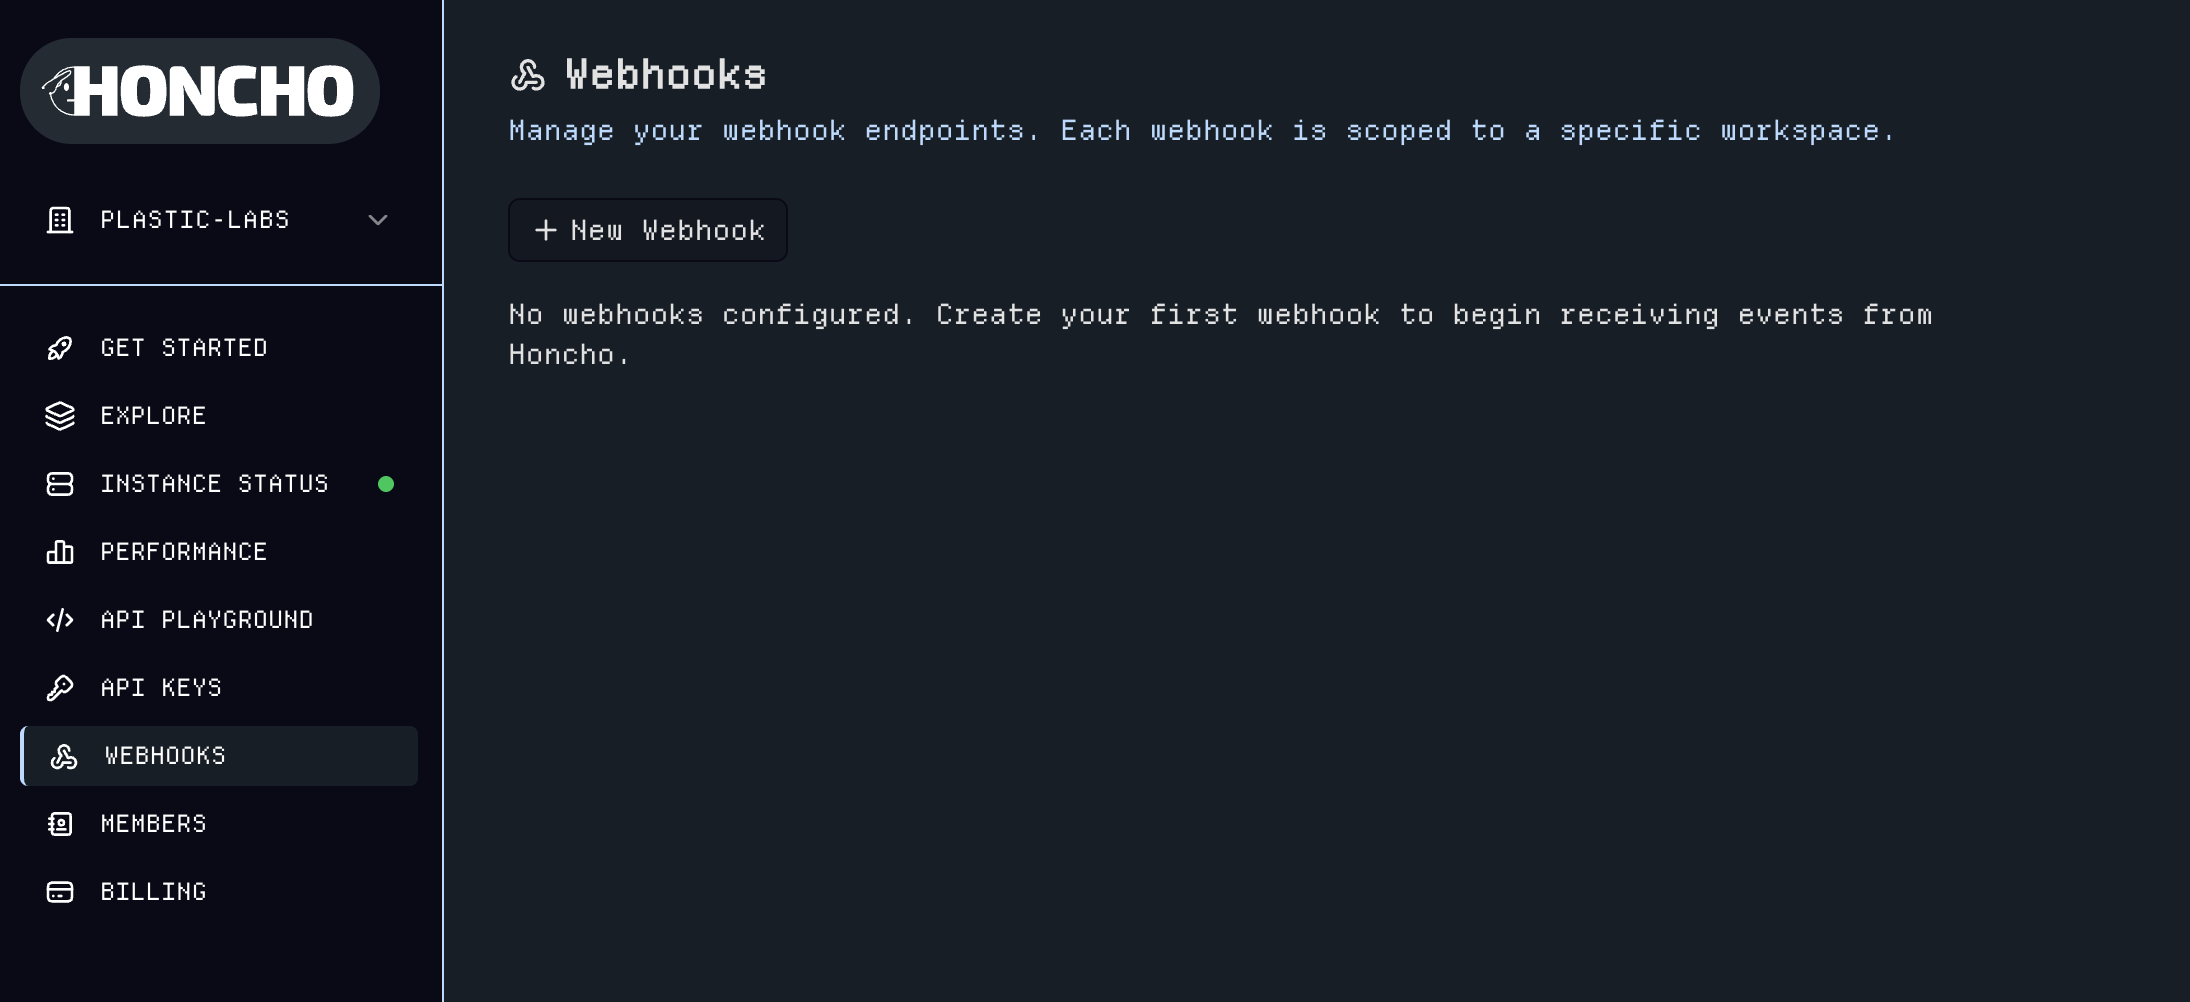 ## 9. Organization Member Access
The [Members](https://app.honcho.dev/members) page provides organization administration to manage your team's access to Honcho with the ability to grant admin permissions.
## 9. Organization Member Access
The [Members](https://app.honcho.dev/members) page provides organization administration to manage your team's access to Honcho with the ability to grant admin permissions.
 ## Go Further
View the [Architecture](/v2/documentation/core-concepts/architecture) to see how Honcho works under the hood.
Dive into our [API Reference](/v2/api-reference) to explore all available endpoints.
## Next Steps
Get started with managed Honcho instances
Connect with 1000+ developers building with Honcho
View our guidelines and explore the codebase
See Honcho in action with real examples
We're excited to see what you'll build with Honcho Platform. Let's create smarter, more personalized AI experiences together!
***
*Ready to build personally aligned AI? [Get started with Honcho →](https://app.honcho.dev)*
# SDK Reference
Source: https://docs.honcho.dev/v2/documentation/reference/sdk
Complete SDK documentation and examples for Python and TypeScript
The Honcho SDKs provide ergonomic interfaces for building agentic AI applications with Honcho in Python and TypeScript/JavaScript.
## Installation
```bash Python (uv) theme={null}
uv add honcho-ai
```
```bash Python (pip) theme={null}
pip install honcho-ai
```
```bash TypeScript (npm) theme={null}
npm install @honcho-ai/sdk
```
```bash TypeScript (yarn) theme={null}
yarn add @honcho-ai/sdk
```
```bash TypeScript (pnpm) theme={null}
pnpm add @honcho-ai/sdk
```
## Quickstart
Without configuration, the SDK defaults to the demo server. For production use:
1. Get your API key at [app.honcho.dev/api-keys](https://app.honcho.dev/api-keys)
2. Set `environment="production"` and provide your `api_key`
```python Python theme={null}
from honcho import Honcho
# Initialize client (using the default workspace)
honcho = Honcho()
# Create peers
alice = honcho.peer("alice")
assistant = honcho.peer("assistant")
# Create a session for conversation
session = honcho.session("conversation-1")
# Add messages to conversation
session.add_messages([
alice.message("What's the weather like today?"),
assistant.message("It's sunny and 75°F outside!")
])
# Query peer representations in natural language
response = alice.chat("What did the assistant tell this user about the weather?")
# Get conversation context for LLM completions
context = session.get_context()
openai_messages = context.to_openai(assistant=assistant)
```
```typescript TypeScript theme={null}
import { Honcho } from "@honcho-ai/sdk";
// Initialize client (using the default workspace)
const honcho = new Honcho({});
// Create peers
const alice = await honcho.peer("alice");
const assistant = await honcho.peer("assistant");
// Create a session for conversation
const session = await honcho.session("conversation-1");
// Add messages to conversation
await session.addMessages([
alice.message("What's the weather like today?"),
assistant.message("It's sunny and 75°F outside!")
]);
// Query peer representations in natural language
const response = await alice.chat("What did the assistant tell this user about the weather?");
// Get conversation context for LLM completions
const context = await session.getContext();
const openaiMessages = context.toOpenAI(assistant);
```
## Core Concepts
### Peers and Representations
**Representations** are how Honcho models what peers know. Each peer has a **global representation** (everything they know across all sessions) and **local representations** (what other specific peers know about them, scoped by session or globally).
```python Python theme={null}
# Query alice's global knowledge
response = alice.chat("What does the user know about weather?")
# Query what alice knows about the assistant (local representation)
response = alice.chat("What does the user know about the assistant?", target=assistant)
# Query scoped to a specific session
response = alice.chat("What happened in our conversation?", session_id=session.id)
```
```typescript TypeScript theme={null}
// Query alice's global knowledge
const response = await alice.chat("What does the user know about weather?");
// Query what alice knows about the assistant (local representation)
const targetResponse = await alice.chat("What does the user know about the assistant?", {
target: assistant
});
// Query scoped to a specific session
const sessionResponse = await alice.chat("What happened in our conversation?", {
sessionId: session.id
});
```
## Core Classes
### Honcho Client
The main entry point for workspace operations:
```python Python theme={null}
from honcho import Honcho
# Basic initialization (uses environment variables)
honcho = Honcho(workspace_id="my-app-name")
# Full configuration
honcho = Honcho(
workspace_id="my-app-name",
api_key="my-api-key",
environment="production", # or "local", "demo"
base_url="https://api.honcho.dev",
timeout=30.0,
max_retries=3
)
```
```typescript TypeScript theme={null}
import { Honcho } from "@honcho-ai/sdk";
// Basic initialization (uses environment variables)
const honcho = new Honcho({
workspaceId: "my-app-name"
});
// Full configuration
const honcho = new Honcho({
workspaceId: "my-app-name",
apiKey: "my-api-key",
environment: "production", // or "local", "demo"
baseURL: "https://api.honcho.dev",
timeout: 30000,
maxRetries: 3,
defaultHeaders: { "X-Custom-Header": "value" },
defaultQuery: { "param": "value" }
});
```
**Environment Variables:**
* `HONCHO_API_KEY` - API key for authentication
* `HONCHO_BASE_URL` - Base URL for the Honcho API
* `HONCHO_WORKSPACE_ID` - Default workspace ID
**Key Methods:**
```python Python theme={null}
# Get or create a peer
peer = honcho.peer(id)
# Get or create a session
session = honcho.session(id)
# List all peers in workspace
peers = honcho.get_peers()
# List all sessions in workspace
sessions = honcho.get_sessions()
# Search across all content in workspace
results = honcho.search(query)
# Workspace metadata management
metadata = honcho.get_metadata()
honcho.set_metadata(dict)
# Get list of all workspace IDs
workspaces = honcho.get_workspaces()
```
```typescript TypeScript theme={null}
// Get or create a peer
const peer = await honcho.peer(id);
// Get or create a session
const session = await honcho.session(id);
// List all peers in workspace (returns Page)
const peers = await honcho.getPeers();
// List all sessions in workspace (returns Page)
const sessions = await honcho.getSessions();
// Search across all content in workspace (returns Page)
const results = await honcho.search(query);
// Workspace metadata management
const metadata = await honcho.getMetadata();
await honcho.setMetadata(metadata);
// Get list of all workspace IDs
const workspaces = await honcho.getWorkspaces();
```
Peer and session creation is **lazy** - no API calls are made until you actually use the peer or session.
### Peer
Represents an entity that can participate in conversations:
```python Python theme={null}
# Create peers (lazy creation - no API call yet)
alice = honcho.peer("alice")
assistant = honcho.peer("assistant")
# Create with immediate configuration
# This will make an API call to create the peer with the custom configuration and/or metadata
alice = honcho.peer("bob", config={"role": "user", "active": True}, metadata={"location": "NYC", "role": "developer"})
# Peer properties
print(f"Peer ID: {alice.id}")
print(f"Workspace: {alice.workspace_id}")
# Chat with peer's representations (supports streaming)
response = alice.chat("What did I have for breakfast?")
response = alice.chat("What do I know about Bob?", target="bob")
response = alice.chat("What happened in session-1?", session_id="session-1")
# Add content to a session with a peer
session = honcho.session("session-1")
session.add_messages([
alice.message("I love Python programming"),
alice.message("Today I learned about async programming"),
alice.message("I prefer functional programming patterns")
])
# Get peer's sessions
sessions = alice.get_sessions()
# Search peer's messages
results = alice.search("programming")
# Metadata management
metadata = alice.get_metadata()
metadata["location"] = "Paris"
alice.set_metadata(metadata)
```
```typescript TypeScript theme={null}
// Create peers (returns Promise)
const alice = await honcho.peer("alice");
const assistant = await honcho.peer("assistant");
// Peer properties
console.log(`Peer ID: ${alice.id}`);
// Chat with peer's representations (supports streaming)
const response = await alice.chat("What did I have for breakfast?");
const targetResponse = await alice.chat("What do I know about Bob?", { target: "bob" });
const sessionResponse = await alice.chat("What happened in session-1?", {
sessionId: "session-1"
});
// Chat with streaming support
const streamResponse = await alice.chat("Tell me a story", { stream: true });
// Add content to a session with a peer
const session = await honcho.session("session-1");
await session.addMessages([
alice.message("I love TypeScript programming"),
alice.message("Today I learned about async programming"),
alice.message("I prefer functional programming patterns")
]);
// Get peer's sessions
const sessions = await alice.getSessions();
// Search peer's messages
const results = await alice.search("programming");
// Metadata management
const metadata = await alice.getMetadata();
await alice.setMetadata({
...metadata,
location: "Paris"
});
```
### Session
Manages multi-party conversations:
```python Python theme={null}
# Create session (like peers, lazy creation)
session = honcho.session("conversation-1")
# Create with immediate configuration
# This will make an API call to create the session with the custom configuration and/or metadata
session = honcho.session("meeting-1", config={"type": "meeting", "max_peers": 10})
# Session properties
print(f"Session ID: {session.id}")
print(f"Workspace: {session.workspace_id}")
# Peer management
session.add_peers([alice, assistant])
session.add_peers([(alice, SessionPeerConfig(observe_others=True))])
session.set_peers([alice, bob, charlie]) # Replace all peers
session.remove_peers([alice])
# Get session peers and their configurations
peers = session.get_peers()
peer_config = session.get_peer_config(alice)
session.set_peer_config(alice, SessionPeerConfig(observe_me=False))
# Message management
session.add_messages([
alice.message("Hello everyone!"),
assistant.message("Hi Alice! How can I help today?")
])
# Get messages
messages = session.get_messages()
# Get conversation context
context = session.get_context(summary=True, tokens=2000)
# Search session content
results = session.search("help")
# Working representation queries
global_rep = session.working_rep("alice")
targeted_rep = session.working_rep(alice, bob)
# Metadata management
session.set_metadata({"topic": "product planning", "status": "active"})
metadata = session.get_metadata()
```
```typescript TypeScript theme={null}
// Create session (returns Promise)
const session = await honcho.session("conversation-1");
// Session properties
console.log(`Session ID: ${session.id}`);
// Peer management
await session.addPeers([alice, assistant]);
await session.addPeers("single-peer-id");
await session.setPeers([alice, bob, charlie]); // Replace all peers
await session.removePeers([alice]);
await session.removePeers("single-peer-id");
// Get session peers
const peers = await session.getPeers();
// Message management
await session.addMessages([
alice.message("Hello everyone!"),
assistant.message("Hi Alice! How can I help today?")
]);
// Get messages
const messages = await session.getMessages();
// Get conversation context
const context = await session.getContext({ summary: true, tokens: 2000 });
// Search session content
const results = await session.search("help");
// Working representation queries
const globalRep = await session.workingRep("alice");
const targetedRep = await session.workingRep(alice, bob);
// Metadata management
await session.setMetadata({
topic: "product planning",
status: "active"
});
const metadata = await session.getMetadata();
```
**Session-Level Theory of Mind Configuration:**
**Theory of Mind** controls whether peers can form models of what other peers think. Use `observe_others=False` to prevent a peer from modeling others within a session, and `observe_me=False` to prevent others from modeling this peer within a session.
```python Python theme={null}
from honcho import SessionPeerConfig
# Configure peer observation settings
config = SessionPeerConfig(
observe_others=False, # Form theory-of-mind of other peers -- False by default
observe_me=True # Don't let others form theory-of-mind of me -- True by default
)
session.add_peers([(alice, config)])
```
```typescript TypeScript theme={null}
// Configure peer observation settings
const config = new SessionPeerConfig({
observeOthers: false, // Form theory-of-mind of other peers -- False by default
observeMe: true // Don't let others form theory-of-mind of me -- True by default
});
await session.addPeers([alice, config]);
```
### SessionContext
Provides formatted conversation context for LLM integration:
```python Python theme={null}
# Get session context
context = session.get_context(summary=True, tokens=1500)
# Convert to LLM-friendly formats
openai_messages = context.to_openai(assistant=assistant)
anthropic_messages = context.to_anthropic(assistant=assistant)
```
```typescript TypeScript theme={null}
// Get session context
const context = await session.getContext({ summary: true, tokens: 1500 });
// Convert to LLM-friendly formats
const openaiMessages = context.toOpenAI(assistant);
const anthropicMessages = context.toAnthropic(assistant);
```
The SessionContext object has the following structure:
```json theme={null}
{
"id": "string",
"messages": [
{
"id": "string",
"content": "string",
"peer_id": "string",
"session_id": "string",
"workspace_id": "string",
"metadata": {},
"created_at": "2024-01-15T10:30:00Z",
"token_count": 42
}
],
"summary": {
"content": "string",
"message_id": 123,
"summary_type": "short|long",
"created_at": "2024-01-15T10:30:00Z"
}
}
```
## Advanced Usage
### Multi-Party Conversations
```python Python theme={null}
# Create multiple peers
users = [honcho.peer(f"user-{i}") for i in range(5)]
moderator = honcho.peer("moderator")
# Create group session
group_chat = honcho.session("group-discussion")
group_chat.add_peers(users + [moderator])
# Add messages from different peers
group_chat.add_messages([
users[0].message("What's our agenda for today?"),
moderator.message("We'll discuss the new feature roadmap"),
users[1].message("I have some concerns about the timeline")
])
# Query different perspectives
user_perspective = users[0].chat("What are people's concerns?")
moderator_view = moderator.chat("What feedback am I getting?", session_id=group_chat.id)
```
```typescript TypeScript theme={null}
// Create multiple peers
const users = await Promise.all(
Array.from({ length: 5 }, (_, i) => honcho.peer(`user-${i}`))
);
const moderator = await honcho.peer("moderator");
// Create group session
const groupChat = await honcho.session("group-discussion");
await groupChat.addPeers([...users, moderator]);
// Add messages from different peers
await groupChat.addMessages([
users[0].message("What's our agenda for today?"),
moderator.message("We'll discuss the new feature roadmap"),
users[1].message("I have some concerns about the timeline")
]);
// Query different perspectives
const userPerspective = await users[0].chat("What are people's concerns?");
const moderatorView = await moderator.chat("What feedback am I getting?", {
sessionId: groupChat.id
});
```
### LLM Integration
```python Python theme={null}
import openai
# Get conversation context
context = session.get_context(tokens=3000)
messages = context.to_openai(assistant=assistant)
# Call OpenAI API
response = openai.chat.completions.create(
model="gpt-4",
messages=messages + [
{"role": "user", "content": "Summarize the key discussion points."}
]
)
```
```typescript TypeScript theme={null}
import OpenAI from 'openai';
const openai = new OpenAI();
// Get conversation context
const context = await session.getContext({ tokens: 3000 });
const messages = context.toOpenAI(assistant);
// Call OpenAI API
const response = await openai.chat.completions.create({
model: "gpt-4",
messages: [
...messages,
{ role: "user", content: "Summarize the key discussion points." }
]
});
```
### Custom Message Timestamps
When creating messages, you can optionally specify a custom `created_at` timestamp instead of using the server's current time:
```bash theme={null}
curl -X POST "https://api.honcho.dev/v2/workspaces/{workspace_id}/sessions/{session_id}/messages" \
-H "Authorization: Bearer $API_KEY" \
-H "Content-Type: application/json" \
-d '{
"messages": [
{
"peer_id": "user123",
"content": "This message happened yesterday",
"created_at": "2024-01-01T12:00:00Z",
"metadata": {"source": "historical_data"}
}
]
}'
```
This is useful for:
* Importing historical conversation data
* Backfilling messages from other systems
* Maintaining accurate timeline ordering when processing batch data
If `created_at` is not provided, messages will use the server's current timestamp.
### Metadata and Filtering
See [Using Filters](/v2/guides/using-filters) for more examples on how to use filters.
```python Python theme={null}
# Add messages with metadata
session.add_messages([
alice.message("Let's discuss the budget", metadata={
"topic": "finance",
"priority": "high"
}),
assistant.message("I'll prepare the financial report", metadata={
"action_item": True,
"due_date": "2024-01-15"
})
])
# Filter messages by metadata
finance_messages = session.get_messages(filters={"metadata": {"topic": "finance"}})
action_items = session.get_messages(filters={"metadata": {"action_item": True}})
```
```typescript TypeScript theme={null}
// Add messages with metadata
await session.addMessages([
alice.message("Let's discuss the budget", {
metadata: {
topic: "finance",
priority: "high"
}
}),
assistant.message("I'll prepare the financial report", {
metadata: {
action_item: true,
due_date: "2024-01-15"
}
})
]);
// Filter messages by metadata
const financeMessages = await session.getMessages({
filters: { metadata: { topic: "finance" } }
});
const actionItems = await session.getMessages({
filters: { metadata: { action_item: true } }
});
```
### Pagination
```python Python theme={null}
# Iterate through all sessions
for session in honcho.get_sessions():
print(f"Session: {session.id}")
# Iterate through session messages
for message in session.get_messages():
print(f" {message.peer_id}: {message.content}")
```
```typescript TypeScript theme={null}
// Get paginated results
const peersPage = await honcho.getPeers();
// Iterate through all items
for await (const peer of peersPage) {
console.log(`Peer: ${peer.id}`);
}
// Manual pagination
let currentPage = peersPage;
while (currentPage) {
const data = await currentPage.data();
console.log(`Processing ${data.length} items`);
currentPage = await currentPage.nextPage();
}
```
## Best Practices
### Resource Management
```python Python theme={null}
# Peers and sessions are lightweight - create as needed
alice = honcho.peer("alice")
session = honcho.session("chat-1")
# Use descriptive IDs for better debugging
user_session = honcho.session(f"user-{user_id}-support-{ticket_id}")
support_agent = honcho.peer(f"agent-{agent_id}")
```
```typescript TypeScript theme={null}
// Peers and sessions are lightweight - create as needed
const alice = await honcho.peer("alice");
const session = await honcho.session("chat-1");
// Use descriptive IDs for better debugging
const userSession = await honcho.session(`user-${userId}-support-${ticketId}`);
const supportAgent = await honcho.peer(`agent-${agentId}`);
```
### Performance Optimization
```python Python theme={null}
# Lazy creation - no API calls until needed
peers = [honcho.peer(f"user-{i}") for i in range(100)] # Fast
# Batch operations when possible
session.add_messages([peer.message(f"Message {i}") for i, peer in enumerate(peers)])
# Use context limits to control token usage
context = session.get_context(tokens=1500) # Limit context size
```
```typescript TypeScript theme={null}
// Lazy creation - no API calls until needed
const peers = await Promise.all(
Array.from({ length: 100 }, (_, i) => honcho.peer(`user-${i}`))
);
// Batch operations when possible
await session.addMessages(
peers.map((peer, i) => peer.message(`Message ${i}`))
);
// Use context limits to control token usage
const context = await session.getContext({ tokens: 1500 }); // Limit context size
// Iterate efficiently with async iteration
for await (const peer of await honcho.getPeers()) {
// Process one peer at a time without loading all into memory
}
```
# Discord Bots with Honcho
Source: https://docs.honcho.dev/v2/guides/discord
Use Honcho to build a Discord bot with conversational memory and context management.
> Example code is available on [GitHub](https://github.com/plastic-labs/discord-python-starter)
Any application interface that defines logic based on events and supports
special commands can work easily with Honcho. Here's how to use Honcho with
**Discord** as an interface. If you're not familiar with Discord bot
application logic, the [py-cord](https://pycord.dev/) docs would be a good
place to start.
## Events
Most Discord bots have async functions that listen for specific events, the most common one being messages. We can use Honcho to store messages by user and session based on an interface's event logic. Take the following function definition for example:
```python theme={null}
@bot.event
async def on_message(message):
"""
Receive a message from Discord and respond with a message from our LLM assistant.
"""
if not validate_message(message):
return
input = sanitize_message(message)
# If the message is empty after sanitizing, ignore it
if not input:
return
peer = honcho_client.peer(id=get_peer_id_from_discord(message))
session = honcho_client.session(id=str(message.channel.id))
async with message.channel.typing():
response = llm(session, input)
await send_discord_message(message, response)
# Save both the user's message and the bot's response to the session
session.add_messages(
[
peer.message(input),
assistant.message(response),
]
)
```
Let's break down what this code is doing...
```python theme={null}
@bot.event
async def on_message(message):
if not validate_message(message):
return
```
This is how you define an event function in `py-cord` that listens for messages. We use a helper function `validate_message()` to check if the message should be processed.
## Helper Functions
The code uses several helper functions to keep the main logic clean and readable. Let's examine each one:
### Message Validation
```python theme={null}
def validate_message(message) -> bool:
"""
Determine if the message is valid for the bot to respond to.
Return True if it is, False otherwise. Currently, the bot will
only respond to messages that tag it with an @mention in a
public channel and are not from the bot itself.
"""
if message.author == bot.user:
# ensure the bot does not reply to itself
return False
if isinstance(message.channel, discord.DMChannel):
return False
if not bot.user.mentioned_in(message):
return False
return True
```
This function centralizes all the logic for determining whether the bot should respond to a message. It checks that:
* The message isn't from the bot itself
* The message isn't in a DM channel
* The bot is mentioned in the message
### Message Sanitization
```python theme={null}
def sanitize_message(message) -> str | None:
"""Remove the bot's mention from the message content if present"""
content = message.content.replace(f"<@{bot.user.id}>", "").strip()
if not content:
return None
return content
```
This helper removes the bot's mention from the message content, leaving just the actual user input.
### Peer ID Generation
```python theme={null}
def get_peer_id_from_discord(message):
"""Get a Honcho peer ID for the message author"""
return f"discord_{str(message.author.id)}"
```
This creates a unique peer identifier for each Discord user by prefixing their Discord ID.
### LLM Integration
```python theme={null}
def llm(session, prompt) -> str:
"""
Call the LLM with the given prompt and chat history.
You should expand this function with custom logic, prompts, etc.
"""
messages: list[dict[str, object]] = session.get_context().to_openai(
assistant=assistant
)
messages.append({"role": "user", "content": prompt})
try:
completion = openai.chat.completions.create(
model=MODEL_NAME,
messages=messages,
)
return completion.choices[0].message.content
except Exception as e:
print(e)
return f"Error: {e}"
```
This function handles the LLM interaction. It uses Honcho's built-in `to_openai()` method to automatically convert the session context into the format expected by OpenAI's chat completions API.
### Message Sending
```python theme={null}
async def send_discord_message(message, response_content: str):
"""Send a message to the Discord channel"""
if len(response_content) > 1500:
# Split response into chunks at newlines, keeping under 1500 chars
chunks = []
current_chunk = ""
for line in response_content.splitlines(keepends=True):
if len(current_chunk) + len(line) > 1500:
chunks.append(current_chunk)
current_chunk = line
else:
current_chunk += line
if current_chunk:
chunks.append(current_chunk)
for chunk in chunks:
await message.channel.send(chunk)
else:
await message.channel.send(response_content)
```
This function handles sending messages to Discord, automatically splitting long responses into multiple messages to stay within Discord's character limits.
## Honcho Integration
The new Honcho peer/session API makes integration much simpler:
```python theme={null}
peer = honcho_client.peer(id=get_peer_id_from_discord(message))
session = honcho_client.session(id=str(message.channel.id))
```
Here we create a peer object for the user and a session object using the Discord channel ID. This automatically handles user and session management.
```python theme={null}
# Save both the user's message and the bot's response to the session
session.add_messages(
[
peer.message(input),
assistant.message(response),
]
)
```
After generating the response, we save both the user's input and the bot's response to the session using the `add_messages()` method. The `peer.message()` creates a message from the user, while `assistant.message()` creates a message from the assistant.
## Slash Commands
Discord bots also offer slash command functionality. Here's an example using Honcho's dialectic feature:
```python theme={null}
@bot.slash_command(
name="dialectic",
description="Query the Honcho Dialectic endpoint.",
)
async def dialectic(ctx, query: str):
await ctx.defer()
try:
peer = honcho_client.peer(id=get_peer_id_from_discord(ctx))
session = honcho_client.session(id=str(ctx.channel.id))
response = peer.chat(
query=query,
session_id=session.id,
)
if response:
await ctx.followup.send(response)
else:
await ctx.followup.send(
f"I don't know anything about {ctx.author.name} because we haven't talked yet!"
)
except Exception as e:
logger.error(f"Error calling Dialectic API: {e}")
await ctx.followup.send(
f"Sorry, there was an error processing your request: {str(e)}"
)
```
This slash command uses Honcho's dialectic functionality to answer questions about the user based on their conversation history.
## Setup and Configuration
The bot requires several environment variables and setup:
```python theme={null}
honcho_client = Honcho()
assistant = honcho_client.peer(id="assistant", config={"observe_me": False})
openai = OpenAI(base_url="https://openrouter.ai/api/v1", api_key=MODEL_API_KEY)
```
* `honcho_client`: The main Honcho client
* `assistant`: A peer representing the bot/assistant
* `openai`: OpenAI client configured to use OpenRouter
## Recap
The new Honcho peer/session API makes Discord bot integration much simpler and more intuitive. Key patterns we learned:
* **Peer/Session Model**: Users are represented as peers, conversations as sessions
* **Automatic Context Management**: `session.get_context().to_openai()` automatically formats chat history
* **Message Storage**: `session.add_messages()` stores both user and assistant messages
* **Dialectic Queries**: `peer.chat()` enables querying conversation history
* **Helper Functions**: Clean code organization with focused helper functions
This approach provides a clean, maintainable structure for building Discord bots with conversational memory and context management.
# Honcho MCP
Source: https://docs.honcho.dev/v2/guides/mcp
Use Honcho in Claude Desktop
You can let Claude use Honcho to manage its own memory in the native desktop app by using the Honcho MCP integration! Follow these steps:
1. Go to [https://app.honcho.dev](https://app.honcho.dev) and get an API key. Then go to Claude Desktop and navigate to custom MCP servers.
If you don't have node installed you will need to do that. Claude Desktop or Claude Code can help!
2. Add Honcho to your Claude desktop config. You must provide a username for Honcho to refer to you as -- preferably what you want Claude to actually call you.
```json theme={null}
{
"mcpServers": {
"honcho": {
"command": "npx",
"args": [
"mcp-remote",
"https://mcp.honcho.dev",
"--header",
"Authorization:${AUTH_HEADER}",
"--header",
"X-Honcho-User-Name:${USER_NAME}"
],
"env": {
"AUTH_HEADER": "Bearer ",
"USER_NAME": ""
}
}
}
}
```
You may customize your assistant name and/or workspace ID. Both are optional.
```json theme={null}
{
"mcpServers": {
"honcho": {
"command": "npx",
"args": [
"mcp-remote",
"https://mcp.honcho.dev",
"--header",
"Authorization:${AUTH_HEADER}",
"--header",
"X-Honcho-User-Name:${USER_NAME}",
"--header",
"X-Honcho-Assistant-Name:${ASSISTANT_NAME}",
"--header",
"X-Honcho-Workspace-ID:${WORKSPACE_ID}"
],
"env": {
"AUTH_HEADER": "Bearer ",
"USER_NAME": "",
"ASSISTANT_NAME": "",
"WORKSPACE_ID": ""
}
}
}
}
```
3. Restart the Claude Desktop app. Upon relaunch, it should start Honcho and the tools should be available!
4. Finally, Claude needs instructions on how to use Honcho. The Desktop app doesn't allow you to add system prompts directly, but you can create a project and paste these [instructions](https://raw.githubusercontent.com/plastic-labs/honcho/refs/heads/main/mcp/instructions.md) into the "Project Instructions" field.
Claude should then query for insights before responding and write your messages to storage! If you come up with more creative ways to get Claude to manage its own memory with Honcho, feel free to [let us know](https://discord.gg/plasticlabs) or make a PR on this [repo](https://github.com/plastic-labs/honcho/tree/main/mcp)!
# Spellbooks and Tutorials
Source: https://docs.honcho.dev/v2/guides/overview
Helpful guides and design patterns for building with Honcho
Before you start a tutorial, follow [Quickstart](/v2/documentation/introduction/quickstart) to get up and running with Honcho in your language of choice.
AI development often feels like magic - you craft the right prompt and get exactly what you need. Our Spellbooks are practical guides that show you how to cast effective spells with Honcho.
Whether you're integrating Honcho into existing platforms, exploring advanced features, or getting up and running quickly, these guides provide concrete examples and implementation patterns.
Each spellbook focuses on a specific use case with working code you can adapt to your needs. The goal is to get you from idea to working prototype as quickly as possible, then provide the depth you need to scale and customize.
## Application Interfaces
Ready-to-use integration patterns for popular platforms:
Build a Discord bot that remembers users across conversations
Create a Telegram bot with persistent user understanding
Get Honcho running with a single prompt in Cursor or Claude Code
# Telegram Bots with Honcho
Source: https://docs.honcho.dev/v2/guides/telegram
Use Honcho to build a Telegram bot with conversational memory and context management.
> Example code is available on [GitHub](https://github.com/plastic-labs/telegram-python-starter)
Any application interface that defines logic based on events and supports
special commands can work easily with Honcho. Here's how to use Honcho with
**Telegram** as an interface. If you're not familiar with Telegram bot
development, the [python-telegram-bot](https://docs.python-telegram-bot.org/en/stable/) docs would be a good
place to start.
## Message Handling
Most Telegram bots have async functions that handle incoming messages. We can use Honcho to store messages by user and session based on the chat context. Take the following function definition for example:
```python theme={null}
async def handle_message(update: Update, context: ContextTypes.DEFAULT_TYPE):
"""
Receive a message from Telegram and respond with a message from our LLM assistant.
"""
if not validate_message(update, context):
return
message_text = update.effective_message.text
input_text = sanitize_message(message_text, context.bot.username)
# If the message is empty after sanitizing, ignore it
if not input_text:
return
peer = honcho_client.peer(id=get_peer_id_from_telegram(update))
session = honcho_client.session(id=str(update.effective_chat.id))
# Send typing indicator
await context.bot.send_chat_action(
chat_id=update.effective_chat.id, action="typing"
)
response = llm(session, input_text)
await send_telegram_message(update, context, response)
# Save both the user's message and the bot's response to the session
session.add_messages(
[
peer.message(input_text),
assistant.message(response),
]
)
```
Let's break down what this code is doing...
```python theme={null}
async def handle_message(update: Update, context: ContextTypes.DEFAULT_TYPE):
if not validate_message(update, context):
return
```
This is how you define a message handler in `python-telegram-bot` that processes incoming messages. We use a helper function `validate_message()` to check if the message should be processed.
## Helper Functions
The code uses several helper functions to keep the main logic clean and readable. Let's examine each one:
### Message Validation
```python theme={null}
def validate_message(update: Update, context: ContextTypes.DEFAULT_TYPE) -> bool:
"""
Determine if the message is valid for the bot to respond to.
Return True if it is, False otherwise. The bot will respond to:
- Direct messages (private chats)
- Group messages that mention the bot or reply to it
- Messages that are not from the bot itself
"""
message = update.effective_message
if not message or not message.text:
return False
# Don't respond to our own messages
if message.from_user.id == context.bot.id:
return False
# Always respond in private chats
if update.effective_chat.type == "private":
return True
# In groups, only respond if mentioned or replied to
if (
message.reply_to_message
and message.reply_to_message.from_user.id == context.bot.id
):
return True
# Check if bot is mentioned
if message.entities:
for entity in message.entities:
if entity.type == "mention":
username = message.text[entity.offset : entity.offset + entity.length]
if username == f"@{context.bot.username}":
return True
return False
```
This function centralizes all the logic for determining whether the bot should respond to a message. It handles different chat types:
* **Private chats**: Always respond
* **Group chats**: Only respond when mentioned or when replying to the bot's messages
* **Bot prevention**: Never respond to the bot's own messages
### Message Sanitization
```python theme={null}
def sanitize_message(message_text: str, bot_username: str) -> str | None:
"""Remove the bot's mention from the message content if present"""
content = message_text.replace(f"@{bot_username}", "").strip()
if not content:
return None
return content
```
This helper removes the bot's mention from the message content, leaving just the actual user input.
### Peer ID Generation
```python theme={null}
def get_peer_id_from_telegram(update: Update) -> str:
"""Get a Honcho peer ID for the message author"""
return f"telegram_{update.effective_user.id}"
```
This creates a unique peer identifier for each Telegram user by prefixing their Telegram user ID.
### LLM Integration
```python theme={null}
def llm(session, prompt) -> str:
"""
Call the LLM with the given prompt and chat history.
You should expand this function with custom logic, prompts, etc.
"""
messages: list[dict[str, object]] = session.get_context().to_openai(
assistant=assistant
)
messages.append({"role": "user", "content": prompt})
try:
completion = openai.chat.completions.create(
model=MODEL_NAME,
messages=messages,
)
return completion.choices[0].message.content
except Exception as e:
logger.error(f"LLM error: {e}")
return f"Error: {e}"
```
This function handles the LLM interaction. It uses Honcho's built-in `to_openai()` method to automatically convert the session context into the format expected by OpenAI's chat completions API.
### Message Sending
```python theme={null}
async def send_telegram_message(
update: Update, context: ContextTypes.DEFAULT_TYPE, response_content: str
):
"""Send a message to the Telegram chat, splitting if necessary"""
# Telegram has a 4096 character limit, but we'll use 4000 to be safe
max_length = 4000
if len(response_content) <= max_length:
await update.effective_message.reply_text(response_content)
else:
# Split response into chunks at newlines, keeping under max_length chars
chunks = []
current_chunk = ""
for line in response_content.splitlines(keepends=True):
if len(current_chunk) + len(line) > max_length:
if current_chunk:
chunks.append(current_chunk)
current_chunk = line
else:
current_chunk += line
if current_chunk:
chunks.append(current_chunk)
for chunk in chunks:
await update.effective_message.reply_text(chunk)
```
This function handles sending messages to Telegram, automatically splitting long responses into multiple messages to stay within Telegram's 4096 character limit. It also includes a typing indicator to show the bot is processing.
## Honcho Integration
The new Honcho peer/session API makes integration much simpler:
```python theme={null}
peer = honcho_client.peer(id=get_peer_id_from_telegram(update))
session = honcho_client.session(id=str(update.effective_chat.id))
```
Here we create a peer object for the user and a session object using the Telegram chat ID. This automatically handles user and session management across both private chats and group conversations.
```python theme={null}
# Save both the user's message and the bot's response to the session
session.add_messages(
[
peer.message(input_text),
assistant.message(response),
]
)
```
After generating the response, we save both the user's input and the bot's response to the session using the `add_messages()` method. The `peer.message()` creates a message from the user, while `assistant.message()` creates a message from the assistant.
## Commands
Telegram bots support slash commands natively. Here's how to implement the `/dialectic` command using Honcho's dialectic feature:
```python theme={null}
async def dialectic_command(update: Update, context: ContextTypes.DEFAULT_TYPE):
"""
Handle the /dialectic command to query the Honcho Dialectic endpoint.
"""
if not context.args:
await update.message.reply_text(
"Please provide a query. Usage: /dialectic "
)
return
query = " ".join(context.args)
try:
peer = honcho_client.peer(id=get_peer_id_from_telegram(update))
session = honcho_client.session(id=str(update.effective_chat.id))
response = peer.chat(
query=query,
session_id=session.id,
)
if response:
await send_telegram_message(update, context, response)
else:
await update.message.reply_text(
f"I don't know anything about {update.effective_user.first_name} because we haven't talked yet!"
)
except Exception as e:
logger.error(f"Error calling Dialectic API: {e}")
await update.message.reply_text(
f"Sorry, there was an error processing your request: {str(e)}"
)
```
You can also add a `/start` command for user onboarding:
```python theme={null}
async def start_command(update: Update, context: ContextTypes.DEFAULT_TYPE):
"""Handle the /start command"""
await update.message.reply_text(
"Hello! I'm your AI assistant. You can:\n"
"• Chat with me directly in private messages\n"
"• Mention me (@username) in groups to get my attention\n"
"• Use /dialectic to search our conversation history\n\n"
"Let's start chatting!"
)
```
## Setup and Configuration
The bot requires several environment variables and setup:
```python theme={null}
honcho_client = Honcho()
assistant = honcho_client.peer(id="assistant", config={"observe_me": False})
openai = OpenAI(base_url="https://openrouter.ai/api/v1", api_key=MODEL_API_KEY)
```
* `honcho_client`: The main Honcho client
* `assistant`: A peer representing the bot/assistant
* `openai`: OpenAI client configured to use OpenRouter
### Application Setup
Register your handlers with the Telegram application:
```python theme={null}
def main():
"""Start the bot"""
if not BOT_TOKEN:
logger.error("BOT_TOKEN not found in environment variables")
return
# Create the Application
application = Application.builder().token(BOT_TOKEN).build()
# Add handlers
application.add_handler(CommandHandler("start", start_command))
application.add_handler(CommandHandler("dialectic", dialectic_command))
application.add_handler(
MessageHandler(filters.TEXT & ~filters.COMMAND, handle_message)
)
# Start the bot
logger.info("Starting Telegram bot...")
application.run_polling(allowed_updates=Update.ALL_TYPES)
```
## Environment Variables
Your bot needs these environment variables:
```env theme={null}
# Your Telegram bot token from BotFather
BOT_TOKEN=
# AI model to use (see OpenRouter for available models)
MODEL_NAME=
# Your OpenRouter API key
MODEL_API_KEY=
```
## Chat Types and Behavior
The bot handles different Telegram chat types intelligently:
### Private Chats
* **Behavior**: Responds to all messages
* **Session ID**: Uses the private chat ID
* **Memory**: Maintains conversation history per user
### Group Chats
* **Behavior**: Only responds when mentioned or replied to
* **Session ID**: Uses the group chat ID (shared across all members)
* **Memory**: Maintains group conversation context
## Recap
The new Honcho peer/session API makes Telegram bot integration much simpler and more intuitive. Key patterns we learned:
* **Peer/Session Model**: Users are represented as peers, conversations as sessions
* **Chat Type Handling**: Different validation logic for private vs group chats
* **Automatic Context Management**: `session.get_context().to_openai()` automatically formats chat history
* **Message Storage**: `session.add_messages()` stores both user and assistant messages
* **Dialectic Queries**: `peer.chat()` enables querying conversation history
* **Command System**: Native Telegram command support with `/start` and `/dialectic`
* **Message Splitting**: Automatic handling of Telegram's character limits
* **Helper Functions**: Clean code organization with focused helper functions
This approach provides a clean, maintainable structure for building Telegram bots with conversational memory and context management across both private conversations and group chats.
# SDK and API Compatibility Guide
Source: https://docs.honcho.dev/changelog/compatibility-guide
Compatibility guide for Honcho's SDKs and API
This guide helps you understand which versions of Honcho's API are compatible with which SDK versions.
## Version Compatibility
### Honcho API v2.4.2 (Current)
**Compatible Version:** v1.5.0
Install with:
```bash theme={null}
npm install @honcho-ai/sdk@1.5.0
```
**Compatible Version:** v1.5.0
Install with:
```bash theme={null}
pip install honcho-ai==1.5.0
```
## Version Compatibility Table
| Honcho API Version | TypeScript SDK | Python SDK |
| ------------------ | -------------- | ---------- |
| v2.4.2 (Current) | v1.5.0 | v1.5.0 |
| v2.4.1 | v1.5.0 | v1.5.0 |
| v2.4.0 | v1.5.0 | v1.5.0 |
| v2.3.3 | v1.4.1 | v1.4.1 |
| v2.3.2 | v1.4.0 | v1.4.0 |
| v2.3.1 | v1.4.0 | v1.4.0 |
| v2.3.0 | v1.4.0 | v1.4.0 |
| v2.2.0 | v1.3.0 | v1.3.0 |
| v2.1.1 | v1.2.1 | v1.2.2 |
| v2.1.0 | v1.2.1 | v1.2.2 |
| v2.0.5 | v1.1.0 | v1.1.0 |
| v2.0.4 | v1.1.0 | v1.1.0 |
# Changelog
Source: https://docs.honcho.dev/changelog/introduction
Welcome to the Honcho changelog! This section documents all notable changes to the Honcho API and SDKs.
Each release is documented with:
* **Added**: New features and capabilities
* **Changed**: Modifications to existing functionality
* **Deprecated**: Features that will be removed in future versions
* **Removed**: Features that have been removed
* **Fixed**: Bug fixes and corrections
* **Security**: Security-related improvements
## Version Format
Honcho follows [Semantic Versioning](https://semver.org/):
* **MAJOR** version for incompatible API changes
* **MINOR** version for backwards-compatible functionality additions
* **PATCH** version for backwards-compatible bug fixes
### Honcho API and SDK Changelogs
### Fixed
* Langfuse tracing to have readable waterfalls
* Alembic Migrations to match models.py
* message\_in\_seq correctly included in webhook payload
### Changed
* Alembic to always use a session pooler
* Statement timeout during alembic operations to 5 min
### Added
* Alembic migration validation test suite
### Fixed
* Alembic migrations to batch changes
* Batch message creation sequence number
### Changed
* Logging infrastructure to remove noisy messages
* Sentry integration is centralized
### Added
* Unified `Representation` class
* vllm client support
* Periodic queue cleanup logic
* WIP Dreaming Feature
* LongMemEval to Test Bench
* Prometheus Client for better Metrics
* Performance metrics instrumentation
* Error reporting to deriver
* Workspace Delete Method
* Multi-db option in test harness
### Changed
* Working Representations are Queried on the fly rather than cached in metadata
* EmbeddingStore to RepresentationFactory
* Summary Response Model to use public\_id of message for cutoff
* Semantic across codebase to reference resources based on `observer` and `observed`
* Prompts for Deriver & Dialectic to reference peer\_id and add examples
* `Get Context` route returns peer card and representation in addition to messages and summaries
* Refactoring logger.info calls to logger.debug where applicable
### Fixed
* Gemini client to use async methods
### Changed
* Deriver Rollup Queue processes interleaved messages for more context
### Fixed
* Dialectic Streaming to follow SSE conventions
* Sentry tracing in the deriver
### Added
* Get peer cards endpoint (`GET /v2/peers/{peer_id}/peer-card`) for retrieving targeted peer context information
### Changed
* Replaced Mirascope dependency with small client implementation for better control
* Optimized deriver performance by using joins on messages table instead of storing token count in queue payload
* Database scope optimization for various operations
* Batch representation task processing for \~10x speed improvement in practice
### Fixed
* Separated clean and claim work units in queue manager to prevent race conditions
* Skip locked ActiveQueueSession rows on delete operations
* Langfuse SDK integration updates for compatibility
* Added configurable maximum message size to prevent token overflow in deriver
* Various minor bugfixes
### Fixed
* Added max message count to deriver in order to not overflow token limits
### Added
* `getSummaries` endpoint to get all available summaries for a session directly
* Peer Card feature to improve context for deriver and dialectic
### Changed
* Session Peer limit to be based on observers instead, renamed config value to
`SESSION_OBSERVERS_LIMIT`
* `Messages` can take a custom timestamp for the `created_at` field, defaulting
to the current time
* `get_context` endpoint returns detailed `Summary` object rather than just
summary content
* Working representations use a FIFO queue structure to maintain facts rather
than a full rewrite
* Optimized deriver enqueue by prefetching message sequence numbers (eliminates N+1 queries)
### Fixed
* Deriver uses `get_context` internally to prevent context window limit errors
* Embedding store will truncate context when querying documents to prevent embedding
token limit errors
* Queue manager to schedule work based on available works rather than total
number of workers
* Queue manager to use atomic db transactions rather than long lived transaction
for the worker lifecycle
* Timestamp formats unified to ISO 8601 across the codebase
* Internal get\_context method's cutoff value is exclusive now
### Added
* Arbitrary filters now available on all search endpoints
* Search combines full-text and semantic using reciprocal rank fusion
* Webhook support (currently only supports queue\_empty and test events, more to come)
* Small test harness and custom test format for evaluating Honcho output quality
* Added MCP server and documentation for it
### Changed
* Search has 10 results by default, max 100 results
* Queue structure generalized to handle more event types
* Summarizer now exhaustive by default and tuned for performance
### Fixed
* Resolve race condition for peers that leave a session while sending messages
* Added explicit rollback to solve integrity error in queue
* Re-introduced Sentry tracing to deriver
* Better integrity logic in get\_or\_create API methods
### Fixed
* Summarizer module to ignore empty summaries and pass appropriate one to get\_context
* Structured Outputs calls with OpenAI provider to pass strict=True to Pydantic Schema
### Added
* Test harness for custom Honcho evaluations
* Better support for session and peer aware dialectic queries
* Langfuse settings
* Added recent history to dialectic prompt, dynamic based on new context window size setting
### Fixed
* Summary queue logic
* Formatting of logs
* Filtering by session
* Peer targeting in queries
### Changed
* Made query expansion in dialectic off by default
* Overhauled logging
* Refactor summarization for performance and code clarity
* Refactor queue payloads for clarity
### Added
* File uploads
* Brand new "ROTE" deriver system
* Updated dialectic system
* Local working representations
* Better logging for deriver/dialectic
* Deriver Queue Status no longer has redundant data
### Fixed
* Document insertion
* Session-scoped and peer-targeted dialectic queries work now
* Minor bugs
### Removed
* Peer-level messages
### Changed
* Dialectic chat endpoint takes a single query
* Rearranged configuration values (LLM, Deriver, Dialectic, History->Summary)
### Fixed
* Groq API client to use the Async library
### Fixed
* Migration/provision scripts did not have correct database connection arguments, causing timeouts
### Fixed
* Bug that causes runtime error when Sentry flags are enabled
### Fixed
* Database initialization was misconfigured and led to provision\_db script failing: switch to consistent working configuration with transaction pooler
### Added
* Ergonomic SDKs for Python and TypeScript (uses Stainless underneath)
* Deriver Queue Status endpoint
* Complex arbitrary filters on workspace/session/peer/message
* Message embedding table for full semantic search
### Changed
* Overhauled documentation
* BasedPyright typing for entire project
* Resource filtering expanded to include logical operators
### Fixed
* Various bugs
* Use new config arrangement everywhere
* Remove hardcoded responses
### Added
* Ability to get a peer's working representation
* Metadata to all data primitives (Workspaces, Peers, Sessions, Messages)
* Internal metadata to store Honcho's state no longer exposed in API
* Batch message operations and enhanced message querying with token and message count limits
* Search and summary functionalities scoped by workspace, peer, and session
* Session context retrieval with summaries and token allocatio
* HNSW Index for Documents Table
* Centralized Configuration via Environment Variables or config.toml file
### Changed
* New architecture centered around the concept of a "peer" replaces the former
"app"/"user"/"session" paradigm
* Workspaces replace "apps" as top-level namespace
* Peers replace "users"
* Sessions no longer nested beneath peers and no longer limited to a single
user-assistant model. A session exists independently of any one peer and
peers can be added to and removed from sessions.
* Dialectic API is now part of the Peer, not the Session
* Dialectic API now allows queries to be scoped to a session or "targeted"
to a fellow peer
* Database schema migrated to adopt workspace/peer/session naming and structure
* Authentication and JWT scopes updated to workspace/peer/session hierarchy
* Queue processing now works on 'work units' instead of sessions
* Message token counting updated with tiktoken integration and fallback heuristic
* Queue and message processing updated to handle sender/target and task types for multi-peer scenarios
### Fixed
* Improved error handling and validation for batch message operations and metadata
* Database Sessions to be more atomic to reduce idle in transaction time
### Removed
* Metamessages removed in favor of metadata
* Collections and Documents no longer exposed in the API, solely internal
* Obsolete tests for apps, users, collections, documents, and metamessages
***
### Added
* Normalize resources to remove joins and increase query performance
* Query tracing for debugging
### Changed
* `/list` endpoints to not require a request body
* `metamessage_type` to `label` with backwards compatability
* Database Provisioning to rely on alembic
* Database Session Manager to explicitly rollback transactions before closing
the connection
### Fixed
* Alembic Migrations to include initial database migrations
* Sentry Middleware to not report Honcho Exceptions
### Added
* JWT based API authentication
* Configurable logging
* Consolidated LLM Inference via `ModelClient` class
* Dynamic logging configurable via environment variables
### Changed
* Deriver & Dialectic API to use Hybrid Memory Architecture
* Metamessages are not strictly tied to a message
* Database provisioning is a separate script instead of happening on startup
* Consolidated `session/chat` and `session/chat/stream` endpoints
## Previous Releases
For a complete history of all releases, see our [GitHub Releases](https://github.com/plastic-labs/honcho/tags) page.
[Python SDK](https://pypi.org/project/honcho-ai/)
### Added
* Delete workspace method
### Changed
* message\_id of `Summary` model is a string nanoid
* Get Context can return Peer Card & Peer Representation
### Added
* Get Peer Card method
* Update Message metadata method
* Session level deriver status methods
* Delete session message
### Fixed
* Dialectic Stream returns Iterators
* Type warnings
### Changed
* Pagination class to match core implementation
### Added
* getSummaries API returning structured summaries
* Webhook support
### Changed
* Messages can take an optional `created_at` value, defaulting to the current
time (UTC ISO 8601)
### Added
* Filter parameter to various endpoints
### Fixed
* Honcho util import paths
### Added
* Get/poll deriver queue status endpoints added to workspace
* Added endpoint to upload files as messages
### Removed
* Removed peer messages in accordance with Honcho 2.1.0
### Changed
* Updated chat endpoint to use singular `query` in accordance with Honcho 2.1.0
### Fixed
* Properly handle AsyncClient
[TypeScript SDK](https://www.npmjs.com/package/@honcho-ai/sdk)
### Added
* Delete workspace method
### Changed
* message\_id of `Summary` model is a string nanoid
* Get Context can return Peer Card & Peer Representation
### Added
* Get Peer Card method
* Update Message metadata method
* Session level deriver status methods
* Delete session message
### Fixed
* Dialectic Stream returns Iterators
* Type warnings
### Changed
* Pagination class to match core implementation
### Added
* getSummaries API returning structured summaries
* Webhook support
### Changed
* Messages can take an optional `created_at` value, defaulting to the current
time (UTC ISO 8601)
### Added
* linting via Biome
* Adding filter parameter to various endpoints
### Fixed
* Order of parameters in `getSessions` endpoint
### Added
* Get/poll deriver queue status endpoints added to workspace
* Added endpoint to upload files as messages
### Removed
* Removed peer messages in accordance with Honcho 2.1.0
### Changed
* Updated chat endpoint to use singular `query` in accordance with Honcho 2.1.0
### Fixed
* Create default workspace on Honcho client instantiation
* Simplified Honcho client import path
## Getting Help
If you encounter issues using the Honcho API or its SDKs:
1. Open an issue on [GitHub](https://github.com/plastic-labs/honcho/issues)
2. Join our [Discord community](http://discord.gg/plasticlabs) for support
## Go Further
View the [Architecture](/v2/documentation/core-concepts/architecture) to see how Honcho works under the hood.
Dive into our [API Reference](/v2/api-reference) to explore all available endpoints.
## Next Steps
Get started with managed Honcho instances
Connect with 1000+ developers building with Honcho
View our guidelines and explore the codebase
See Honcho in action with real examples
We're excited to see what you'll build with Honcho Platform. Let's create smarter, more personalized AI experiences together!
***
*Ready to build personally aligned AI? [Get started with Honcho →](https://app.honcho.dev)*
# SDK Reference
Source: https://docs.honcho.dev/v2/documentation/reference/sdk
Complete SDK documentation and examples for Python and TypeScript
The Honcho SDKs provide ergonomic interfaces for building agentic AI applications with Honcho in Python and TypeScript/JavaScript.
## Installation
```bash Python (uv) theme={null}
uv add honcho-ai
```
```bash Python (pip) theme={null}
pip install honcho-ai
```
```bash TypeScript (npm) theme={null}
npm install @honcho-ai/sdk
```
```bash TypeScript (yarn) theme={null}
yarn add @honcho-ai/sdk
```
```bash TypeScript (pnpm) theme={null}
pnpm add @honcho-ai/sdk
```
## Quickstart
Without configuration, the SDK defaults to the demo server. For production use:
1. Get your API key at [app.honcho.dev/api-keys](https://app.honcho.dev/api-keys)
2. Set `environment="production"` and provide your `api_key`
```python Python theme={null}
from honcho import Honcho
# Initialize client (using the default workspace)
honcho = Honcho()
# Create peers
alice = honcho.peer("alice")
assistant = honcho.peer("assistant")
# Create a session for conversation
session = honcho.session("conversation-1")
# Add messages to conversation
session.add_messages([
alice.message("What's the weather like today?"),
assistant.message("It's sunny and 75°F outside!")
])
# Query peer representations in natural language
response = alice.chat("What did the assistant tell this user about the weather?")
# Get conversation context for LLM completions
context = session.get_context()
openai_messages = context.to_openai(assistant=assistant)
```
```typescript TypeScript theme={null}
import { Honcho } from "@honcho-ai/sdk";
// Initialize client (using the default workspace)
const honcho = new Honcho({});
// Create peers
const alice = await honcho.peer("alice");
const assistant = await honcho.peer("assistant");
// Create a session for conversation
const session = await honcho.session("conversation-1");
// Add messages to conversation
await session.addMessages([
alice.message("What's the weather like today?"),
assistant.message("It's sunny and 75°F outside!")
]);
// Query peer representations in natural language
const response = await alice.chat("What did the assistant tell this user about the weather?");
// Get conversation context for LLM completions
const context = await session.getContext();
const openaiMessages = context.toOpenAI(assistant);
```
## Core Concepts
### Peers and Representations
**Representations** are how Honcho models what peers know. Each peer has a **global representation** (everything they know across all sessions) and **local representations** (what other specific peers know about them, scoped by session or globally).
```python Python theme={null}
# Query alice's global knowledge
response = alice.chat("What does the user know about weather?")
# Query what alice knows about the assistant (local representation)
response = alice.chat("What does the user know about the assistant?", target=assistant)
# Query scoped to a specific session
response = alice.chat("What happened in our conversation?", session_id=session.id)
```
```typescript TypeScript theme={null}
// Query alice's global knowledge
const response = await alice.chat("What does the user know about weather?");
// Query what alice knows about the assistant (local representation)
const targetResponse = await alice.chat("What does the user know about the assistant?", {
target: assistant
});
// Query scoped to a specific session
const sessionResponse = await alice.chat("What happened in our conversation?", {
sessionId: session.id
});
```
## Core Classes
### Honcho Client
The main entry point for workspace operations:
```python Python theme={null}
from honcho import Honcho
# Basic initialization (uses environment variables)
honcho = Honcho(workspace_id="my-app-name")
# Full configuration
honcho = Honcho(
workspace_id="my-app-name",
api_key="my-api-key",
environment="production", # or "local", "demo"
base_url="https://api.honcho.dev",
timeout=30.0,
max_retries=3
)
```
```typescript TypeScript theme={null}
import { Honcho } from "@honcho-ai/sdk";
// Basic initialization (uses environment variables)
const honcho = new Honcho({
workspaceId: "my-app-name"
});
// Full configuration
const honcho = new Honcho({
workspaceId: "my-app-name",
apiKey: "my-api-key",
environment: "production", // or "local", "demo"
baseURL: "https://api.honcho.dev",
timeout: 30000,
maxRetries: 3,
defaultHeaders: { "X-Custom-Header": "value" },
defaultQuery: { "param": "value" }
});
```
**Environment Variables:**
* `HONCHO_API_KEY` - API key for authentication
* `HONCHO_BASE_URL` - Base URL for the Honcho API
* `HONCHO_WORKSPACE_ID` - Default workspace ID
**Key Methods:**
```python Python theme={null}
# Get or create a peer
peer = honcho.peer(id)
# Get or create a session
session = honcho.session(id)
# List all peers in workspace
peers = honcho.get_peers()
# List all sessions in workspace
sessions = honcho.get_sessions()
# Search across all content in workspace
results = honcho.search(query)
# Workspace metadata management
metadata = honcho.get_metadata()
honcho.set_metadata(dict)
# Get list of all workspace IDs
workspaces = honcho.get_workspaces()
```
```typescript TypeScript theme={null}
// Get or create a peer
const peer = await honcho.peer(id);
// Get or create a session
const session = await honcho.session(id);
// List all peers in workspace (returns Page)
const peers = await honcho.getPeers();
// List all sessions in workspace (returns Page)
const sessions = await honcho.getSessions();
// Search across all content in workspace (returns Page)
const results = await honcho.search(query);
// Workspace metadata management
const metadata = await honcho.getMetadata();
await honcho.setMetadata(metadata);
// Get list of all workspace IDs
const workspaces = await honcho.getWorkspaces();
```
Peer and session creation is **lazy** - no API calls are made until you actually use the peer or session.
### Peer
Represents an entity that can participate in conversations:
```python Python theme={null}
# Create peers (lazy creation - no API call yet)
alice = honcho.peer("alice")
assistant = honcho.peer("assistant")
# Create with immediate configuration
# This will make an API call to create the peer with the custom configuration and/or metadata
alice = honcho.peer("bob", config={"role": "user", "active": True}, metadata={"location": "NYC", "role": "developer"})
# Peer properties
print(f"Peer ID: {alice.id}")
print(f"Workspace: {alice.workspace_id}")
# Chat with peer's representations (supports streaming)
response = alice.chat("What did I have for breakfast?")
response = alice.chat("What do I know about Bob?", target="bob")
response = alice.chat("What happened in session-1?", session_id="session-1")
# Add content to a session with a peer
session = honcho.session("session-1")
session.add_messages([
alice.message("I love Python programming"),
alice.message("Today I learned about async programming"),
alice.message("I prefer functional programming patterns")
])
# Get peer's sessions
sessions = alice.get_sessions()
# Search peer's messages
results = alice.search("programming")
# Metadata management
metadata = alice.get_metadata()
metadata["location"] = "Paris"
alice.set_metadata(metadata)
```
```typescript TypeScript theme={null}
// Create peers (returns Promise)
const alice = await honcho.peer("alice");
const assistant = await honcho.peer("assistant");
// Peer properties
console.log(`Peer ID: ${alice.id}`);
// Chat with peer's representations (supports streaming)
const response = await alice.chat("What did I have for breakfast?");
const targetResponse = await alice.chat("What do I know about Bob?", { target: "bob" });
const sessionResponse = await alice.chat("What happened in session-1?", {
sessionId: "session-1"
});
// Chat with streaming support
const streamResponse = await alice.chat("Tell me a story", { stream: true });
// Add content to a session with a peer
const session = await honcho.session("session-1");
await session.addMessages([
alice.message("I love TypeScript programming"),
alice.message("Today I learned about async programming"),
alice.message("I prefer functional programming patterns")
]);
// Get peer's sessions
const sessions = await alice.getSessions();
// Search peer's messages
const results = await alice.search("programming");
// Metadata management
const metadata = await alice.getMetadata();
await alice.setMetadata({
...metadata,
location: "Paris"
});
```
### Session
Manages multi-party conversations:
```python Python theme={null}
# Create session (like peers, lazy creation)
session = honcho.session("conversation-1")
# Create with immediate configuration
# This will make an API call to create the session with the custom configuration and/or metadata
session = honcho.session("meeting-1", config={"type": "meeting", "max_peers": 10})
# Session properties
print(f"Session ID: {session.id}")
print(f"Workspace: {session.workspace_id}")
# Peer management
session.add_peers([alice, assistant])
session.add_peers([(alice, SessionPeerConfig(observe_others=True))])
session.set_peers([alice, bob, charlie]) # Replace all peers
session.remove_peers([alice])
# Get session peers and their configurations
peers = session.get_peers()
peer_config = session.get_peer_config(alice)
session.set_peer_config(alice, SessionPeerConfig(observe_me=False))
# Message management
session.add_messages([
alice.message("Hello everyone!"),
assistant.message("Hi Alice! How can I help today?")
])
# Get messages
messages = session.get_messages()
# Get conversation context
context = session.get_context(summary=True, tokens=2000)
# Search session content
results = session.search("help")
# Working representation queries
global_rep = session.working_rep("alice")
targeted_rep = session.working_rep(alice, bob)
# Metadata management
session.set_metadata({"topic": "product planning", "status": "active"})
metadata = session.get_metadata()
```
```typescript TypeScript theme={null}
// Create session (returns Promise)
const session = await honcho.session("conversation-1");
// Session properties
console.log(`Session ID: ${session.id}`);
// Peer management
await session.addPeers([alice, assistant]);
await session.addPeers("single-peer-id");
await session.setPeers([alice, bob, charlie]); // Replace all peers
await session.removePeers([alice]);
await session.removePeers("single-peer-id");
// Get session peers
const peers = await session.getPeers();
// Message management
await session.addMessages([
alice.message("Hello everyone!"),
assistant.message("Hi Alice! How can I help today?")
]);
// Get messages
const messages = await session.getMessages();
// Get conversation context
const context = await session.getContext({ summary: true, tokens: 2000 });
// Search session content
const results = await session.search("help");
// Working representation queries
const globalRep = await session.workingRep("alice");
const targetedRep = await session.workingRep(alice, bob);
// Metadata management
await session.setMetadata({
topic: "product planning",
status: "active"
});
const metadata = await session.getMetadata();
```
**Session-Level Theory of Mind Configuration:**
**Theory of Mind** controls whether peers can form models of what other peers think. Use `observe_others=False` to prevent a peer from modeling others within a session, and `observe_me=False` to prevent others from modeling this peer within a session.
```python Python theme={null}
from honcho import SessionPeerConfig
# Configure peer observation settings
config = SessionPeerConfig(
observe_others=False, # Form theory-of-mind of other peers -- False by default
observe_me=True # Don't let others form theory-of-mind of me -- True by default
)
session.add_peers([(alice, config)])
```
```typescript TypeScript theme={null}
// Configure peer observation settings
const config = new SessionPeerConfig({
observeOthers: false, // Form theory-of-mind of other peers -- False by default
observeMe: true // Don't let others form theory-of-mind of me -- True by default
});
await session.addPeers([alice, config]);
```
### SessionContext
Provides formatted conversation context for LLM integration:
```python Python theme={null}
# Get session context
context = session.get_context(summary=True, tokens=1500)
# Convert to LLM-friendly formats
openai_messages = context.to_openai(assistant=assistant)
anthropic_messages = context.to_anthropic(assistant=assistant)
```
```typescript TypeScript theme={null}
// Get session context
const context = await session.getContext({ summary: true, tokens: 1500 });
// Convert to LLM-friendly formats
const openaiMessages = context.toOpenAI(assistant);
const anthropicMessages = context.toAnthropic(assistant);
```
The SessionContext object has the following structure:
```json theme={null}
{
"id": "string",
"messages": [
{
"id": "string",
"content": "string",
"peer_id": "string",
"session_id": "string",
"workspace_id": "string",
"metadata": {},
"created_at": "2024-01-15T10:30:00Z",
"token_count": 42
}
],
"summary": {
"content": "string",
"message_id": 123,
"summary_type": "short|long",
"created_at": "2024-01-15T10:30:00Z"
}
}
```
## Advanced Usage
### Multi-Party Conversations
```python Python theme={null}
# Create multiple peers
users = [honcho.peer(f"user-{i}") for i in range(5)]
moderator = honcho.peer("moderator")
# Create group session
group_chat = honcho.session("group-discussion")
group_chat.add_peers(users + [moderator])
# Add messages from different peers
group_chat.add_messages([
users[0].message("What's our agenda for today?"),
moderator.message("We'll discuss the new feature roadmap"),
users[1].message("I have some concerns about the timeline")
])
# Query different perspectives
user_perspective = users[0].chat("What are people's concerns?")
moderator_view = moderator.chat("What feedback am I getting?", session_id=group_chat.id)
```
```typescript TypeScript theme={null}
// Create multiple peers
const users = await Promise.all(
Array.from({ length: 5 }, (_, i) => honcho.peer(`user-${i}`))
);
const moderator = await honcho.peer("moderator");
// Create group session
const groupChat = await honcho.session("group-discussion");
await groupChat.addPeers([...users, moderator]);
// Add messages from different peers
await groupChat.addMessages([
users[0].message("What's our agenda for today?"),
moderator.message("We'll discuss the new feature roadmap"),
users[1].message("I have some concerns about the timeline")
]);
// Query different perspectives
const userPerspective = await users[0].chat("What are people's concerns?");
const moderatorView = await moderator.chat("What feedback am I getting?", {
sessionId: groupChat.id
});
```
### LLM Integration
```python Python theme={null}
import openai
# Get conversation context
context = session.get_context(tokens=3000)
messages = context.to_openai(assistant=assistant)
# Call OpenAI API
response = openai.chat.completions.create(
model="gpt-4",
messages=messages + [
{"role": "user", "content": "Summarize the key discussion points."}
]
)
```
```typescript TypeScript theme={null}
import OpenAI from 'openai';
const openai = new OpenAI();
// Get conversation context
const context = await session.getContext({ tokens: 3000 });
const messages = context.toOpenAI(assistant);
// Call OpenAI API
const response = await openai.chat.completions.create({
model: "gpt-4",
messages: [
...messages,
{ role: "user", content: "Summarize the key discussion points." }
]
});
```
### Custom Message Timestamps
When creating messages, you can optionally specify a custom `created_at` timestamp instead of using the server's current time:
```bash theme={null}
curl -X POST "https://api.honcho.dev/v2/workspaces/{workspace_id}/sessions/{session_id}/messages" \
-H "Authorization: Bearer $API_KEY" \
-H "Content-Type: application/json" \
-d '{
"messages": [
{
"peer_id": "user123",
"content": "This message happened yesterday",
"created_at": "2024-01-01T12:00:00Z",
"metadata": {"source": "historical_data"}
}
]
}'
```
This is useful for:
* Importing historical conversation data
* Backfilling messages from other systems
* Maintaining accurate timeline ordering when processing batch data
If `created_at` is not provided, messages will use the server's current timestamp.
### Metadata and Filtering
See [Using Filters](/v2/guides/using-filters) for more examples on how to use filters.
```python Python theme={null}
# Add messages with metadata
session.add_messages([
alice.message("Let's discuss the budget", metadata={
"topic": "finance",
"priority": "high"
}),
assistant.message("I'll prepare the financial report", metadata={
"action_item": True,
"due_date": "2024-01-15"
})
])
# Filter messages by metadata
finance_messages = session.get_messages(filters={"metadata": {"topic": "finance"}})
action_items = session.get_messages(filters={"metadata": {"action_item": True}})
```
```typescript TypeScript theme={null}
// Add messages with metadata
await session.addMessages([
alice.message("Let's discuss the budget", {
metadata: {
topic: "finance",
priority: "high"
}
}),
assistant.message("I'll prepare the financial report", {
metadata: {
action_item: true,
due_date: "2024-01-15"
}
})
]);
// Filter messages by metadata
const financeMessages = await session.getMessages({
filters: { metadata: { topic: "finance" } }
});
const actionItems = await session.getMessages({
filters: { metadata: { action_item: true } }
});
```
### Pagination
```python Python theme={null}
# Iterate through all sessions
for session in honcho.get_sessions():
print(f"Session: {session.id}")
# Iterate through session messages
for message in session.get_messages():
print(f" {message.peer_id}: {message.content}")
```
```typescript TypeScript theme={null}
// Get paginated results
const peersPage = await honcho.getPeers();
// Iterate through all items
for await (const peer of peersPage) {
console.log(`Peer: ${peer.id}`);
}
// Manual pagination
let currentPage = peersPage;
while (currentPage) {
const data = await currentPage.data();
console.log(`Processing ${data.length} items`);
currentPage = await currentPage.nextPage();
}
```
## Best Practices
### Resource Management
```python Python theme={null}
# Peers and sessions are lightweight - create as needed
alice = honcho.peer("alice")
session = honcho.session("chat-1")
# Use descriptive IDs for better debugging
user_session = honcho.session(f"user-{user_id}-support-{ticket_id}")
support_agent = honcho.peer(f"agent-{agent_id}")
```
```typescript TypeScript theme={null}
// Peers and sessions are lightweight - create as needed
const alice = await honcho.peer("alice");
const session = await honcho.session("chat-1");
// Use descriptive IDs for better debugging
const userSession = await honcho.session(`user-${userId}-support-${ticketId}`);
const supportAgent = await honcho.peer(`agent-${agentId}`);
```
### Performance Optimization
```python Python theme={null}
# Lazy creation - no API calls until needed
peers = [honcho.peer(f"user-{i}") for i in range(100)] # Fast
# Batch operations when possible
session.add_messages([peer.message(f"Message {i}") for i, peer in enumerate(peers)])
# Use context limits to control token usage
context = session.get_context(tokens=1500) # Limit context size
```
```typescript TypeScript theme={null}
// Lazy creation - no API calls until needed
const peers = await Promise.all(
Array.from({ length: 100 }, (_, i) => honcho.peer(`user-${i}`))
);
// Batch operations when possible
await session.addMessages(
peers.map((peer, i) => peer.message(`Message ${i}`))
);
// Use context limits to control token usage
const context = await session.getContext({ tokens: 1500 }); // Limit context size
// Iterate efficiently with async iteration
for await (const peer of await honcho.getPeers()) {
// Process one peer at a time without loading all into memory
}
```
# Discord Bots with Honcho
Source: https://docs.honcho.dev/v2/guides/discord
Use Honcho to build a Discord bot with conversational memory and context management.
> Example code is available on [GitHub](https://github.com/plastic-labs/discord-python-starter)
Any application interface that defines logic based on events and supports
special commands can work easily with Honcho. Here's how to use Honcho with
**Discord** as an interface. If you're not familiar with Discord bot
application logic, the [py-cord](https://pycord.dev/) docs would be a good
place to start.
## Events
Most Discord bots have async functions that listen for specific events, the most common one being messages. We can use Honcho to store messages by user and session based on an interface's event logic. Take the following function definition for example:
```python theme={null}
@bot.event
async def on_message(message):
"""
Receive a message from Discord and respond with a message from our LLM assistant.
"""
if not validate_message(message):
return
input = sanitize_message(message)
# If the message is empty after sanitizing, ignore it
if not input:
return
peer = honcho_client.peer(id=get_peer_id_from_discord(message))
session = honcho_client.session(id=str(message.channel.id))
async with message.channel.typing():
response = llm(session, input)
await send_discord_message(message, response)
# Save both the user's message and the bot's response to the session
session.add_messages(
[
peer.message(input),
assistant.message(response),
]
)
```
Let's break down what this code is doing...
```python theme={null}
@bot.event
async def on_message(message):
if not validate_message(message):
return
```
This is how you define an event function in `py-cord` that listens for messages. We use a helper function `validate_message()` to check if the message should be processed.
## Helper Functions
The code uses several helper functions to keep the main logic clean and readable. Let's examine each one:
### Message Validation
```python theme={null}
def validate_message(message) -> bool:
"""
Determine if the message is valid for the bot to respond to.
Return True if it is, False otherwise. Currently, the bot will
only respond to messages that tag it with an @mention in a
public channel and are not from the bot itself.
"""
if message.author == bot.user:
# ensure the bot does not reply to itself
return False
if isinstance(message.channel, discord.DMChannel):
return False
if not bot.user.mentioned_in(message):
return False
return True
```
This function centralizes all the logic for determining whether the bot should respond to a message. It checks that:
* The message isn't from the bot itself
* The message isn't in a DM channel
* The bot is mentioned in the message
### Message Sanitization
```python theme={null}
def sanitize_message(message) -> str | None:
"""Remove the bot's mention from the message content if present"""
content = message.content.replace(f"<@{bot.user.id}>", "").strip()
if not content:
return None
return content
```
This helper removes the bot's mention from the message content, leaving just the actual user input.
### Peer ID Generation
```python theme={null}
def get_peer_id_from_discord(message):
"""Get a Honcho peer ID for the message author"""
return f"discord_{str(message.author.id)}"
```
This creates a unique peer identifier for each Discord user by prefixing their Discord ID.
### LLM Integration
```python theme={null}
def llm(session, prompt) -> str:
"""
Call the LLM with the given prompt and chat history.
You should expand this function with custom logic, prompts, etc.
"""
messages: list[dict[str, object]] = session.get_context().to_openai(
assistant=assistant
)
messages.append({"role": "user", "content": prompt})
try:
completion = openai.chat.completions.create(
model=MODEL_NAME,
messages=messages,
)
return completion.choices[0].message.content
except Exception as e:
print(e)
return f"Error: {e}"
```
This function handles the LLM interaction. It uses Honcho's built-in `to_openai()` method to automatically convert the session context into the format expected by OpenAI's chat completions API.
### Message Sending
```python theme={null}
async def send_discord_message(message, response_content: str):
"""Send a message to the Discord channel"""
if len(response_content) > 1500:
# Split response into chunks at newlines, keeping under 1500 chars
chunks = []
current_chunk = ""
for line in response_content.splitlines(keepends=True):
if len(current_chunk) + len(line) > 1500:
chunks.append(current_chunk)
current_chunk = line
else:
current_chunk += line
if current_chunk:
chunks.append(current_chunk)
for chunk in chunks:
await message.channel.send(chunk)
else:
await message.channel.send(response_content)
```
This function handles sending messages to Discord, automatically splitting long responses into multiple messages to stay within Discord's character limits.
## Honcho Integration
The new Honcho peer/session API makes integration much simpler:
```python theme={null}
peer = honcho_client.peer(id=get_peer_id_from_discord(message))
session = honcho_client.session(id=str(message.channel.id))
```
Here we create a peer object for the user and a session object using the Discord channel ID. This automatically handles user and session management.
```python theme={null}
# Save both the user's message and the bot's response to the session
session.add_messages(
[
peer.message(input),
assistant.message(response),
]
)
```
After generating the response, we save both the user's input and the bot's response to the session using the `add_messages()` method. The `peer.message()` creates a message from the user, while `assistant.message()` creates a message from the assistant.
## Slash Commands
Discord bots also offer slash command functionality. Here's an example using Honcho's dialectic feature:
```python theme={null}
@bot.slash_command(
name="dialectic",
description="Query the Honcho Dialectic endpoint.",
)
async def dialectic(ctx, query: str):
await ctx.defer()
try:
peer = honcho_client.peer(id=get_peer_id_from_discord(ctx))
session = honcho_client.session(id=str(ctx.channel.id))
response = peer.chat(
query=query,
session_id=session.id,
)
if response:
await ctx.followup.send(response)
else:
await ctx.followup.send(
f"I don't know anything about {ctx.author.name} because we haven't talked yet!"
)
except Exception as e:
logger.error(f"Error calling Dialectic API: {e}")
await ctx.followup.send(
f"Sorry, there was an error processing your request: {str(e)}"
)
```
This slash command uses Honcho's dialectic functionality to answer questions about the user based on their conversation history.
## Setup and Configuration
The bot requires several environment variables and setup:
```python theme={null}
honcho_client = Honcho()
assistant = honcho_client.peer(id="assistant", config={"observe_me": False})
openai = OpenAI(base_url="https://openrouter.ai/api/v1", api_key=MODEL_API_KEY)
```
* `honcho_client`: The main Honcho client
* `assistant`: A peer representing the bot/assistant
* `openai`: OpenAI client configured to use OpenRouter
## Recap
The new Honcho peer/session API makes Discord bot integration much simpler and more intuitive. Key patterns we learned:
* **Peer/Session Model**: Users are represented as peers, conversations as sessions
* **Automatic Context Management**: `session.get_context().to_openai()` automatically formats chat history
* **Message Storage**: `session.add_messages()` stores both user and assistant messages
* **Dialectic Queries**: `peer.chat()` enables querying conversation history
* **Helper Functions**: Clean code organization with focused helper functions
This approach provides a clean, maintainable structure for building Discord bots with conversational memory and context management.
# Honcho MCP
Source: https://docs.honcho.dev/v2/guides/mcp
Use Honcho in Claude Desktop
You can let Claude use Honcho to manage its own memory in the native desktop app by using the Honcho MCP integration! Follow these steps:
1. Go to [https://app.honcho.dev](https://app.honcho.dev) and get an API key. Then go to Claude Desktop and navigate to custom MCP servers.
If you don't have node installed you will need to do that. Claude Desktop or Claude Code can help!
2. Add Honcho to your Claude desktop config. You must provide a username for Honcho to refer to you as -- preferably what you want Claude to actually call you.
```json theme={null}
{
"mcpServers": {
"honcho": {
"command": "npx",
"args": [
"mcp-remote",
"https://mcp.honcho.dev",
"--header",
"Authorization:${AUTH_HEADER}",
"--header",
"X-Honcho-User-Name:${USER_NAME}"
],
"env": {
"AUTH_HEADER": "Bearer ",
"USER_NAME": ""
}
}
}
}
```
You may customize your assistant name and/or workspace ID. Both are optional.
```json theme={null}
{
"mcpServers": {
"honcho": {
"command": "npx",
"args": [
"mcp-remote",
"https://mcp.honcho.dev",
"--header",
"Authorization:${AUTH_HEADER}",
"--header",
"X-Honcho-User-Name:${USER_NAME}",
"--header",
"X-Honcho-Assistant-Name:${ASSISTANT_NAME}",
"--header",
"X-Honcho-Workspace-ID:${WORKSPACE_ID}"
],
"env": {
"AUTH_HEADER": "Bearer ",
"USER_NAME": "",
"ASSISTANT_NAME": "",
"WORKSPACE_ID": ""
}
}
}
}
```
3. Restart the Claude Desktop app. Upon relaunch, it should start Honcho and the tools should be available!
4. Finally, Claude needs instructions on how to use Honcho. The Desktop app doesn't allow you to add system prompts directly, but you can create a project and paste these [instructions](https://raw.githubusercontent.com/plastic-labs/honcho/refs/heads/main/mcp/instructions.md) into the "Project Instructions" field.
Claude should then query for insights before responding and write your messages to storage! If you come up with more creative ways to get Claude to manage its own memory with Honcho, feel free to [let us know](https://discord.gg/plasticlabs) or make a PR on this [repo](https://github.com/plastic-labs/honcho/tree/main/mcp)!
# Spellbooks and Tutorials
Source: https://docs.honcho.dev/v2/guides/overview
Helpful guides and design patterns for building with Honcho
Before you start a tutorial, follow [Quickstart](/v2/documentation/introduction/quickstart) to get up and running with Honcho in your language of choice.
AI development often feels like magic - you craft the right prompt and get exactly what you need. Our Spellbooks are practical guides that show you how to cast effective spells with Honcho.
Whether you're integrating Honcho into existing platforms, exploring advanced features, or getting up and running quickly, these guides provide concrete examples and implementation patterns.
Each spellbook focuses on a specific use case with working code you can adapt to your needs. The goal is to get you from idea to working prototype as quickly as possible, then provide the depth you need to scale and customize.
## Application Interfaces
Ready-to-use integration patterns for popular platforms:
Build a Discord bot that remembers users across conversations
Create a Telegram bot with persistent user understanding
Get Honcho running with a single prompt in Cursor or Claude Code
# Telegram Bots with Honcho
Source: https://docs.honcho.dev/v2/guides/telegram
Use Honcho to build a Telegram bot with conversational memory and context management.
> Example code is available on [GitHub](https://github.com/plastic-labs/telegram-python-starter)
Any application interface that defines logic based on events and supports
special commands can work easily with Honcho. Here's how to use Honcho with
**Telegram** as an interface. If you're not familiar with Telegram bot
development, the [python-telegram-bot](https://docs.python-telegram-bot.org/en/stable/) docs would be a good
place to start.
## Message Handling
Most Telegram bots have async functions that handle incoming messages. We can use Honcho to store messages by user and session based on the chat context. Take the following function definition for example:
```python theme={null}
async def handle_message(update: Update, context: ContextTypes.DEFAULT_TYPE):
"""
Receive a message from Telegram and respond with a message from our LLM assistant.
"""
if not validate_message(update, context):
return
message_text = update.effective_message.text
input_text = sanitize_message(message_text, context.bot.username)
# If the message is empty after sanitizing, ignore it
if not input_text:
return
peer = honcho_client.peer(id=get_peer_id_from_telegram(update))
session = honcho_client.session(id=str(update.effective_chat.id))
# Send typing indicator
await context.bot.send_chat_action(
chat_id=update.effective_chat.id, action="typing"
)
response = llm(session, input_text)
await send_telegram_message(update, context, response)
# Save both the user's message and the bot's response to the session
session.add_messages(
[
peer.message(input_text),
assistant.message(response),
]
)
```
Let's break down what this code is doing...
```python theme={null}
async def handle_message(update: Update, context: ContextTypes.DEFAULT_TYPE):
if not validate_message(update, context):
return
```
This is how you define a message handler in `python-telegram-bot` that processes incoming messages. We use a helper function `validate_message()` to check if the message should be processed.
## Helper Functions
The code uses several helper functions to keep the main logic clean and readable. Let's examine each one:
### Message Validation
```python theme={null}
def validate_message(update: Update, context: ContextTypes.DEFAULT_TYPE) -> bool:
"""
Determine if the message is valid for the bot to respond to.
Return True if it is, False otherwise. The bot will respond to:
- Direct messages (private chats)
- Group messages that mention the bot or reply to it
- Messages that are not from the bot itself
"""
message = update.effective_message
if not message or not message.text:
return False
# Don't respond to our own messages
if message.from_user.id == context.bot.id:
return False
# Always respond in private chats
if update.effective_chat.type == "private":
return True
# In groups, only respond if mentioned or replied to
if (
message.reply_to_message
and message.reply_to_message.from_user.id == context.bot.id
):
return True
# Check if bot is mentioned
if message.entities:
for entity in message.entities:
if entity.type == "mention":
username = message.text[entity.offset : entity.offset + entity.length]
if username == f"@{context.bot.username}":
return True
return False
```
This function centralizes all the logic for determining whether the bot should respond to a message. It handles different chat types:
* **Private chats**: Always respond
* **Group chats**: Only respond when mentioned or when replying to the bot's messages
* **Bot prevention**: Never respond to the bot's own messages
### Message Sanitization
```python theme={null}
def sanitize_message(message_text: str, bot_username: str) -> str | None:
"""Remove the bot's mention from the message content if present"""
content = message_text.replace(f"@{bot_username}", "").strip()
if not content:
return None
return content
```
This helper removes the bot's mention from the message content, leaving just the actual user input.
### Peer ID Generation
```python theme={null}
def get_peer_id_from_telegram(update: Update) -> str:
"""Get a Honcho peer ID for the message author"""
return f"telegram_{update.effective_user.id}"
```
This creates a unique peer identifier for each Telegram user by prefixing their Telegram user ID.
### LLM Integration
```python theme={null}
def llm(session, prompt) -> str:
"""
Call the LLM with the given prompt and chat history.
You should expand this function with custom logic, prompts, etc.
"""
messages: list[dict[str, object]] = session.get_context().to_openai(
assistant=assistant
)
messages.append({"role": "user", "content": prompt})
try:
completion = openai.chat.completions.create(
model=MODEL_NAME,
messages=messages,
)
return completion.choices[0].message.content
except Exception as e:
logger.error(f"LLM error: {e}")
return f"Error: {e}"
```
This function handles the LLM interaction. It uses Honcho's built-in `to_openai()` method to automatically convert the session context into the format expected by OpenAI's chat completions API.
### Message Sending
```python theme={null}
async def send_telegram_message(
update: Update, context: ContextTypes.DEFAULT_TYPE, response_content: str
):
"""Send a message to the Telegram chat, splitting if necessary"""
# Telegram has a 4096 character limit, but we'll use 4000 to be safe
max_length = 4000
if len(response_content) <= max_length:
await update.effective_message.reply_text(response_content)
else:
# Split response into chunks at newlines, keeping under max_length chars
chunks = []
current_chunk = ""
for line in response_content.splitlines(keepends=True):
if len(current_chunk) + len(line) > max_length:
if current_chunk:
chunks.append(current_chunk)
current_chunk = line
else:
current_chunk += line
if current_chunk:
chunks.append(current_chunk)
for chunk in chunks:
await update.effective_message.reply_text(chunk)
```
This function handles sending messages to Telegram, automatically splitting long responses into multiple messages to stay within Telegram's 4096 character limit. It also includes a typing indicator to show the bot is processing.
## Honcho Integration
The new Honcho peer/session API makes integration much simpler:
```python theme={null}
peer = honcho_client.peer(id=get_peer_id_from_telegram(update))
session = honcho_client.session(id=str(update.effective_chat.id))
```
Here we create a peer object for the user and a session object using the Telegram chat ID. This automatically handles user and session management across both private chats and group conversations.
```python theme={null}
# Save both the user's message and the bot's response to the session
session.add_messages(
[
peer.message(input_text),
assistant.message(response),
]
)
```
After generating the response, we save both the user's input and the bot's response to the session using the `add_messages()` method. The `peer.message()` creates a message from the user, while `assistant.message()` creates a message from the assistant.
## Commands
Telegram bots support slash commands natively. Here's how to implement the `/dialectic` command using Honcho's dialectic feature:
```python theme={null}
async def dialectic_command(update: Update, context: ContextTypes.DEFAULT_TYPE):
"""
Handle the /dialectic command to query the Honcho Dialectic endpoint.
"""
if not context.args:
await update.message.reply_text(
"Please provide a query. Usage: /dialectic "
)
return
query = " ".join(context.args)
try:
peer = honcho_client.peer(id=get_peer_id_from_telegram(update))
session = honcho_client.session(id=str(update.effective_chat.id))
response = peer.chat(
query=query,
session_id=session.id,
)
if response:
await send_telegram_message(update, context, response)
else:
await update.message.reply_text(
f"I don't know anything about {update.effective_user.first_name} because we haven't talked yet!"
)
except Exception as e:
logger.error(f"Error calling Dialectic API: {e}")
await update.message.reply_text(
f"Sorry, there was an error processing your request: {str(e)}"
)
```
You can also add a `/start` command for user onboarding:
```python theme={null}
async def start_command(update: Update, context: ContextTypes.DEFAULT_TYPE):
"""Handle the /start command"""
await update.message.reply_text(
"Hello! I'm your AI assistant. You can:\n"
"• Chat with me directly in private messages\n"
"• Mention me (@username) in groups to get my attention\n"
"• Use /dialectic to search our conversation history\n\n"
"Let's start chatting!"
)
```
## Setup and Configuration
The bot requires several environment variables and setup:
```python theme={null}
honcho_client = Honcho()
assistant = honcho_client.peer(id="assistant", config={"observe_me": False})
openai = OpenAI(base_url="https://openrouter.ai/api/v1", api_key=MODEL_API_KEY)
```
* `honcho_client`: The main Honcho client
* `assistant`: A peer representing the bot/assistant
* `openai`: OpenAI client configured to use OpenRouter
### Application Setup
Register your handlers with the Telegram application:
```python theme={null}
def main():
"""Start the bot"""
if not BOT_TOKEN:
logger.error("BOT_TOKEN not found in environment variables")
return
# Create the Application
application = Application.builder().token(BOT_TOKEN).build()
# Add handlers
application.add_handler(CommandHandler("start", start_command))
application.add_handler(CommandHandler("dialectic", dialectic_command))
application.add_handler(
MessageHandler(filters.TEXT & ~filters.COMMAND, handle_message)
)
# Start the bot
logger.info("Starting Telegram bot...")
application.run_polling(allowed_updates=Update.ALL_TYPES)
```
## Environment Variables
Your bot needs these environment variables:
```env theme={null}
# Your Telegram bot token from BotFather
BOT_TOKEN=
# AI model to use (see OpenRouter for available models)
MODEL_NAME=
# Your OpenRouter API key
MODEL_API_KEY=
```
## Chat Types and Behavior
The bot handles different Telegram chat types intelligently:
### Private Chats
* **Behavior**: Responds to all messages
* **Session ID**: Uses the private chat ID
* **Memory**: Maintains conversation history per user
### Group Chats
* **Behavior**: Only responds when mentioned or replied to
* **Session ID**: Uses the group chat ID (shared across all members)
* **Memory**: Maintains group conversation context
## Recap
The new Honcho peer/session API makes Telegram bot integration much simpler and more intuitive. Key patterns we learned:
* **Peer/Session Model**: Users are represented as peers, conversations as sessions
* **Chat Type Handling**: Different validation logic for private vs group chats
* **Automatic Context Management**: `session.get_context().to_openai()` automatically formats chat history
* **Message Storage**: `session.add_messages()` stores both user and assistant messages
* **Dialectic Queries**: `peer.chat()` enables querying conversation history
* **Command System**: Native Telegram command support with `/start` and `/dialectic`
* **Message Splitting**: Automatic handling of Telegram's character limits
* **Helper Functions**: Clean code organization with focused helper functions
This approach provides a clean, maintainable structure for building Telegram bots with conversational memory and context management across both private conversations and group chats.
# SDK and API Compatibility Guide
Source: https://docs.honcho.dev/changelog/compatibility-guide
Compatibility guide for Honcho's SDKs and API
This guide helps you understand which versions of Honcho's API are compatible with which SDK versions.
## Version Compatibility
### Honcho API v2.4.2 (Current)
**Compatible Version:** v1.5.0
Install with:
```bash theme={null}
npm install @honcho-ai/sdk@1.5.0
```
**Compatible Version:** v1.5.0
Install with:
```bash theme={null}
pip install honcho-ai==1.5.0
```
## Version Compatibility Table
| Honcho API Version | TypeScript SDK | Python SDK |
| ------------------ | -------------- | ---------- |
| v2.4.2 (Current) | v1.5.0 | v1.5.0 |
| v2.4.1 | v1.5.0 | v1.5.0 |
| v2.4.0 | v1.5.0 | v1.5.0 |
| v2.3.3 | v1.4.1 | v1.4.1 |
| v2.3.2 | v1.4.0 | v1.4.0 |
| v2.3.1 | v1.4.0 | v1.4.0 |
| v2.3.0 | v1.4.0 | v1.4.0 |
| v2.2.0 | v1.3.0 | v1.3.0 |
| v2.1.1 | v1.2.1 | v1.2.2 |
| v2.1.0 | v1.2.1 | v1.2.2 |
| v2.0.5 | v1.1.0 | v1.1.0 |
| v2.0.4 | v1.1.0 | v1.1.0 |
# Changelog
Source: https://docs.honcho.dev/changelog/introduction
Welcome to the Honcho changelog! This section documents all notable changes to the Honcho API and SDKs.
Each release is documented with:
* **Added**: New features and capabilities
* **Changed**: Modifications to existing functionality
* **Deprecated**: Features that will be removed in future versions
* **Removed**: Features that have been removed
* **Fixed**: Bug fixes and corrections
* **Security**: Security-related improvements
## Version Format
Honcho follows [Semantic Versioning](https://semver.org/):
* **MAJOR** version for incompatible API changes
* **MINOR** version for backwards-compatible functionality additions
* **PATCH** version for backwards-compatible bug fixes
### Honcho API and SDK Changelogs
### Fixed
* Langfuse tracing to have readable waterfalls
* Alembic Migrations to match models.py
* message\_in\_seq correctly included in webhook payload
### Changed
* Alembic to always use a session pooler
* Statement timeout during alembic operations to 5 min
### Added
* Alembic migration validation test suite
### Fixed
* Alembic migrations to batch changes
* Batch message creation sequence number
### Changed
* Logging infrastructure to remove noisy messages
* Sentry integration is centralized
### Added
* Unified `Representation` class
* vllm client support
* Periodic queue cleanup logic
* WIP Dreaming Feature
* LongMemEval to Test Bench
* Prometheus Client for better Metrics
* Performance metrics instrumentation
* Error reporting to deriver
* Workspace Delete Method
* Multi-db option in test harness
### Changed
* Working Representations are Queried on the fly rather than cached in metadata
* EmbeddingStore to RepresentationFactory
* Summary Response Model to use public\_id of message for cutoff
* Semantic across codebase to reference resources based on `observer` and `observed`
* Prompts for Deriver & Dialectic to reference peer\_id and add examples
* `Get Context` route returns peer card and representation in addition to messages and summaries
* Refactoring logger.info calls to logger.debug where applicable
### Fixed
* Gemini client to use async methods
### Changed
* Deriver Rollup Queue processes interleaved messages for more context
### Fixed
* Dialectic Streaming to follow SSE conventions
* Sentry tracing in the deriver
### Added
* Get peer cards endpoint (`GET /v2/peers/{peer_id}/peer-card`) for retrieving targeted peer context information
### Changed
* Replaced Mirascope dependency with small client implementation for better control
* Optimized deriver performance by using joins on messages table instead of storing token count in queue payload
* Database scope optimization for various operations
* Batch representation task processing for \~10x speed improvement in practice
### Fixed
* Separated clean and claim work units in queue manager to prevent race conditions
* Skip locked ActiveQueueSession rows on delete operations
* Langfuse SDK integration updates for compatibility
* Added configurable maximum message size to prevent token overflow in deriver
* Various minor bugfixes
### Fixed
* Added max message count to deriver in order to not overflow token limits
### Added
* `getSummaries` endpoint to get all available summaries for a session directly
* Peer Card feature to improve context for deriver and dialectic
### Changed
* Session Peer limit to be based on observers instead, renamed config value to
`SESSION_OBSERVERS_LIMIT`
* `Messages` can take a custom timestamp for the `created_at` field, defaulting
to the current time
* `get_context` endpoint returns detailed `Summary` object rather than just
summary content
* Working representations use a FIFO queue structure to maintain facts rather
than a full rewrite
* Optimized deriver enqueue by prefetching message sequence numbers (eliminates N+1 queries)
### Fixed
* Deriver uses `get_context` internally to prevent context window limit errors
* Embedding store will truncate context when querying documents to prevent embedding
token limit errors
* Queue manager to schedule work based on available works rather than total
number of workers
* Queue manager to use atomic db transactions rather than long lived transaction
for the worker lifecycle
* Timestamp formats unified to ISO 8601 across the codebase
* Internal get\_context method's cutoff value is exclusive now
### Added
* Arbitrary filters now available on all search endpoints
* Search combines full-text and semantic using reciprocal rank fusion
* Webhook support (currently only supports queue\_empty and test events, more to come)
* Small test harness and custom test format for evaluating Honcho output quality
* Added MCP server and documentation for it
### Changed
* Search has 10 results by default, max 100 results
* Queue structure generalized to handle more event types
* Summarizer now exhaustive by default and tuned for performance
### Fixed
* Resolve race condition for peers that leave a session while sending messages
* Added explicit rollback to solve integrity error in queue
* Re-introduced Sentry tracing to deriver
* Better integrity logic in get\_or\_create API methods
### Fixed
* Summarizer module to ignore empty summaries and pass appropriate one to get\_context
* Structured Outputs calls with OpenAI provider to pass strict=True to Pydantic Schema
### Added
* Test harness for custom Honcho evaluations
* Better support for session and peer aware dialectic queries
* Langfuse settings
* Added recent history to dialectic prompt, dynamic based on new context window size setting
### Fixed
* Summary queue logic
* Formatting of logs
* Filtering by session
* Peer targeting in queries
### Changed
* Made query expansion in dialectic off by default
* Overhauled logging
* Refactor summarization for performance and code clarity
* Refactor queue payloads for clarity
### Added
* File uploads
* Brand new "ROTE" deriver system
* Updated dialectic system
* Local working representations
* Better logging for deriver/dialectic
* Deriver Queue Status no longer has redundant data
### Fixed
* Document insertion
* Session-scoped and peer-targeted dialectic queries work now
* Minor bugs
### Removed
* Peer-level messages
### Changed
* Dialectic chat endpoint takes a single query
* Rearranged configuration values (LLM, Deriver, Dialectic, History->Summary)
### Fixed
* Groq API client to use the Async library
### Fixed
* Migration/provision scripts did not have correct database connection arguments, causing timeouts
### Fixed
* Bug that causes runtime error when Sentry flags are enabled
### Fixed
* Database initialization was misconfigured and led to provision\_db script failing: switch to consistent working configuration with transaction pooler
### Added
* Ergonomic SDKs for Python and TypeScript (uses Stainless underneath)
* Deriver Queue Status endpoint
* Complex arbitrary filters on workspace/session/peer/message
* Message embedding table for full semantic search
### Changed
* Overhauled documentation
* BasedPyright typing for entire project
* Resource filtering expanded to include logical operators
### Fixed
* Various bugs
* Use new config arrangement everywhere
* Remove hardcoded responses
### Added
* Ability to get a peer's working representation
* Metadata to all data primitives (Workspaces, Peers, Sessions, Messages)
* Internal metadata to store Honcho's state no longer exposed in API
* Batch message operations and enhanced message querying with token and message count limits
* Search and summary functionalities scoped by workspace, peer, and session
* Session context retrieval with summaries and token allocatio
* HNSW Index for Documents Table
* Centralized Configuration via Environment Variables or config.toml file
### Changed
* New architecture centered around the concept of a "peer" replaces the former
"app"/"user"/"session" paradigm
* Workspaces replace "apps" as top-level namespace
* Peers replace "users"
* Sessions no longer nested beneath peers and no longer limited to a single
user-assistant model. A session exists independently of any one peer and
peers can be added to and removed from sessions.
* Dialectic API is now part of the Peer, not the Session
* Dialectic API now allows queries to be scoped to a session or "targeted"
to a fellow peer
* Database schema migrated to adopt workspace/peer/session naming and structure
* Authentication and JWT scopes updated to workspace/peer/session hierarchy
* Queue processing now works on 'work units' instead of sessions
* Message token counting updated with tiktoken integration and fallback heuristic
* Queue and message processing updated to handle sender/target and task types for multi-peer scenarios
### Fixed
* Improved error handling and validation for batch message operations and metadata
* Database Sessions to be more atomic to reduce idle in transaction time
### Removed
* Metamessages removed in favor of metadata
* Collections and Documents no longer exposed in the API, solely internal
* Obsolete tests for apps, users, collections, documents, and metamessages
***
### Added
* Normalize resources to remove joins and increase query performance
* Query tracing for debugging
### Changed
* `/list` endpoints to not require a request body
* `metamessage_type` to `label` with backwards compatability
* Database Provisioning to rely on alembic
* Database Session Manager to explicitly rollback transactions before closing
the connection
### Fixed
* Alembic Migrations to include initial database migrations
* Sentry Middleware to not report Honcho Exceptions
### Added
* JWT based API authentication
* Configurable logging
* Consolidated LLM Inference via `ModelClient` class
* Dynamic logging configurable via environment variables
### Changed
* Deriver & Dialectic API to use Hybrid Memory Architecture
* Metamessages are not strictly tied to a message
* Database provisioning is a separate script instead of happening on startup
* Consolidated `session/chat` and `session/chat/stream` endpoints
## Previous Releases
For a complete history of all releases, see our [GitHub Releases](https://github.com/plastic-labs/honcho/tags) page.
[Python SDK](https://pypi.org/project/honcho-ai/)
### Added
* Delete workspace method
### Changed
* message\_id of `Summary` model is a string nanoid
* Get Context can return Peer Card & Peer Representation
### Added
* Get Peer Card method
* Update Message metadata method
* Session level deriver status methods
* Delete session message
### Fixed
* Dialectic Stream returns Iterators
* Type warnings
### Changed
* Pagination class to match core implementation
### Added
* getSummaries API returning structured summaries
* Webhook support
### Changed
* Messages can take an optional `created_at` value, defaulting to the current
time (UTC ISO 8601)
### Added
* Filter parameter to various endpoints
### Fixed
* Honcho util import paths
### Added
* Get/poll deriver queue status endpoints added to workspace
* Added endpoint to upload files as messages
### Removed
* Removed peer messages in accordance with Honcho 2.1.0
### Changed
* Updated chat endpoint to use singular `query` in accordance with Honcho 2.1.0
### Fixed
* Properly handle AsyncClient
[TypeScript SDK](https://www.npmjs.com/package/@honcho-ai/sdk)
### Added
* Delete workspace method
### Changed
* message\_id of `Summary` model is a string nanoid
* Get Context can return Peer Card & Peer Representation
### Added
* Get Peer Card method
* Update Message metadata method
* Session level deriver status methods
* Delete session message
### Fixed
* Dialectic Stream returns Iterators
* Type warnings
### Changed
* Pagination class to match core implementation
### Added
* getSummaries API returning structured summaries
* Webhook support
### Changed
* Messages can take an optional `created_at` value, defaulting to the current
time (UTC ISO 8601)
### Added
* linting via Biome
* Adding filter parameter to various endpoints
### Fixed
* Order of parameters in `getSessions` endpoint
### Added
* Get/poll deriver queue status endpoints added to workspace
* Added endpoint to upload files as messages
### Removed
* Removed peer messages in accordance with Honcho 2.1.0
### Changed
* Updated chat endpoint to use singular `query` in accordance with Honcho 2.1.0
### Fixed
* Create default workspace on Honcho client instantiation
* Simplified Honcho client import path
## Getting Help
If you encounter issues using the Honcho API or its SDKs:
1. Open an issue on [GitHub](https://github.com/plastic-labs/honcho/issues)
2. Join our [Discord community](http://discord.gg/plasticlabs) for support