Quick Start
Prerequisites
- n8n instance (self-hosted or cloud)
- Honcho API key (get one here)
- Basic understanding of n8n workflows
- Basic understanding of Honcho architecture. Specifically workspaces, sessions, peers, and messages.
Before You Start
This integration uses HTTP Request nodes. There’s no native Honcho node for n8n yet. While this requires more setup, it gives you full control over the API and works with any n8n version. This tutorial is instructional, not production-ready. We load a single Gmail message with hardcoded IDs to demonstrate the concepts clearly. See Next Steps for handling multiple messages and dynamic configurations. Why Honcho over n8n’s built-in memory? n8n’s “memory” nodes are vector databases for RAG-style retrieval. Honcho offers richer context and reasoning—it builds understanding of users over time, not just similarity search. Learn more.Setting Up the HTTP Request Node
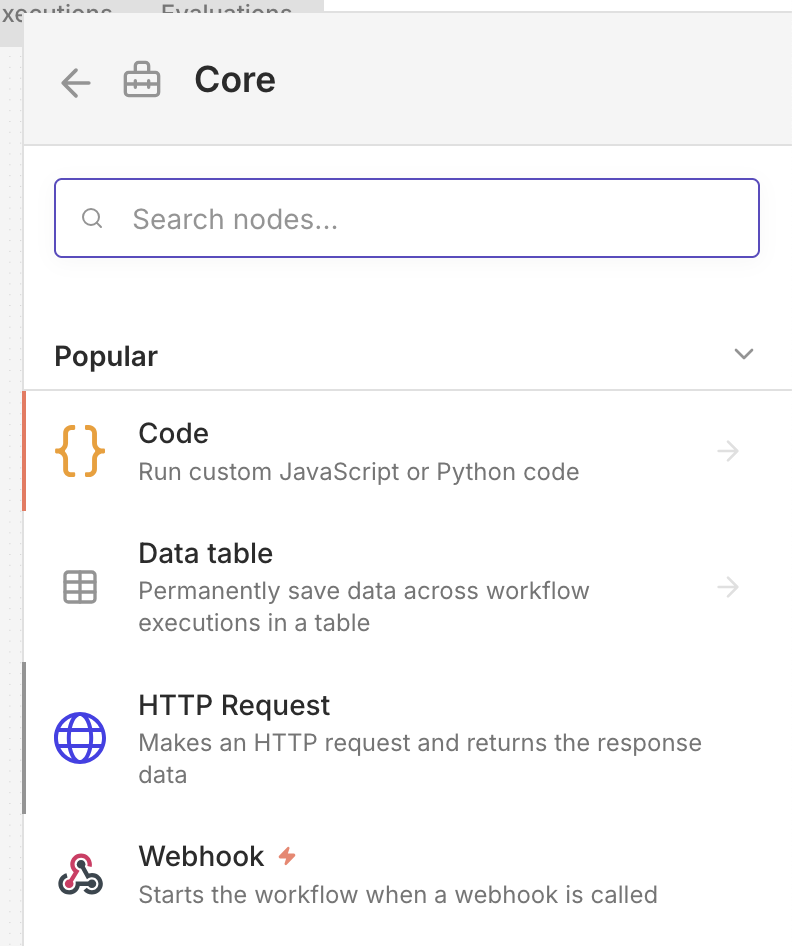
The Honcho integration in n8n uses the HTTP Request node to interact with the Honcho API. Here’s how to configure it:- Add an HTTP Request node to your workflow (Core > HTTP Request)
-
Set the Method based on your operation (typically
POSTfor creating resources,GETfor retrieving) -
Set the URL to the appropriate Honcho API endpoint. For example, create workspace is
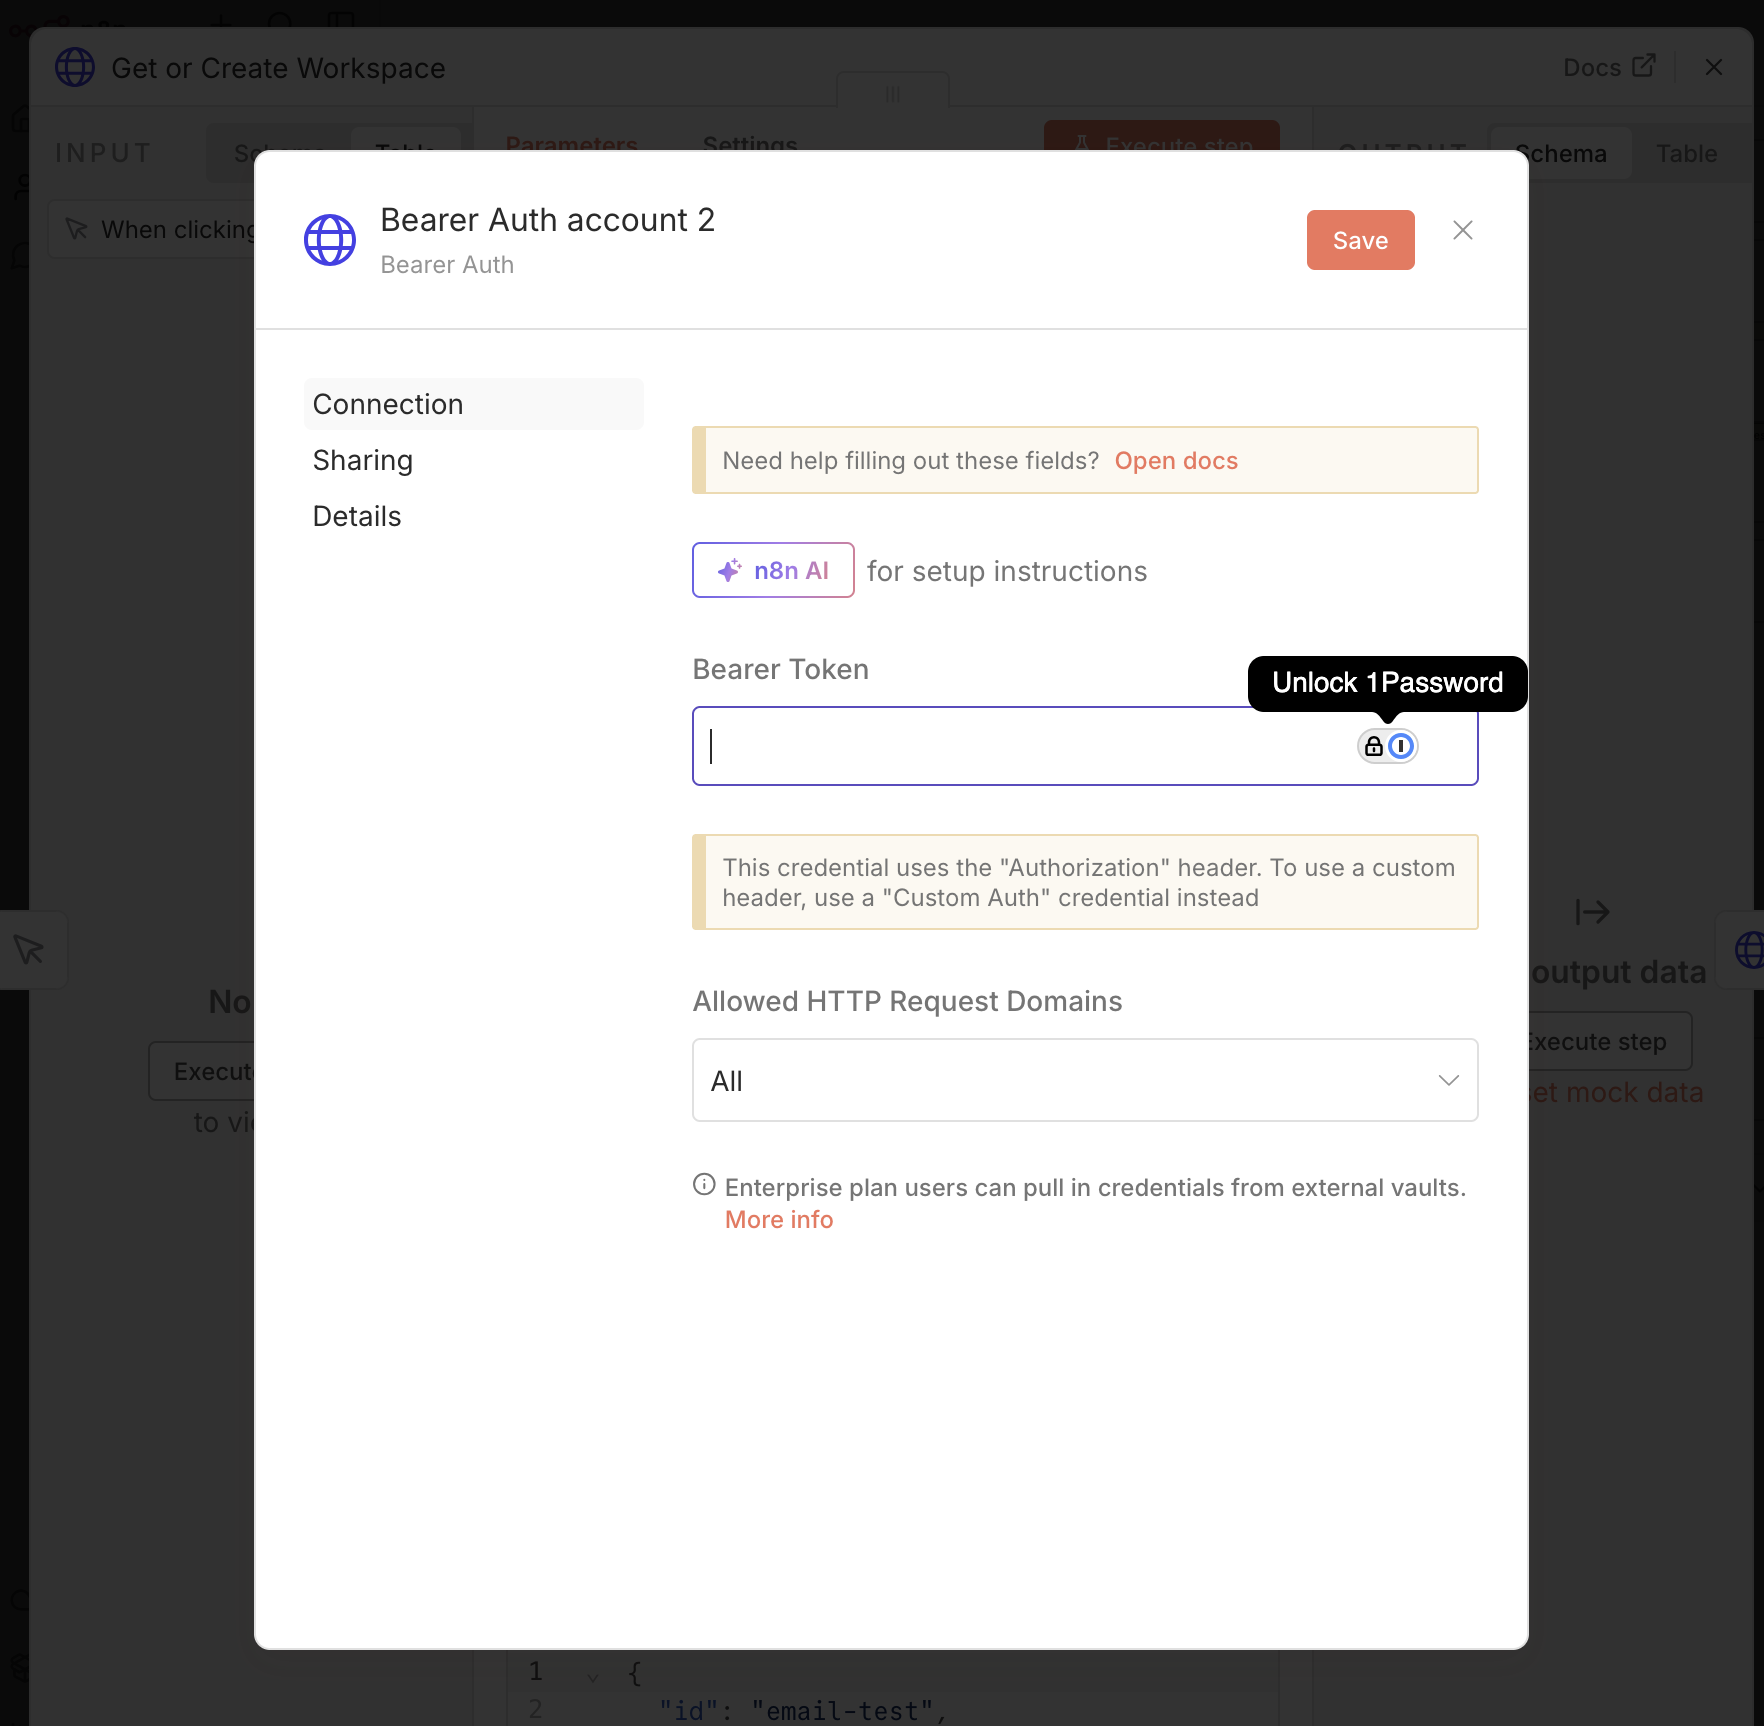
https://api.honcho.dev/v2/workspaces - For authentication, select Generic Credential Type and then Bearer Auth
- Click Create New Credential and paste your Honcho API key in the Bearer Token field
- Check Send Body and select JSON as the Body Content Type when creating resources
Step-by-Step Tutorial
We’ll build a workflow that ingests Gmail emails into Honcho, then uses that memory to power a conversational AI chatbot. The workflow has two parts (separated by sticky notes in the canvas):- Data Ingestion: Manual trigger → Workspace → Session → Gmail → Extract Peers → Create Peers → Add to Session → Create Messages
- AI Chat Interface: Chat Trigger → Agent (with LLM and Honcho tools)
get_context() endpoint to retrieve relevant information about email conversations, enabling contextual conversations about your email data.
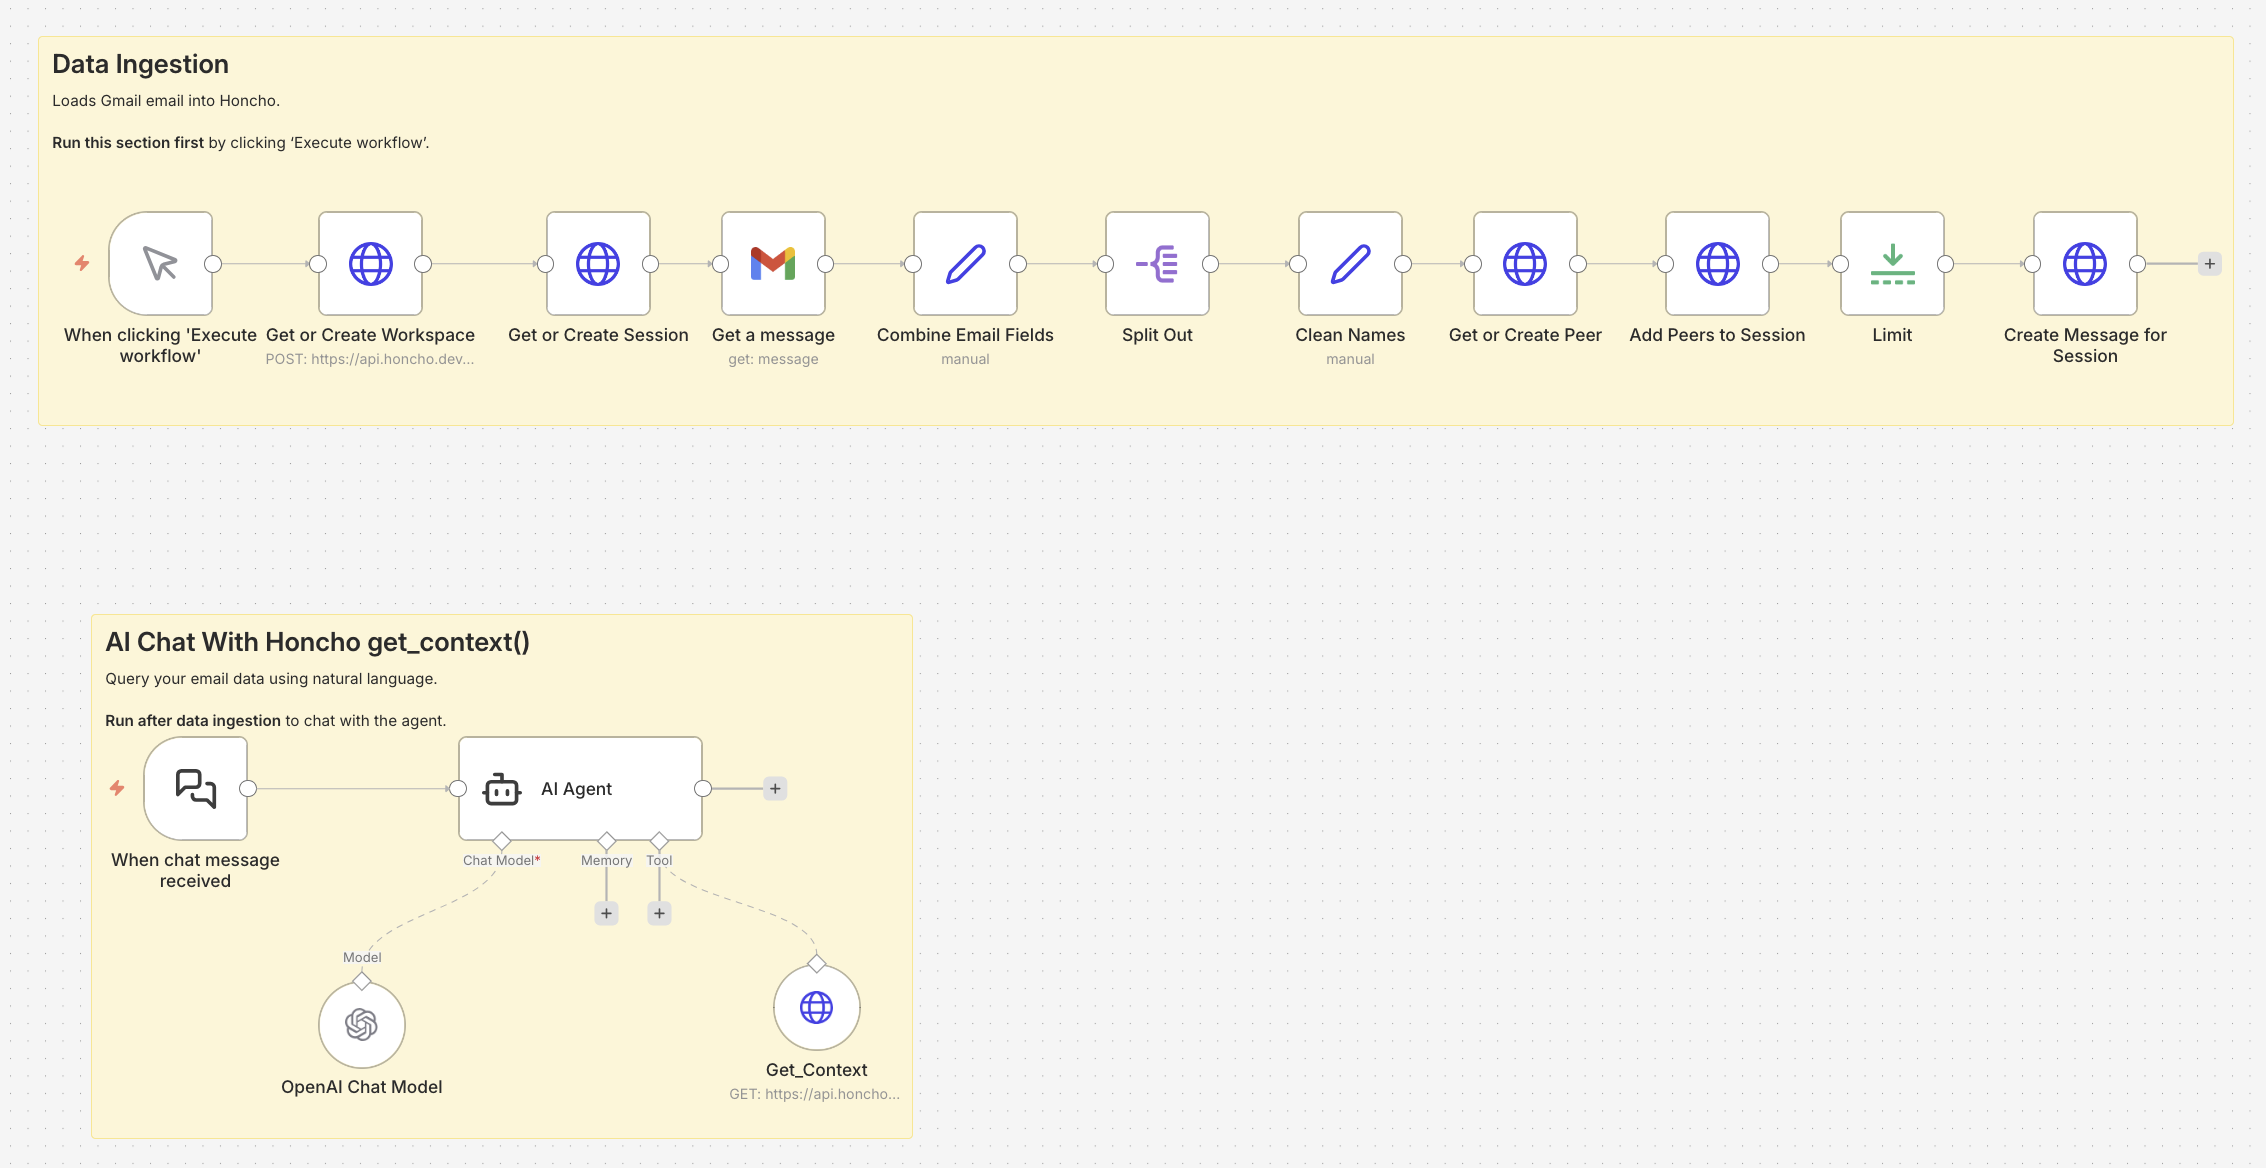
Part 1: Loading Email Data into Honcho
These nodes handle the initial setup and data ingestion:Step 1: Manual Trigger
Start with a Manual Trigger node to execute the workflow on demand. This is useful for initial setup and testing before automating with a Gmail trigger.Step 2: Get or Create Workspace
- Add an HTTP Request node
- Method:
POST - URL:
https://api.honcho.dev/v2/workspaces - Body (JSON):
{ "id": "email-test", "metadata": {} }
Step 3: Get or Create Session
- Add another HTTP Request node
- Method:
POST - URL:
https://api.honcho.dev/v2/workspaces/{{ $('Get or Create Workspace').item.json.id }}/sessions - Body (JSON):
{ "id": "new_session" }
Step 4: Get Gmail Message
- Add a Gmail node
- Operation: Get
- Message ID: Your target message ID (a string of letters & numbers)
- Configure your Gmail OAuth2 credentials
Finding the Gmail Message ID
The easiest way to find a Gmail message ID is to use n8n’s Gmail Get Many operation. Temporarily add it, set the limit to 1, and execute. Use the message ID in the output for the message ID field.In this tutorial, we load in only a single message to demonstrate the workflow.
Step 5: Extract Peers from Email
Use native n8n nodes to extract email participants as peers: 5a. Add a Set node (“Combine Email Fields”)- Combines From, To, Cc, Bcc into an array of individual emails
- Field name:
allEmails - Type: Array
- Value:
{{ [$json.From, $json.To, $json.Cc, $json.Bcc].filter(Boolean).flatMap(field => field.split(',').map(e => e.trim())).filter(Boolean) }}
- Splits the array into individual items (one per email address)
- Field to Split Out:
allEmails
- Extracts the display name from each email and formats it
- Field name:
name - Value:
{{ $json.allEmails.split('<')[0].trim().replace(/ /g, '_') }}
Step 6: Get or Create Peer
- Add an HTTP Request node
- Method:
POST - URL:
https://api.honcho.dev/v2/workspaces/{{ $('Get or Create Workspace').item.json.id }}/peers - Body:
{ "id": "{{ $json.name }}" }
Step 7: Add Peers to Session
- Add an HTTP Request node
- Method:
POST - URL:
https://api.honcho.dev/v2/workspaces/{{ $('Get or Create Workspace').item.json.id }}/sessions/{{ $json.id }}/peers - Body:
{ "{{ $json.id }}": {} }
Step 8: Limit Node
Add a Limit node to control the flow so the message is only added once to the session.Step 9: Create Message for Session
- Add an HTTP Request node
- Method:
POST - URL:
https://api.honcho.dev/v2/workspaces/{{ $('Get or Create Workspace').item.json.id }}/sessions/{{ $('Get or Create Session').item.json.id }}/messages/ - Body (JSON):
{ "messages": [{ "content": "{{ $('Get a message').item.json.snippet }}", "peer_id": "{{ $('Get a message').item.json.From.split('<')[0].trim().replace(/ /g, '_') }}" }] }
peer_id must exactly match a peer created in Step 6. The expression above uses the same cleaning logic as the Clean Names node (split('<')[0].trim().replace(/ /g, '_')).
Part 2: Building a Stateful AI Chatbot
Now that data is loaded into Honcho, create a chat interface that leverages this memory:Step 1: Chat Trigger
Add a When chat message received node (from LangChain nodes) to create an interactive chat interface.Step 2: AI Agent
- Add an Agent node (LangChain)
- Configure the system message:
Step 3: Connect LLM
Add an OpenAI Chat Model node (or your preferred LLM) and connect it to the Agent.Step 4: Add Honcho Tools
Create an HTTP Request Tool node for Honcho’s context retrieval: Get Context Tool:- Method:
GET - URL:
https://api.honcho.dev/v2/workspaces/email-test/sessions/new_session/context - Returns formatted context for the entire session including all messages and peer interactions
email-test) and session (new_session) IDs created during data ingestion.
Import the Workflow
Want to skip the manual setup? Import this workflow directly into n8n. In n8n, go to Workflows → Import from URL (use the raw JSON link below) or Import from File. Import from URL (raw JSON) or expand below to copy:Click to expand workflow JSON
Click to expand workflow JSON
Important: After importing, you’ll need to:
- Add your Honcho API key to the Bearer Auth credential
- Connect your Gmail OAuth2 credential
- Add your OpenAI API key (or swap for your preferred LLM)
- Update the Gmail Message ID in “Get a message” node
- First, execute the data ingestion section (click “Execute workflow”)
- Then use the chat interface to query your email data
Next Steps
Once you have the basic workflow running, consider these enhancements:- Dynamic IDs: Use n8n variables instead of hardcoding
email-testandnew_session - Chat with Peers: Add an HTTP Request Tool for natural language queries about peer representations. Read more in the docs.
- Load more messages: Use Gmail’s “Get All” operation to load entire conversation threads
- Make it real-time: Add a Gmail Trigger node to automatically ingest new emails as they arrive
- Add error handling: Connect an Error Trigger node with notifications (Email, Slack) and retry logic
- Expand to other data sources: Honcho works with Slack messages, CRM interactions, support tickets, and more
Related Resources
- Honcho Architecture - Understand workspaces, sessions, peers, and messages
- Get Context - Learn about retrieving formatted conversation context
- API Reference - Complete API documentation